How to make a digital photogram
Photograms are very different images to standard photos. Traditionally they were created by placing objects on a sheet of photographic (light sensitive) paper. The paper is then exposed, which turns the paper black, except for where the objects are blocking the light.
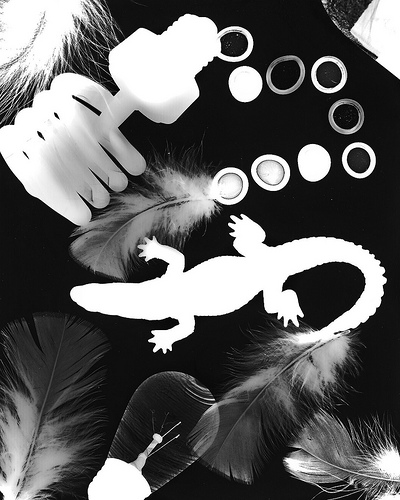
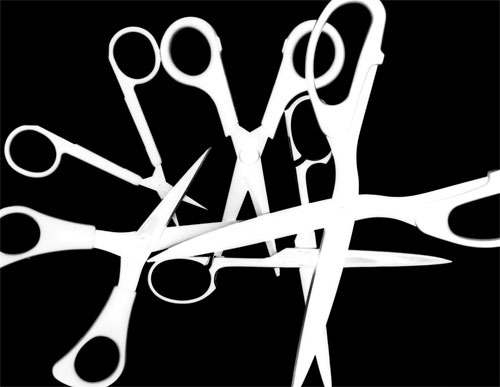
Photogram by aresauburn™ on flickr (licensed CC-BY-SA)
Objects that are translucent let through some light, and so appear in shades of grey, while objects that are opaque appear as solid white.
The effect of a photogram image can be replicated using a digital camera to capture the image, with no photographic paper needed. You will need:
- Digital camera with manual exposure mode
- Glass or clear perspex that you can rest your objects on (or a lightbox).
- White paper
- Light source, e.g. Speedlight flash and a way of triggering it off-camera, or a small continuous light source.
- A tripod - not essential, but very handy.

Normal photo of paintbrushes and toothbrush
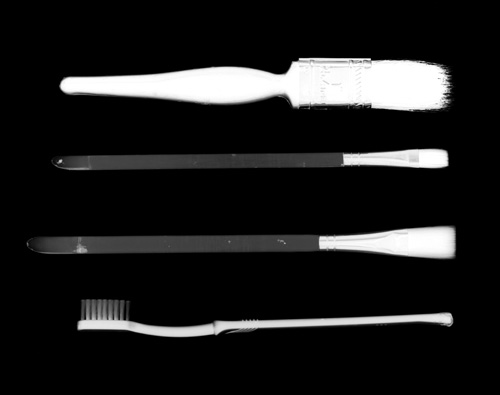
Photogram of paintbrushes and toothbrush - note the X-ray style effect
To create a photogram image, we are going to create a photo with a very bright background. This will produce a photo with a white background, and black silhouetted objects, the opposite of a photogram. This image can be pleasing by itself, but to get the true photogram effect we can later invert the image in photo editing software.
If you have a lightbox, this is ideal to use as a bright background for placing your objects on. If you don't have a lightbox, then you will need to replicate the effect. I used a piece of clear perspex placed on the edges of two boxes, like a bridge. A glass table would probably be more practical, but I don't have one available.
On top of the perspex I put a piece of white paper. The paper shouldn't be too thick, as you need the light to shine through it.
Underneath the perspex, on the floor, I placed a speedlight flash with a radio trigger attached. The flash was pointed upwards towards the bottom of the perspex. When the camera shutter was pressed, the radio transmitter in the camera's hot shoe triggered the flash, which blasts the underside of the perspex / white paper with light. The camera then captures the photo of the bright background, with where objects are placed on the background appearing dark.
If you don't have a flash or you do have a flash but have no way of triggering it off-camera, then you can use continuous lighting underneath the perspex / paper instead. A lamp or torch should work okay.
When you are taking the photo, you need to eliminate (as far as possible) all other light sources. If you have light falling on the top of your objects, then you won't be able to create a good photogram effect. You want your photo to be entirely back lit.
So close the curtains and switch off any lights when you are taking the photo. This is where a tripod comes in very handy. You can place the camera on the tripod, then frame and focus your photo with the lights on / curtains open. If you're using flash, then you might need to lock the focus at this point (the camera might not be able to autofocus in the dark). Turn the lights off or close the curtains, and take your photo.
One of the benefits of using flash for creating the photo over continuous lighting is that flash will let you use a fast shutter speed. This means that it is much less likely that any ambient lighting will affect the image during the exposure.
You do need to be aware that light may bounce off walls or ceilings and light the front of your objects (which we don't want). I didn't find this to be a problem, but if you do encounter problems with this, then try blocking the light from the surface it is bouncing back from by using a piece of black card.
If you really want to eliminate any lighting apart from the backlight, you can drape yourself and the whole setup in thick black cloth. This is a bit of an extreme length to go to though.
When using a speedlight flash, it is important that you trigger the flash using a radio trigger or a cable. Don't use your camera's built in flash to trigger the speedlight flash. The pop-up flash will send out a small burst of light to trigger the speedlight, and this burst of light will be enough to light the tops of your objects, and ruin the photogram silhouette effect.
Take some test shots and adjust your flash power or the exposure settings on your camera until you get a photo with a nice white background. Once you've taken the photo of the backlit subject hopefully you should have something like this:
To create the photogram effect, where the background is black, and the solid objects are white, you need to invert the image. Most image editing software has an invert option. (In Photoshop Elements it is under Filter > Adjustments > Invert).
Alternatively, you can use a curves adjustment to invert the image. Simply drag the black point up to white, and the white point down to black to invert the image. (See this article for a detailed explanation on using curves: Using the curves tool in Photoshop etc. to improve your photos).
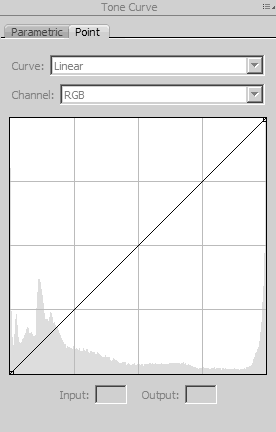
This is the how the curves dialog looks before inverting the image.
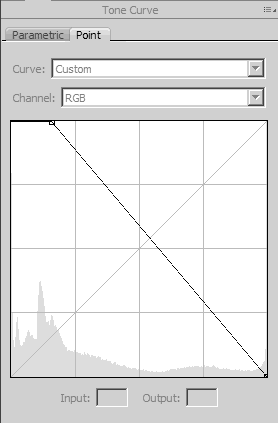
Here I have inverted the curve, and also brought the white point (which was the black point) in a bit from the left edge to increase the contrast.
After cropping away the edges of the image, the final photo looks like this:

Creating Photograms of upright objects
In some cases it can be preferable to create a photogram image of an upright item, rather than laying it down on a flat surface. Creating photos like this is not hard.
As with the flat surface photograms, all you need is a strong backlight behind your subject. If you have a softbox, you could just place the softbox behind your subject, and use this as the backlight.
Alternatively, use a white wall or piece of card (which is what I did). The background needs to be well lit, and the same rules apply here as when lighting the underside of a flat surface for objects to sit on. Again, I used a speedlight flash to light the background, but continuous lighting could be used instead.
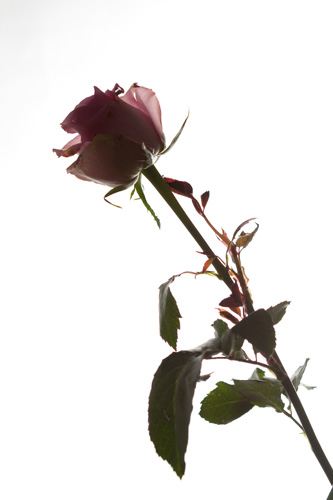
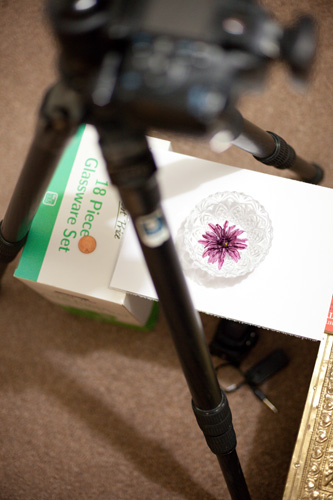
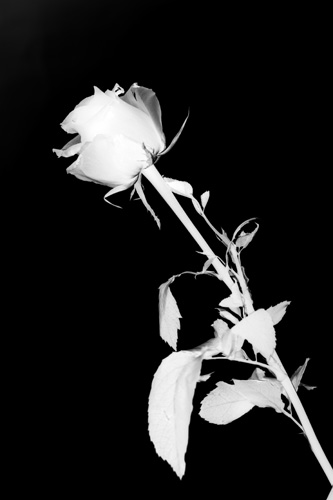
Flower photo as captured before inverting
How to make color Photograms
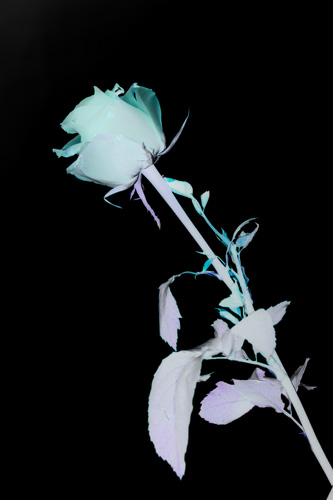
When you invert a photo that has some color in it, such as the flower photo above, you'll find that the colors go quite strange.
If you don't like the inverted colors, one solution is to just change the image to black and white. This is how traditional photograms appear, as they use black & white photographic paper. In the image below I've converted to black & white, and increased the contrast.
Another alternative, is to only invert the luminance data of the image, while leaving the color alone. In Photoshop Elements you can do this by duplicating your image to a new layer. Invert the new layer, then change its blending mode to luminosity.
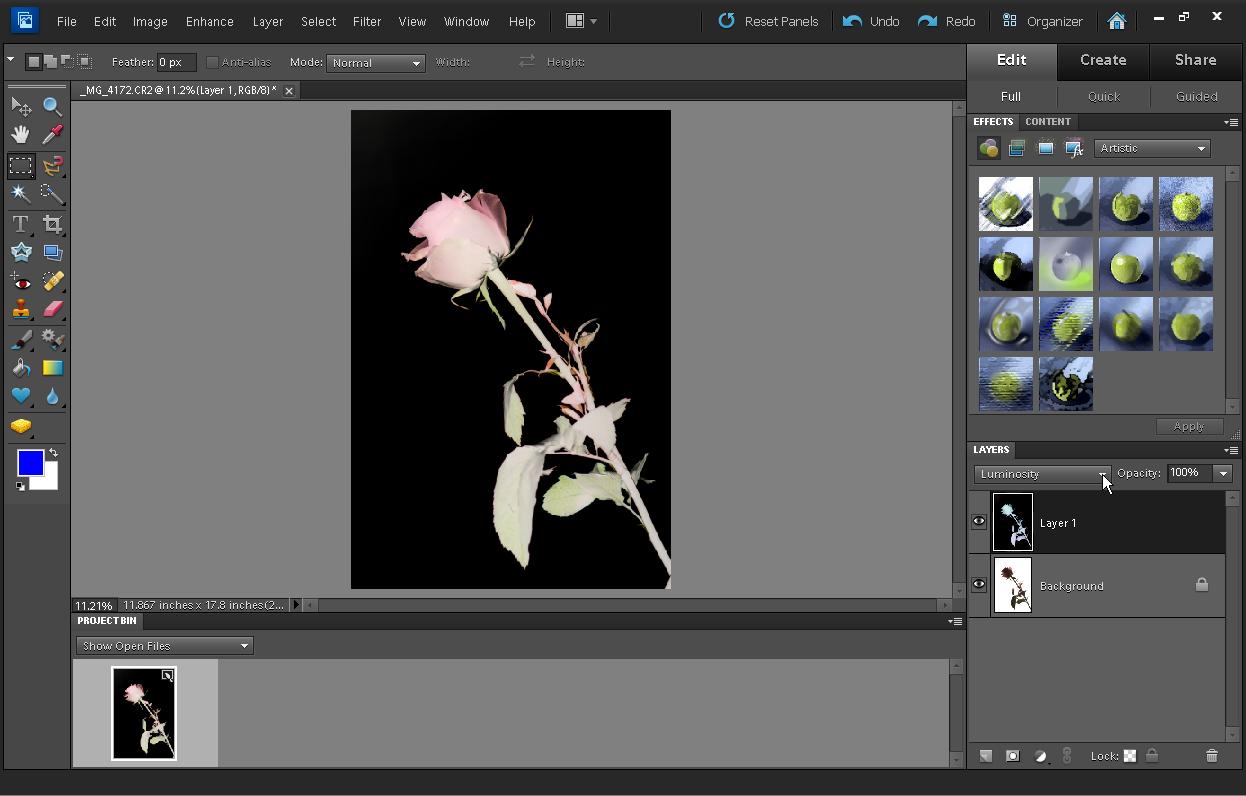
In the same way, you could also use a curves adjustment layer in the full version of Photoshop. Use the curve to invert the image, then set the layer's blend mode to luminosity.
The full version of Photoshop also has another way in which you can invert only the luminance - Lab color mode. This can be accessed through Image > Mode > Lab color. Lab color uses three channels - a lightness channel that contains luminance data, and two color channels (a and b). A curves adjustment can then be used to invert only the Lightness channel.
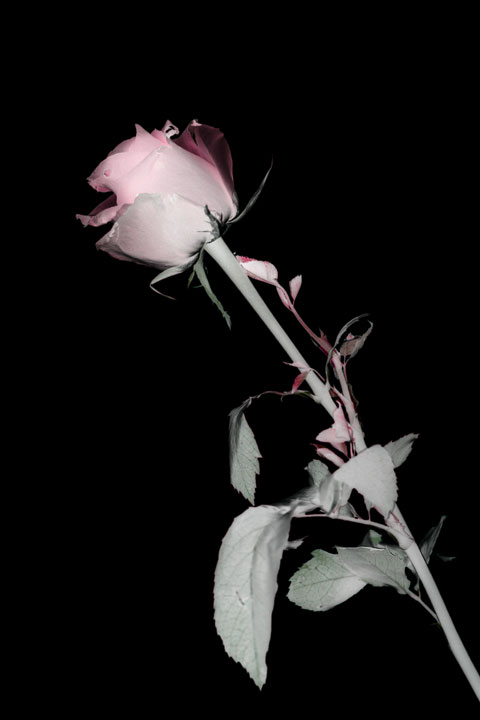
Below is my final image of the flower. I converted to Lab color mode, inverted the lightness channel and brought the white point in. I also adjusted colors using the a and b channels. A duplicate copy of the image that was just inverted normally was then placed on a layer above in multiply blend mode. Finally the small bit of leaf in the bottom right corner of the image was cloned out.
With digital photography we can easily apply different colored effects to our photogram, and change them if we don't like the result. Something that would not be easy to do with a traditional photogram.
Don't feel that you always need to invert the image to achieve a true photogram effect either. Some images work just as well or even better as they were taken with the bright white background. You could call this an inverted photogram.
Inverted photogram (image as originally captured)
Photogram (image inverted)
As always with digital photography, don't be afraid to play around and experiment.
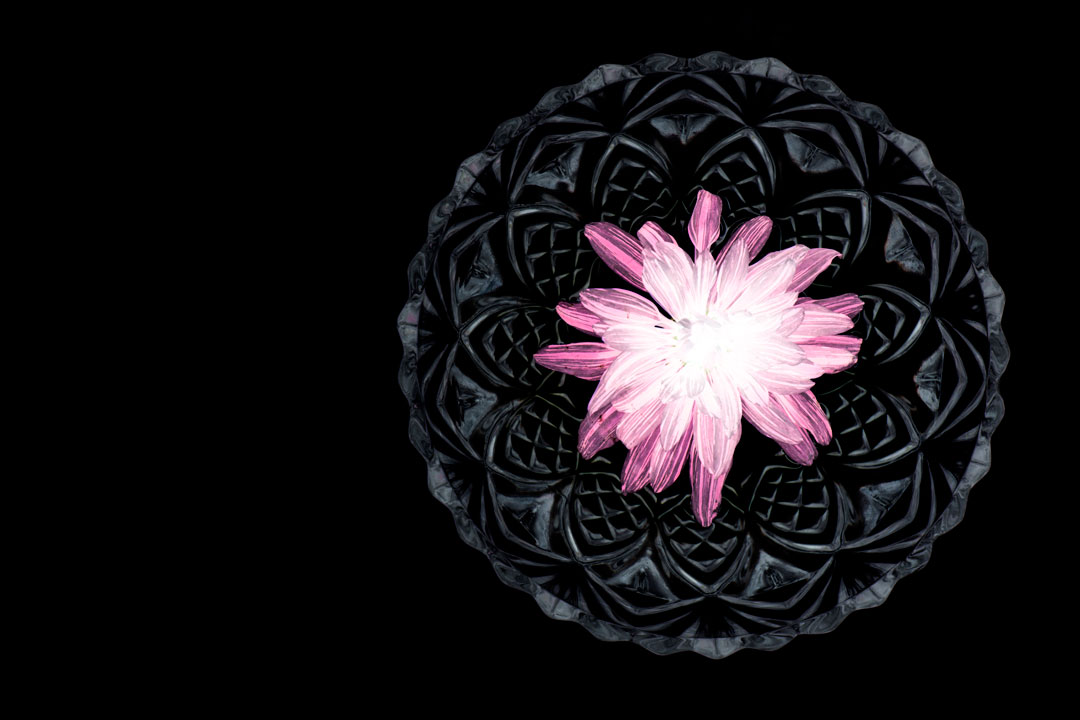
Photogram of a flower head floating in a bowl of water
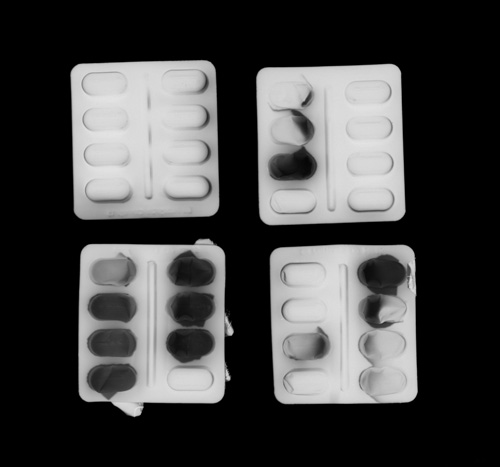
Photogram of partially used pill packets


Collins Dictionary:
Photogram n.
a picture, usually abstract, produced on a photographic material without the use of a camera, as by placing an object on the material and exposing to light.
Without the use of the camera is the very definition of photogram. Your very intriguing experiment is not photogram.