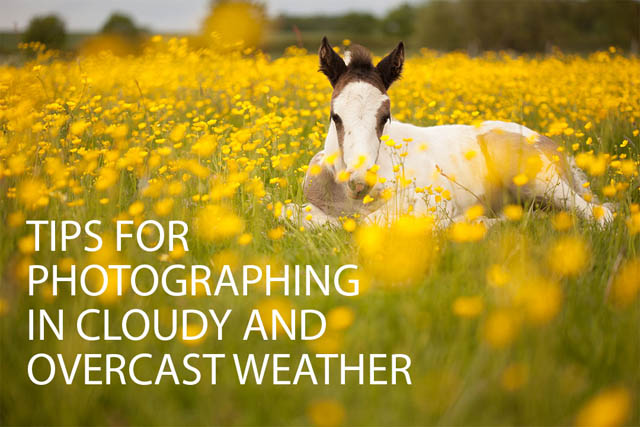
Tips for photographing in cloudy and overcast weather
The vast majority of us greatly prefer bright sunny days to dull overcast days. And the majority of people would likely think that sunny weather is better for photography than dreary overcast weather.
While that is correct in some cases, for many types of photography, overcast and cloudy weather is actually preferable to sunny. In this article I'll go over why overcast weather can be useful for better photos, some of the problems it can cause, and how to work around these issues.
Soft light
The big benefit of overcast weather is that it gives you a nice soft, even light source. Rather than harsh shadows and highlights that you get from direct sun, you get a smooth transition between shadow and highlight areas. Shadows don't have exacting hard edges, but rather have smooth, soft edges.
In direct sunlight the difference in brightness between lit areas and shadow areas can be quite large, with a harsh boundary
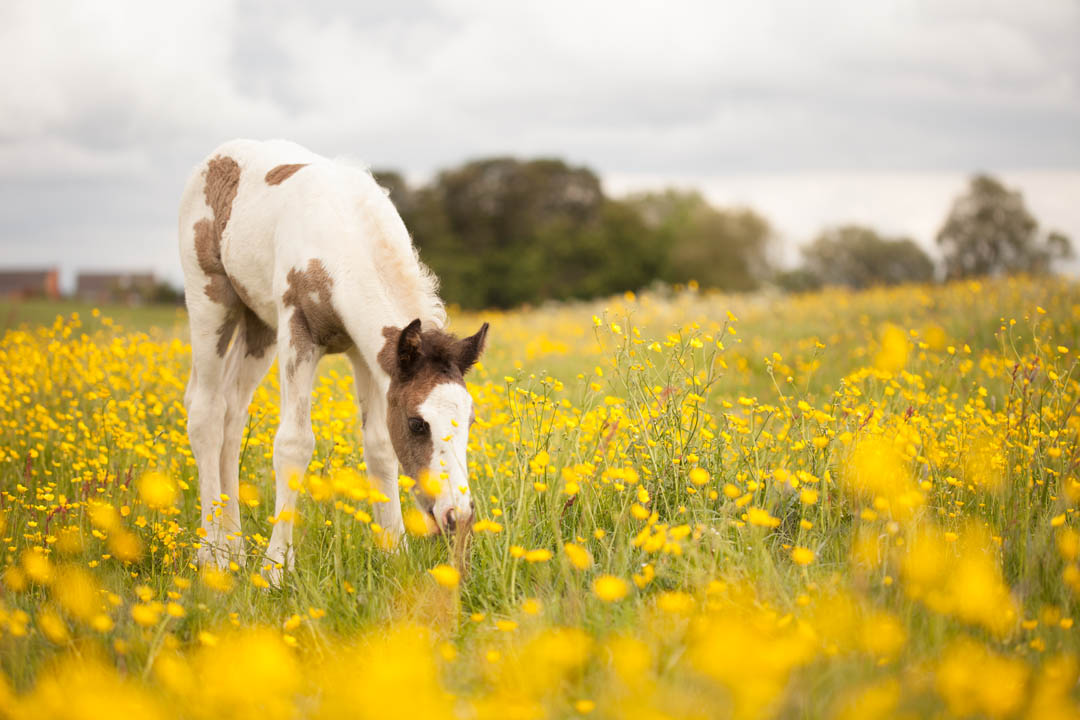
In the soft light of an overcast day the lighting is much more even
Exactly how soft the light becomes depends on how thick the cloud cover is. A light haze on a summer day may result in only a slight softening of the light. While a heavily overcast sky can give extremely flat light with no direction, which gives virtually no shadows at all.
Most of the time, you'll find that cloudy weather gives you quite a strong diffusion of the light, but still with some directionality to it. This is quite a nice compromise, giving a light quality similar to a giant softbox. The clouds act just like the front panel of a softbox, spreading the light out, diffusing it, making it much softer.
Portrait Photography
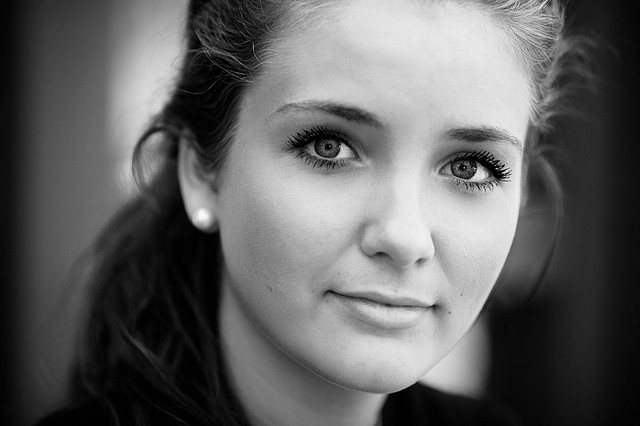
Soft light is well suited to portrait photography. Overcast weather allows you to shoot any time of the day, without worrying so much about the direction and harshness of the light.
Reykjavik by Fred Mancosu on Flickr (licensed CC-BY-ND)
Normally shooting in sunlight can result in harsh shadows under the eyes, nose, and chin, which don't look very flattering. But on a cloudy day these shadows are greatly softened, much less distracting, and easy to minimize.
The 'golden hour' (the time just before sunset and just after sunrise) is often the preferred time of day for natural light portrait photography. However, on an overcast day this time of day is probably the worst. On a sunny day this time is best because the low angle of the sun means the light must travel quite a long way through the atmosphere to reach you. The air particles in the atmosphere act to soften the light slightly.
But on a cloudy day, this means the light must travel a long way through the clouds to reach you. By the time the light gets to you, most of the light has just been absorbed or bounced back into space by the clouds. Instead of getting soft warm light, you get hardly any light at all.
Stick to mid-morning or mid-afternoon. Here the light has some direction, and is not just straight down. And it should still be pretty bright.
Plant and flower photography

roses by liz west on Flickr (licensed CC-BY)
Plants and flowers also benefit greatly from soft lighting. Bright sunlight causes a number of issues such as distracting harsh shadows and high contrast that makes it difficult to capture an image with details in both the highlight and shadow areas.
Many flower photographers carry a diffusion panel with them that they can use for softening harsh sunlight. One of the potential problems when doing this can be that while you can position the diffusion panel over your subject, the background may be some distance away, and in full sunlight. This results in a background that is much brighter than the subject, which can potentially attract attention away from the subject.
With naturally diffuse light on a cloudy day, you don't have this problem. No diffusion panel is needed as the light is already diffused, and the light on your subject will be the same strength as the light on the background.
Exposure
One of the problems or benefits, depending on which way you look at it, is that when it's cloudy the light is not as bright as it is when sunny. The difference in brightness depends on how thick the cloud is, but typically you should expect to loose 2-3 stops of light on a cloudy day compared to a sunny day.
This means that you may need to use a higher ISO setting, wider aperture setting, or slower shutter speed than you would on a sunny day. If you want to capture images with a slow shutter speed, then this can be to your benefit - you can get away with a much slower shutter speed than you could on a sunny day.
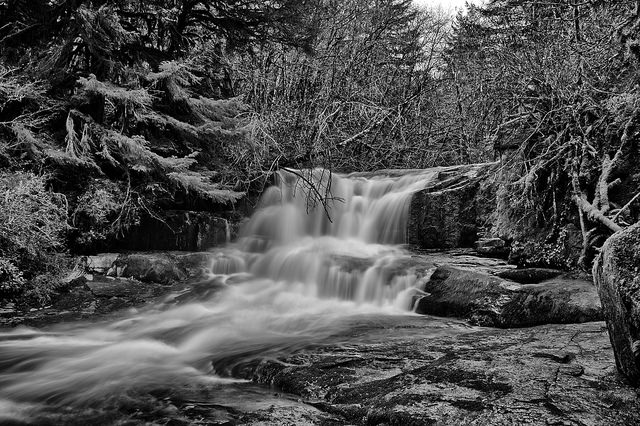
Falls B&W by Kirt Edblom on Flickr (licensed CC-BY-SA)
This can be very useful for capturing subjects such as moving water and panning shots with moving subjects. Cloudy weather essentially acts like a giant neutral density over the sky. Depending on how slow a shutter speed you want, and how thick the cloud is, you may still want to use a neutral density filter on your camera to cut the light levels even further.
Dealing with flat lighting
While soft lighting is great for many subjects, sometimes cloudy weather can give lighting that is just too soft. It looks flat, with no shadow and highlights to give your subject definition. In this case you can add or subtract light yourself to add a bit of shadow and highlight back to your subject.
A black 'reflector' or sheet of black card can be placed near a subject to reduce the amount of light hitting one side of them, adding a bit of shadow to that side of the subject. In the opposite way, a reflector or sheet of white card can be used to add light to one side of a subject, adding some extra light to that side of the subject.
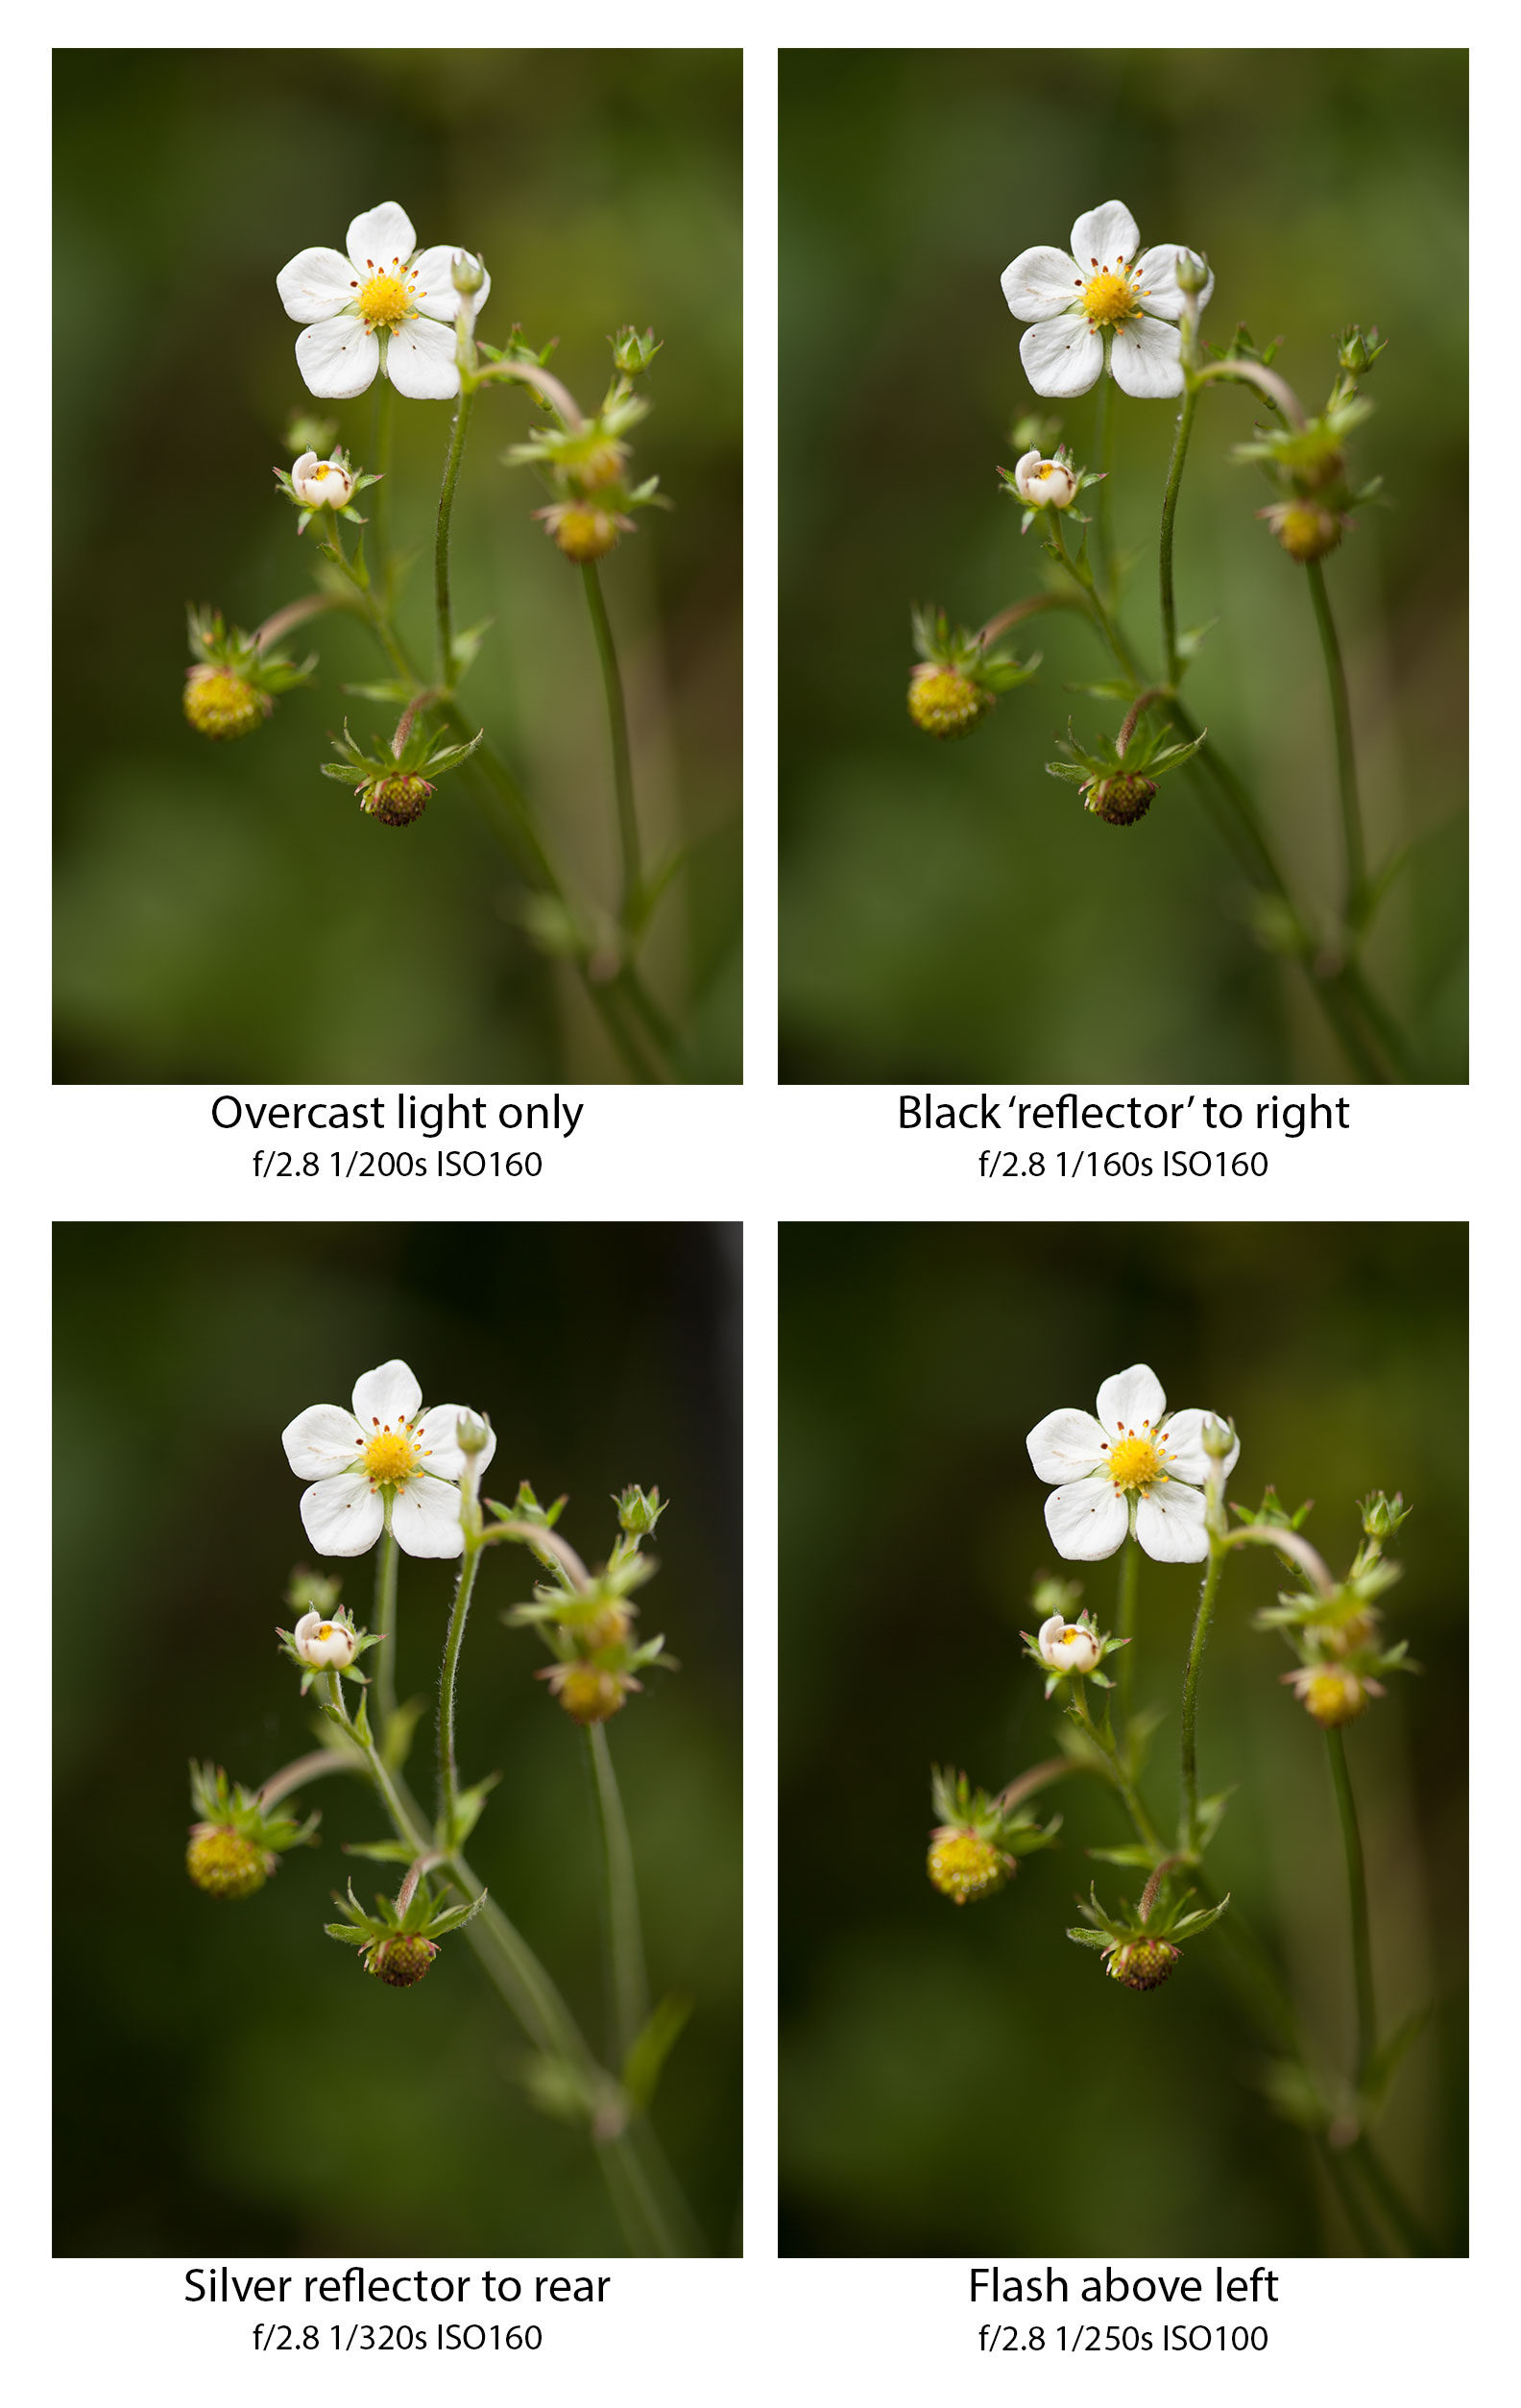
In terms of portrait photography, you don't even need an actual reflector or card to add or block light. You can use buildings to act in the same way. Just have you subject stand under the entrance to a building - the light from either side and above them will be blocked by the sides of the building, giving a more directional light from the front.
Having your subject stand under a bridge can provide lighting from either side, while light from above is blocked. Depending on where you're shooting, a reflector kit may be more convenient, but it's good to know you have other alternatives for shaping the light available to you.
You can also mix soft natural lighting with flash. Flash used on low power can add just enough shadow and highlight to add a bit of dimension to the image. Or fired from behind your subject, it can provide a nice rim light to separate your subject from the background.
Landscapes and overcast lighting
As a general rule, overcast weather is not great for landscapes. Of course, there are always exceptions to the rule. But generally you just get an image with very little texture in the landscape and a boring flat gray or white sky.
However, it can be worth going out around sunset / sunrise for some landscape photography even when it's overcast. On some occasions you'll find that the clouds start to break around the horizon, just as the sun is rising or setting. This can give a really awesome sky where the mass of cloud is lit up orange by the sun as it sets / rises.
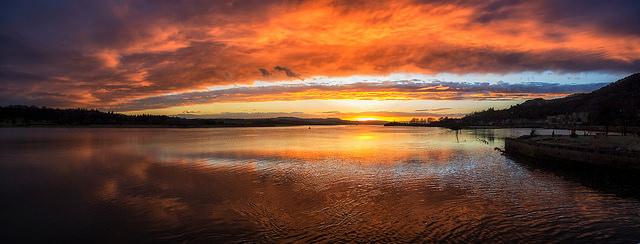
Anything but Dreich by john mcsporran on Flickr (licensed CC-BY)
Bear in mind that more often than not, the sky just stays overcast, the cloud doesn't break, and you don't get any photo opportunity. But when it does happen, you get the chance to capture a spectacular photo.


