Avoid these 5 mistakes in your photography
We all make mistakes on a regular basis. And if no-one's ever told you that you're doing something wrong, you might continue making the same mistake over and over again without even realizing it's a mistake. In this article I'll cover five mistakes you might be making in your photography, explaining why they are problematic, how to avoid them, and how avoiding them can help you get better photos.

Not identifying your subject
Knowing what your subject is when taking a photo is very important. You may think that taking a photo without knowing what your subject is would be quite difficult, but actually it is quite common. The subject should be what drew you to take a photo, the essence of the image.
For example, when taking a photo of a landscape, the subject will not be 'the landscape'. But rather it might be the way long grass is backlit by the sun. It might be an interesting formation of rocks. It might be the wavy line across the image created by a river. The subject may even be a feeling, such as peacefulness.
When you've identified your subject, this will help you compose your image better around the subject, helping you to communicate the subject to the viewer, and so resulting in a stronger image.
Framing your subject too loosely
A problem relating to the previous issue is that many people put the subject in the frame surrounded by too much space. If the subject in the scene is too small, how is the viewer going to know what the subject is? Of course, there are always exceptions to the rule, but generally you want your subject pretty large in the image, to emphasize the subject and make it obvious.
A tighter shot of a subject typically creates a more intimate image, this is especially true if you have to physically get closer to make the subject larger in the frame. The viewer has a better connection with the subject when the subject is close-up.

Loosely framed subject
Framing more tightly, but still with enough space in the frame for the subject to 'breathe' gives a more pleasing image
In terms of portraits, remember that a portrait does not need to be a full length portrait. An upper-body or an even closer headshot will often work better. You can even cut off the top of the head when framing, you may notice this is commonly done in close-ups in movies. Try not to frame the subject so that you cut off their limbs at the joints on the edge of the photo though - this can look a bit strange. A great guide for cropping / framing portraits can be found here: Free portrait photography cropping guide.
Don't think you should only ever shoot your subjects from as close-up as possible though. Shoot a variety of different framings. But just make sure you don't neglect to take a close shot, as this is most likely to be the best.
There are plenty of other tricks you can use to help draw attention to your subject, such as tonal contrast, color contrast, focus, and more. But I won't cover those here, as they're already covered in this article: Eight Ways To Focus A Viewer's Attention On Your Subject.
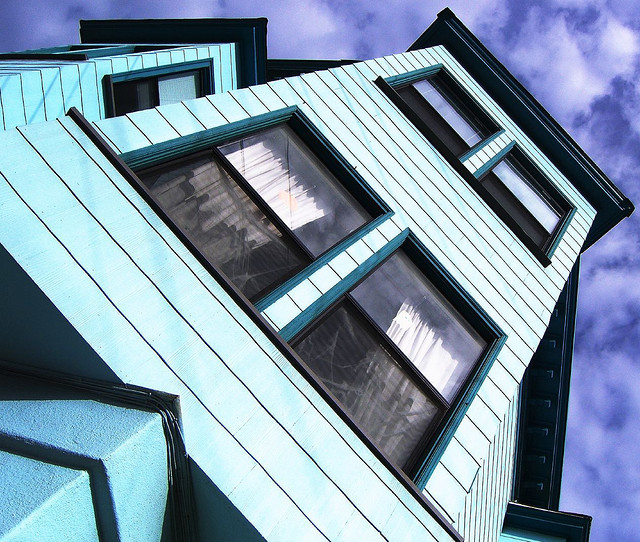
Not analyzing the basic shapes in a scene
Most images can be broken down into a series of shapes, often triangles. Thinking of your image in terms of shapes can be useful when composing an image. It helps you see through the 'noise' of the details in the image, to the basic composition.
Thinking this way is perhaps not so useful for portrait photography (though it can be used there), but does tend to be very useful for landscape and urban photography. Shapes are created by blocks of color and / or tone. For example, with a photo looking up at a tall building, taken with a wide-angle lens, the building may have a triangle shape, and cut the sky into two shapes either side.

Glass and Steel (HONG KONG/ARCHITECTURE) IX by Chi King on Flickr (licensed CC-BY)
Different shapes and combinations of shapes can give different feelings to your image. Curved shapes can give a feeling of relaxation, whereas triangles and slanted straight edged shapes can make an image more dynamic and give a feeling of speed or urgency.
A mix of different shapes (particularly if there are a lot of different shapes) can create an image where there is too much going on for the viewer to easily concentrate. Remember though, we are talking about the very general shapes in the image, not the shapes of small details. While the image may contain numerous different shapes in the details, this is not problematic, it is the main blocks of shape that make up the image we are interested in.
The shapes in an image are partially determined by the subject, but you have a lot of control through how you frame the image as well. Simply tilting your camera can take squares to diamonds. Cropping a rectangle at the edge of the frame can turn it into a triangle. The focal length and lighting can also have a big effect on what shape items in the scene appear as when captured in a 2D photo.
Being sloppy with angles
There are some photographers that think images taken with the camera tilted are a big no-no. They think of them as a poor way of trying to make a boring photo interesting simply by rotating the camera in one direction of the other. When tilting the camera just to try and make a bad photo good, then I would agree, it's not generally going to work. But there are good reasons for tilted photos too.
As I mentioned in the previous section, tilting the camera may be used to change the shapes present in an image. It may also be used to find a framing that keeps unwanted elements from poking in at the edges of the frame. In some cases it can be used to maximize the size that a subject takes up in the frame. It can be used to help create an abstract composition from something that may be more obvious when viewed at a normal angle.
blue on blue by darwin Bell on Flickr (licensed CC-BY)
One place where you do need to be careful with your angles is when an image is tilted without you meaning to tilt it. In many landscape photos, a small amount of tilt is not obvious - after all, the horizon is often not completely flat in real life.
But in some images, particularly if you include the sea or a large body of water such as a lake within the image, then a tilt can be quite obvious. The tilt just makes the image look strange and unnatural, as we know that water will always lie flat, not at an angle. Thankfully, correcting the tilt of images, whether in-camera at the time of shooting or later when editing, can be done quite easily: How to get a straight horizon in your landscape photographs.

Photo including the sea where the horizon line is tilted

Straightening the photo is pretty easy and gives a more natural looking image
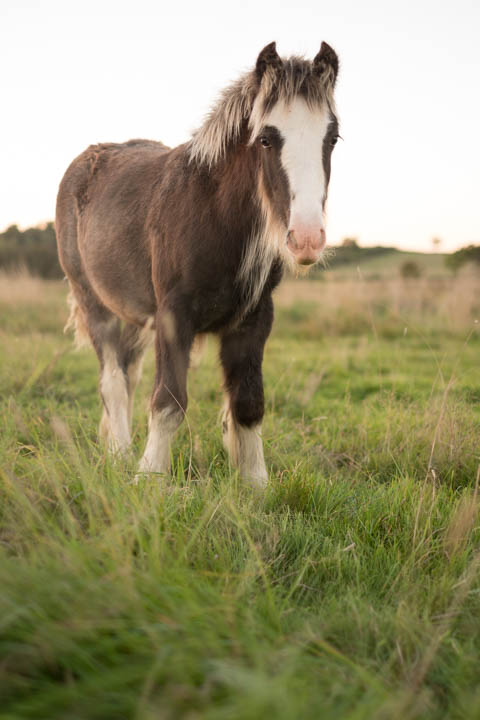
Taking all photos from standing height
Most people take their photos from standing height. They just hold the camera up to their eye (or in front of their face), and take the photo. Even when using a tripod, many photographers set the tripod up so that the camera is at standing height. While this can be the best height to take a photo from, it is not always.
If you want to take better photos, you need to experiment a bit, and see if the photo looks better if the camera is up higher or down lower. For portrait photos, the photo is often better if taken from the subject's eye level - that means getting down lower for portraits of children and pets.
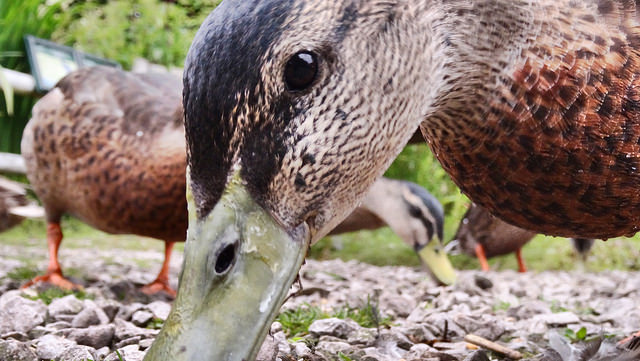
Mallard at Martin Mere, Burscough, Lancashire by Gidzy on Flickr (licensed CC-BY)
For a photo that makes your subject look imposing, shooting up from a low angle can work well. Shooting down from a high angle can work well for getting group shots with everyone's face clearly visible. And both high and low angles can show subjects from fresh perspectives we're not used to seeing them from.
Hopefully you'll now be able to try and avoid these mistakes, and so end up with better photos. And just remember, these tips are only general guidelines, not hard rules. A mistake is not a mistake when you purposefully mean to do it.


