Moon photography tips
The moon, a body out in space that none of us are likely to visit in person, can make for some great photos. However, despite its large size, the long distance from earth means that it can be hard to get a meaningful photo of it.
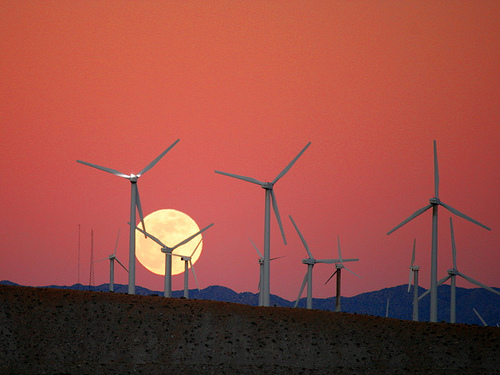
Moon Rise behind the San Gorgonio Pass Wind Farm by Chuck Coker on flickr (licensed CC-BY-ND)
To get a larger photo of the moon you will need a camera with a long lens or zoom. The longer the focal length of the lens, the better. You can use a teleconverter to increase the effective focal length of your lens if necessary, e.g. a 300mm lens with a 2x teleconverter would be equivalent to a 600mm lens, which would let you get a higher magnification of the moon in your photos.
If you don't have a long lens, be aware that many super telephoto lenses (400mm and upwards) can be very expensive. A cheaper alternative can be to purchase older manual lenses 2nd hand. Sometimes you may also need an adapter to make these work on your camera.
With these lenses you will normally need to adjust the aperture and focus on the lens by hand. Focusing is easy if your camera has live-view, if not, then set it at or near infinity when photographing the moon.
And of course, you can always crop your photo down to make the moon more prominent by using photo editing software.
melbourne moonset by Jes on flickr (licensed CC-BY-SA)
Because moon photography requires a long focal length for best results you will need to use a tripod to keep the camera steady. You should also use a remote shutter release cable for the camera to avoid any wobble from pressing the shutter button.
If you don't have a cable release, use the camera's self timer mode. This gives the camera a few seconds for the vibration caused by pressing the shutter button down to dissipate before the actual photo is taken.
For DSLR users, you should also use Mirror Lock-up. Some cameras have a dedicated button / mode for this, with others you might have to go into the menu to activate it. With DSLRs, the mirror used to direct light into the viewfinder flips up before the photo is taken. This can cause some vibrations. So using Mirror lock-up mode flips the mirror up first, then you can wait a few seconds for any vibration to dissipate before you take the photo.
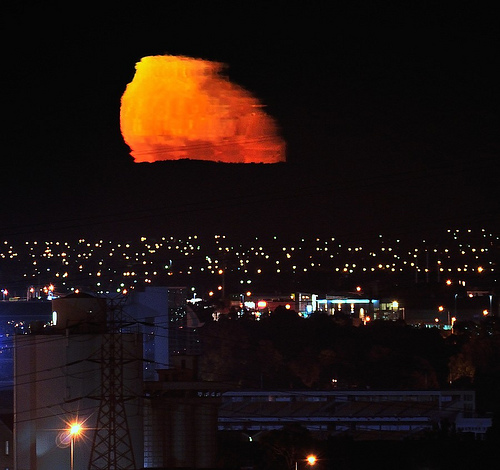
The moon is very bright, especially at a full moon, while the rest of the landscape is usually quite dark. This can fool your camera's auto exposure, and you will often end up with photos where the landscape or sky is exposed correctly but the moon is bright white with all details lost.
Bad Moon Rising by Brian on flickr (licensed CC-BY)
To correct for this, check if your camera has a spot metering mode. Spot metering bases the exposure on a small single spot, usually at the center. Point the spot at the moon and press the button to calculate exposure (usually a half press of the shutter), then lock exposure and compose your photo.
Manual exposure and trial and error (checking on the LCD screen) can also work. A general starting point is that if your aperture is set to f/11, then you would need a shutter speed of one over the ISO value. E.g. for f/11 ISO 100 you might need 1/100s shutter speed.
When composing your moon photo, it is a good idea to include some foreground elements rather than just the moon in the sky by itself. By including some of the distant landscape in the photo, you can make the moon look very large.
Or by including some nearby elements, such as the leaves of a tree close by, you can make the moon appear smaller.
To do this you will need to take your photos when the moon is just rising or setting, and is close to the horizon. These times are also better for including some detail in the landscape as there may still be a small amount of light around from the recently set sun.
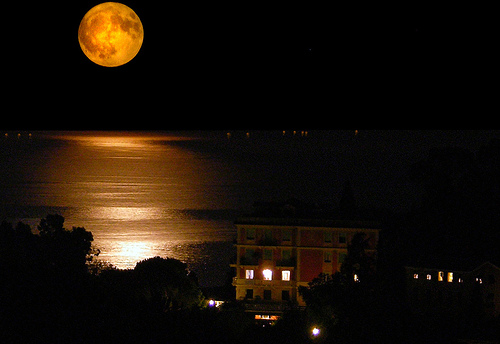
Seamoon by Angelo Amboldi on flickr (licensed CC-BY-ND)
The warm light of the sun just below the horizon can also give the moon some terrific color at this time. As the night goes on the light reflected off the moon becomes more white.
Before you go out to photograph the moon it is a good idea to do some planning. Using the internet you can check the times of moon rise and moon set, and should be able to get a rough idea of whereabouts in the sky the moon will appear. The Photographer's Ephemeris is an excellent desktop app for checking moon (and sun) rise times.
Also check what the weather is going to be like - if the sky is going to be overcast you're not going to be getting any moon photos.
The phase of the moon is important as well. A full moon gives the largest appearance in the sky, and is also the brightest. However, because it is lit front-on by the sun, the lighting on it is relatively flat with little shadows.
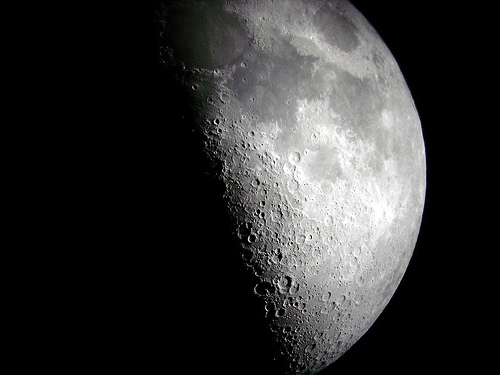
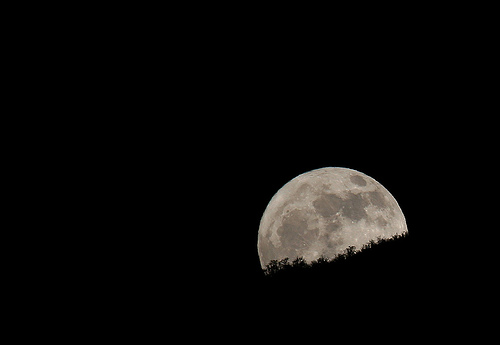
Gibbous is a funny word by Brian on flickr (licensed CC-BY)
When the moon is in a quarter or crescent phases however, the sunlight is hitting it from the side. This creates shadows cast by the mountains and craters, making for a photo with greater contrast.


