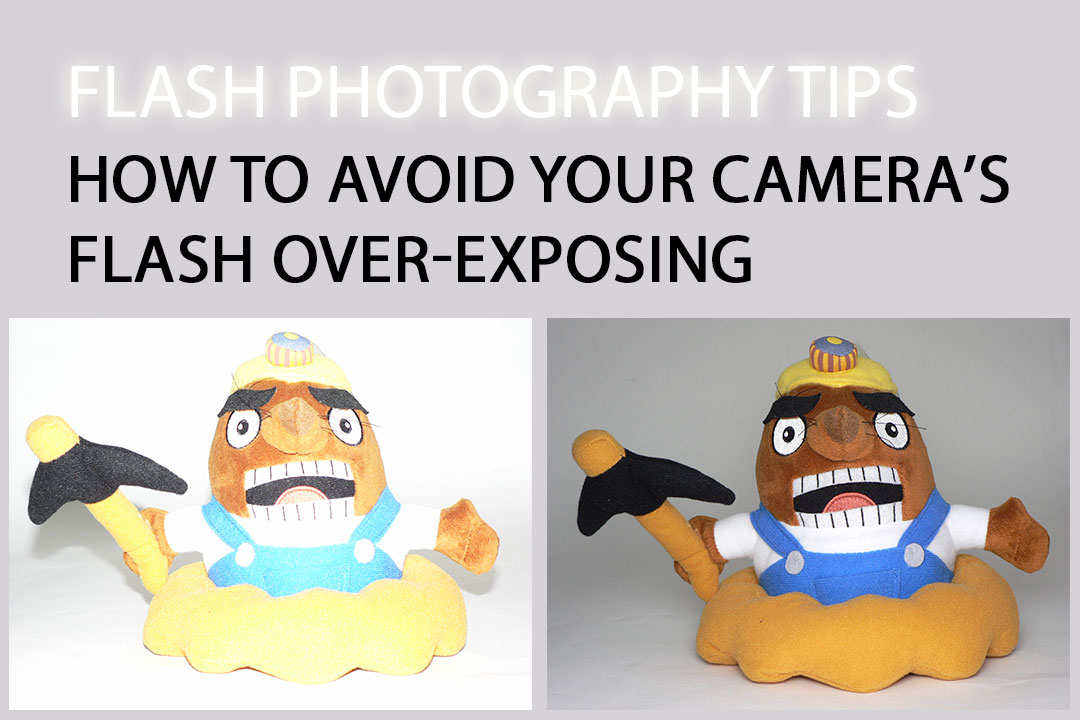
Flash Photography tips – How to avoid your camera’s flash over-exposing
It can be very annoying when you frame a nice photo of your subject and then when you press the shutter the camera's flash fires on full blast, making your subject blown-out white. Unfortunately there's no way you can get back that shot, but there are some things you can do to bring down the flash power for another shot, even if there are no flash settings on your camera.
Adjusting Flash Power using Camera Settings
First, let's look at what you do if you have flash settings available to you.
If you are using an external flash unit (speedlight), check that it is attached to the camera properly and the contacts at the bottom of the flash are clean. Although most modern flash units communicate with the camera to automatically fire at the correct power, if they are not attached properly, they will often just fire on full power.
Some external flash units feature a manual flash mode, and some cameras have a manual flash mode. Check your flash or camera manual, or just scroll through the camera settings menus to see if there is anything related to flash control.
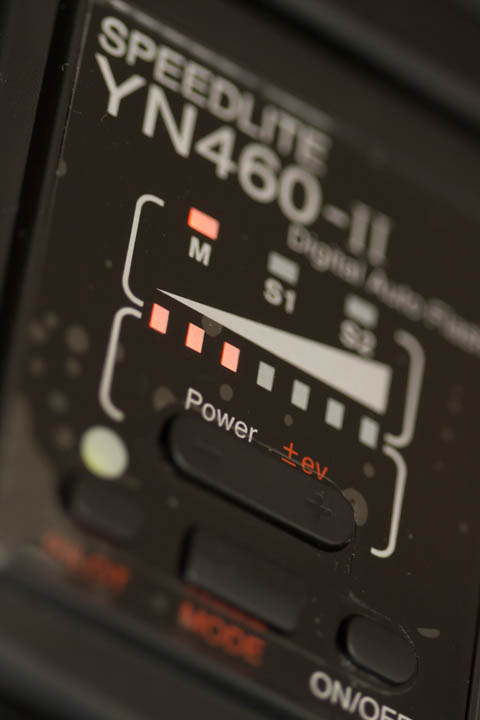
Many speedlite flashes allow you to manually set their power via controls on the back
If your camera does let you use manual flash power, then you can control the exact amount of flash you want. You will probably need to take some test shots and check the resultant photos on the LCD to find out what the exact flash power you need is.
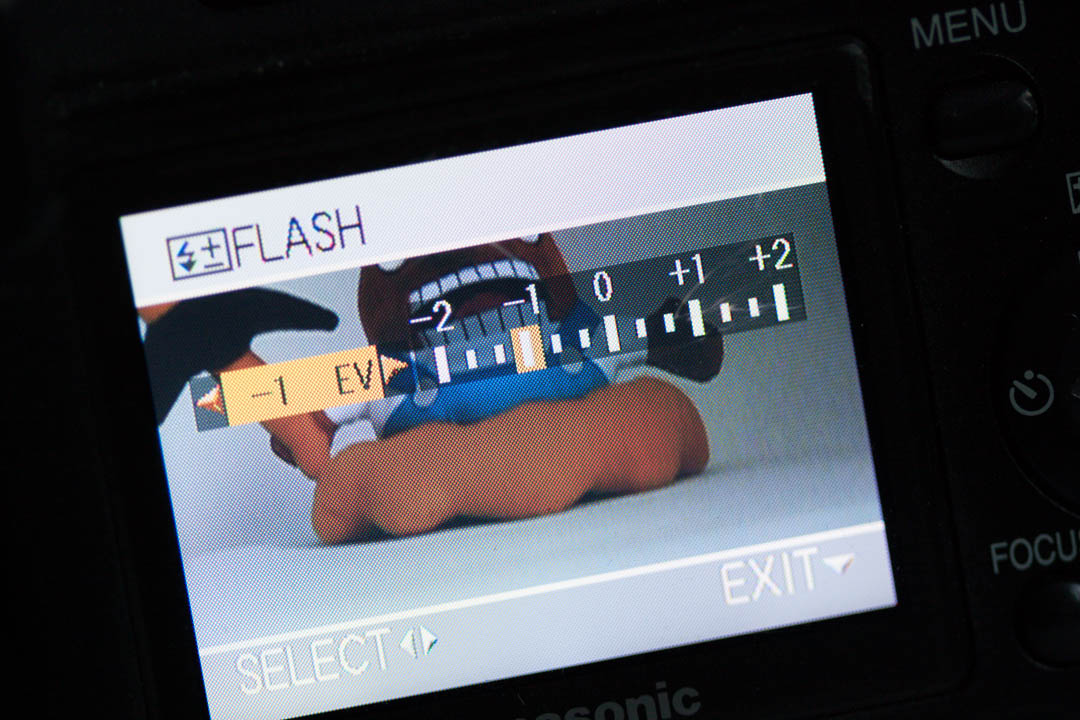
Otherwise, if the camera doesn't offer a manual flash mode, it may offer Flash Exposure Compensation (FEC). This allows you to increase or decrease the flash power from what the camera thinks it should be. Dial this down to decrease the flash power.
Adjusting Flash Power for Cameras without Flash Settings
The majority of cameras fire what is known as a pre-flash before they take the actual photo. This is a very low power flash burst. The camera records how much light from the flash was received back, and from this calculates what the correct flash power should be. This all happens extremely quickly just before the photo is taken, so you can't usually notice it.
Change the background-subject distance
When your camera fires its flash on full power, it's because it thinks there isn't enough light in the scene. For example, lets say you are taking a photo of a person in a dimly lit area, and the background is some distance behind them. If you frame your shot with a significant amount of the background in the image, then the camera thinks that it needs a strong flash power to light up that distant background.
So instead, frame your shot with your subject nearer a solid object, such as a wall. This allows more light to bounce back into the camera, so the camera is less likely to choose a high flash power.
Change the background brightness
If the background is near the subject, but is very dark, this can also affect the flash power. The camera thinks the flash needs a lot of power to light up the dark colored background. So using a brighter background instead can be a good way to reduce the flash power.

With a dark background and loose framing of the subject, the flash compensates for the dark background and over-exposes the subject.

With a brighter background and loose framing of the subject, the flash fires at the correct power.
Fill the frame with the subject
Alternatively, fill the frame with your subject. This ensures there is not much background in the photo, and the camera's exposure metering is less likely to get confused.

With a dark background and loose framing of the subject, the flash compensates for the dark background and over-exposes the subject.

By moving closer to the subject so that they fill more of the frame, the camera does not take the dark background into account when calculating the flash power, so the subject is properly exposed.
Increase aperture or decrease ISO
If you are quite close to your subject, but are using a wide open aperture, or a high ISO, it may be that actually your flash is firing on its minimum power, but this is still too strong. Try stopping down the aperture or decreasing the ISO setting to see if this makes any difference. Moving further away from the subject can also help in this instance.

With a large aperture (f/1.4) and high ISO setting (ISO 1600) the flash is too powerful even though it is probably firing at minimum power.

Just by decreasing the ISO setting (to ISO 200) the flash is now not too powerful.
Bounce the flash
The final way you can decrease the flash power of your camera is to simply reduce the amount of light from the flash that is hitting your subject. By placing a piece of card in front of the flash, you can bounce the light output of the flash off the card. This spreads the light out, so less of it is directly hitting your subject.
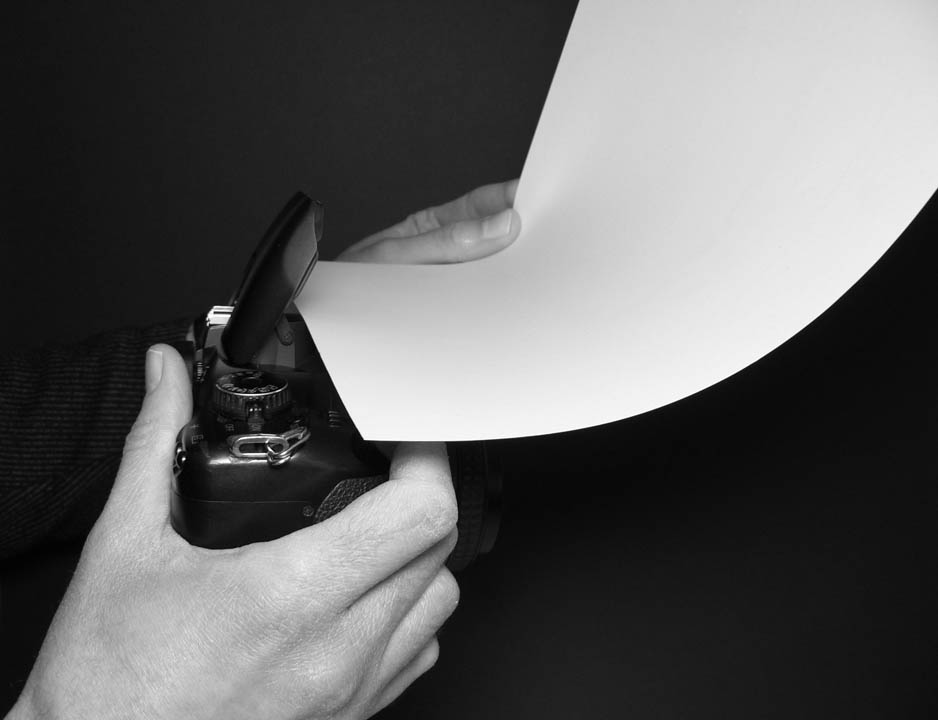
Holding a piece of card in front of your camera's flash and bending it up towards the ceiling allows you to bounce the flash up onto the ceiling, then back down onto your subject. This reduces the intensity of the flash and gives softer lighting.
Bouncing flash is mainly useful indoors, where you can bounce the flash up off a piece of card onto the ceiling, and then it will bounce back down from the ceiling onto your subject. (Or you can do the same thing but use the card to bounce the flash off a wall).
Bouncing the flash in this way can create a much more natural, soft light than direct flash, as well as reducing the effective power of the flash.

With the camera's pop-up flash used normally, this photo came out too bright.

Bending a sheet of card in front of the pop-up flash to bounce the flash from the ceiling has reduced the intensity of the flash. Note the lack of harsh shadows due to the softer lighting this technique gives.
Diffuse / Partially block the flash
An alternative to bouncing the flash is to use a semi-transparent material to diffuse it. Like bouncing this spreads the light out, resulting in a light that is much softer. A piece of kitchen towel or tracing paper can work well as a makeshift diffuser. If the flash is still too bright, just double it up.
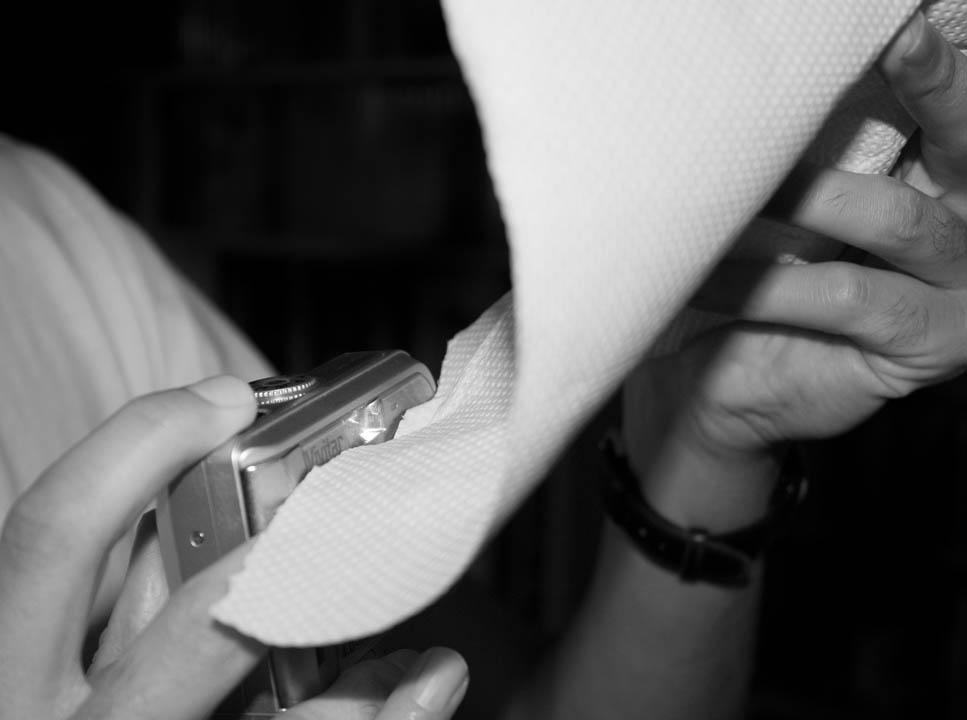
Compact camera with piece of kitchen towel held in front of the flash to diffuse it.
You will need to hold the paper out in front of the flash for it to work effectively, rather than just holding it directly on top of the flash.
Even if your flash is never too bright, bouncing or diffusing the flash like this can still give nicer lighting than direct flash.

Photo taken with the camera's pop-up flash where the flash is too bright.

Photo taken with the camera's pop-up flash with kitchen towel held in front of the flash to reduce the flash power and diffuse the light.
One thing to note is that if your camera's flash is not already firing at full power, then adding a layer of tissue paper in front may not be completely effective in reducing the flash power. The camera will fire its pre-flash, which won't throw as much light on the subject thanks to the tissue paper. The camera then thinks that the flash needs more power, and so compensates for the tissue paper diffusion, resulting in a photo that is just as bright as it was without the tissue paper.
Whether that will happen or not varies between camera models. If it does happen, the only thing you can really do is to put many layers of tissue in front of the flash. The camera will just fire its flash at full power to compensate for the tissue paper diffusion as much as it can. It won't be able to increase the power any more than that, so as long as you have enough tissue paper, you can cut down on the light from the flash.
Different camera models decide on what strength of flash to use in different ways. So while you might find one camera uses too bright a flash in a certain situation, another camera model might not.
I actually don't tend to have any issues with my cameras. In fact, while the example before and after shots above are directly comparable (they used the same settings for each shot, only the background or use of diffusion / bounce was changed), I actually had to use a positive flash exposure compensation setting on the camera to make sure it would overexpose by default.
Some of the tips above can be used in reverse if you find your camera's flash is always too weak. Put more distance between your subject and background, or use a high ISO and large aperture, or put your subject in front of a dark background. Just the opposite of what you should do if the flash is too bright.
I hope this article has been helpful, if you have any other suggestions on reducing the effect of a flash that is too bright, feel free to leave a comment with your suggestion below.


