Posts Tagged ‘Image editing’ (Page 2)

How to add a texture to a photo in Photoshop

without comments

Adding a texture overlay to a photo can be a quick and easy way to create a distressed, vintage look. Depending on the texture and any other effects applied, you can achieve looks from a slightly old photo to a painting on canvas.

In this article I'll cover how to add a texture to a photo in Photoshop Elements / CS. The process is very similar in other image editing software as well, so if you don't have a copy of Photoshop, hopefully this guide will still give you a good idea of how the texturing process works.

Read the rest of this entry »
Creating a shallow DOF effect using Topaz Lens Effects and onOne FocalPoint 2

without comments

In the last two articles we've looked at how to use a shallow depth of field to blur the background using in-camera techniques, and how to replicate the effect using Photoshop or other image editing software. In this article I want to look at a couple of more advanced ways of blurring the background using image editing software.

We'll look at two specialist programs that can replicate the effect of a shallow depth of field, along with a large variety of other lens effects. First we have Lens Effects by Topaz Labs, then we have FocalPoint2 by onOne Software. We'll use the same two images used in the previous article so you can compare the results of each technique against each other.

Read the rest of this entry »

How to simulate a shallow depth of field and blur the background in Photoshop Elements and CS

without comments

In this article we'll look at how to use image editing software to blur the background of a photo while keeping the subject sharp. This is a good way to help draw viewer's attention to your subject, rather than the background.

Although it is best to achieve a blurred background in-camera (see previous article: How to take photos with a blurred background by using a shallow depth of field), this is not always possible. In this case we can use image editing software to simulate the effect of a shallow depth of field instead.

Read the rest of this entry »

Creating a sunburst sunset poster background in Photoshop

without comments

Recently I was asked to create a poster to advertise an event. As a background image for the poster, I decided I wanted a nice sunset image with sunbeams emanating from the clouds.

Looking at my (rather meager) stock library of cloud photos, I couldn't find anything that looked like what I wanted. But I knew that with a little help from Photoshop I could get the image I was looking for.

So, I thought I'd share how I created the background image for the poster. Hopefully you will find it helpful.

Read the rest of this entry »

Written by Discover Digital Photography

January 28th, 2013 at 10:46 am

How much image editing is acceptable?

without comments

With digital photography it is quite easy for us to manipulate our photos using image editing software. Some of us make some adjustments to nearly all our photos. This is often known as post processing - processing applied to the photo after it was captured.

But just how much post processing is it 'acceptable' to apply? The answer to this question lies partly in what you yourself are comfortable with, but also what the image is to be used for.

A Little of This a Little of That Processing
A Little of This a Little of That Processing by fauxto_digit on flickr (licensed CC-BY-ND)

Read the rest of this entry »

Written by Discover Digital Photography

November 20th, 2012 at 9:35 am

Photoshop tutorial: How to apply a texture to a face by using a displacement map

with 5 comments

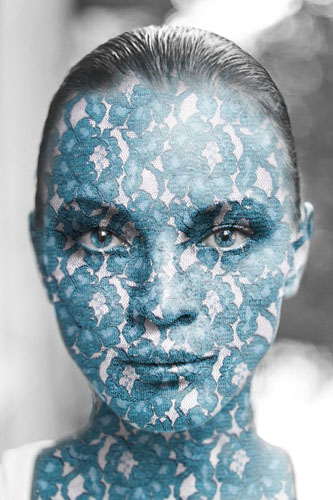
In this post we'll look at how to apply a realistic looking texture to a person's face using a displacement map in Adobe Photoshop.

Photo of a woman's face with texture applied in Photoshop using a displacement map
The end result we will be working towards in this tutorial

The process is exactly the same in the full version of Photoshop and Photoshop Elements, they both feature the displace filter and work in the same way. GIMP also features the displace filter, as does Paint Shop Pro. This tutorial focuses on Photoshop, but the process is similar in GIMP and PSP.

Read the rest of this entry »

Easy Photoshop Portrait Effects

without comments

Post processing can be used to improve your portrait photos, and really give them that professional look. The following three techniques are relatively simple and easy to implement, but can make a big difference.

Read the rest of this entry »

Written by Discover Digital Photography

March 1st, 2012 at 4:57 pm

Using the Levels tool in Photoshop etc. to correct and enhance your photos

without comments

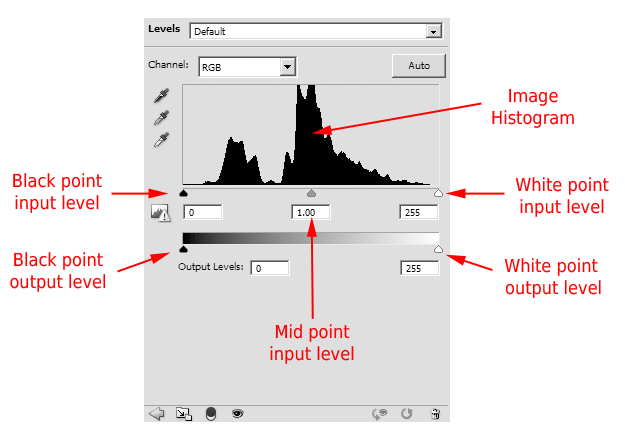
The levels tool is similar to the curves tool, in that it allows you adjust the brightness / darkness and color of the tones in your photos. Levels is slightly simpler than curves in that it only allows you to adjust the black point, white point, and mid point, whereas curves will let you adjust those and any point in between.

For this article, I'll be using the levels tool in Photoshop CS5, but the levels tool in Photoshop Elements, Paintshop Pro, GIMP, etc. are all very similar.

If you want to follow along with the examples in this article, you can download the images used here: image-1.jpg image-2.jpg

Description of the Levels panel in Photoshop CS5

Read the rest of this entry »

Written by Discover Digital Photography

January 25th, 2012 at 3:58 pm

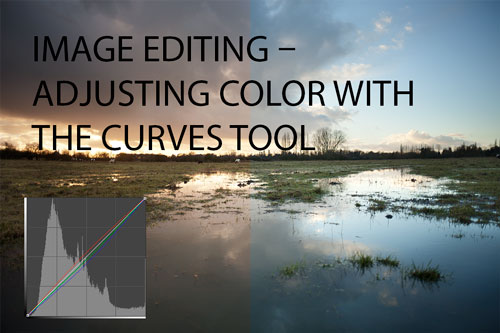
Image editing – adjusting color with the curves tool

without comments

Carrying on from the previous article Using the curves tool in Photoshop etc. to improve your photos, in this article we'll look at using the curves tool to alter the color balance in your photos.

Curves can be used to fix a color cast in your photo, or add a color cast. You can adjust the colors in just the highlights, midtones, or shadows depending on where you place the points on the curve. You can even create giant shifts in color such as a cross-processing effect using curves. They are a very useful tool in adjusting the color of a photo.

Image editing – adjusting color with the curves tool

Read the rest of this entry »

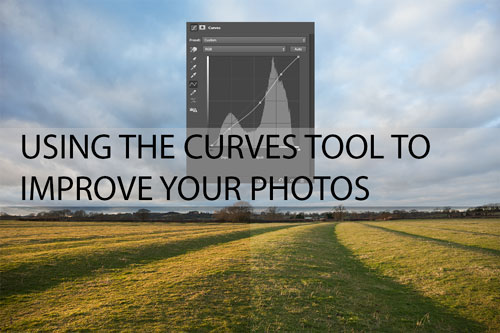
Using the curves tool in Photoshop etc. to improve your photos

without comments

The curves tool is a simple but powerful tool that allows you to brighten, darken, add contrast, and correct or modify the color balance of your photos. As well as being easy to use, it allows you to make fine grained adjustments that will only effect certain parts of the photo.

Most photo editing programs, such as Paintshop Pro, , GIMP, and many others include the curves tool. In this article we'll look at how to use curves, and some example adjustments.

Using the curves tool in Photoshop etc. to improve your photos

Read the rest of this entry »

Written by Discover Digital Photography

December 4th, 2011 at 3:22 pm