Top 10 Photography Tricks
With the increased availability of photography editing software and the introduction of new, easier to use compositing tools, 'trick' photos have become much more common. Compositing together photos to create a trick photo is not a new technique though - even in the early 20th century photos would be cut up then stuck together to form a new image.
However, trick photography isn't just compositing photos together to make something new. There are plenty of tricks that can be performed right in camera, with no Photoshop wizardry needed at all.
In this article we'll look at 10 different tricks that can be achieved wholly in-camera but usually work best with some post production editing as well.
Forced Perspective
One of the classic photography tricks is forced perspective. This is where you compose the image in such as way that it becomes hard to discern the distance of a subject in the scene. By removing depth cues it allows for creative interaction between foreground and background subjects.
The standard use of forced perspective is to make a particular subject appear very large or very small. For example, you may have a subject in the foreground that appears to be standard size and a subject in the background (but you can't tell it's in the background) that appears to be very small in comparison.
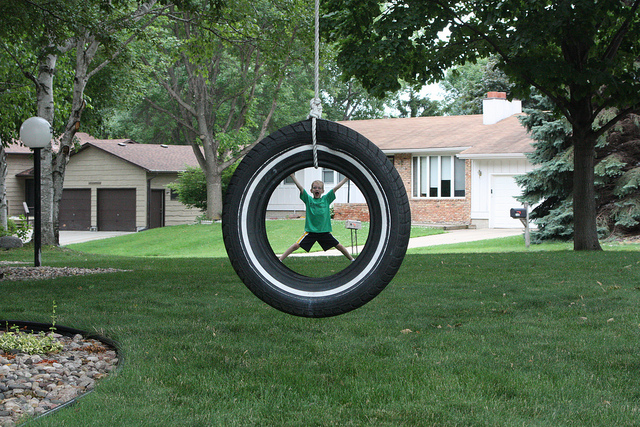
Forced Perspective (take 2) by whelleson on Flickr (licensed CC-BY-SA)
Or you might have a small subject in the foreground (such as a toy car) that appears to be a standard size compared to the background. The removal of depth cues means you can't tell the difference in distance between the foreground and background, producing this illusion of size.
The easiest way to remove depth cues from an image is to photograph somewhere very flat and devoid of any detail. For example, desert, a large beach, snow, large body of water. The lack of any items in the scene to give an idea of distance allows this trick to work.
71 by Ace Armstrong on Flickr (licensed CC-BY-ND)
Another technique, which will work for some scenes, is to put the camera very low to the ground. Depending on the scene, this can hide receding items in the scene behind closer items, getting rid of them as depth cues. It can also get rid of converging lines, which again indicate depth.
Juxtaposition
For this trick you compose your photo to put two elements together that contrast one against the other. This works best when the elements are ones the viewer wouldn't normally expect to see together.
Juxtapostion by Jay (Thanks for 2.5M views) on Flickr (licensed CC-BY)
For example, new and worn-out, big and small, old and young, rich and poor. Sometimes you'll find juxtapositions in natural scenes you can photograph as-is. Or you can create such a setup artificially.
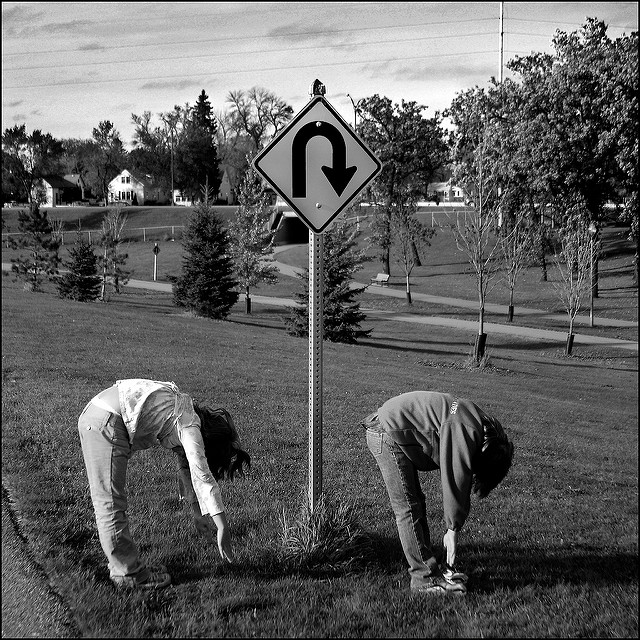
You Turn by gfpeck on Flickr (licensed CC-BY-ND)
Other times you might find a scene that requires use of some of the other tricks mentioned in this article, such as forced perspective or reflection to create an effective juxtaposition.
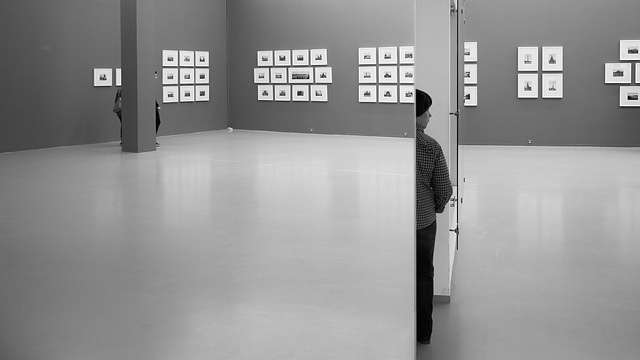
Hiding by Alexey Druzhinin on Flickr (licensed CC-BY)
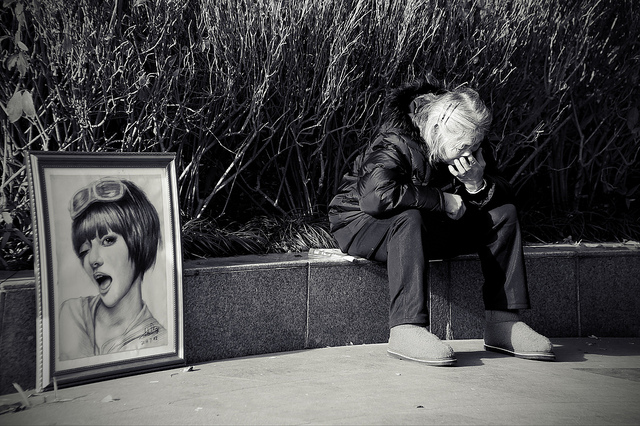
Contradiction / Impossibility
An impossible photo can have a much stronger effect than a drawing or painting, simply because people are used to photos depicting reality. By producing a photo that goes against our sense of reality, it makes the viewer look closer at the image to try and make sense of it.
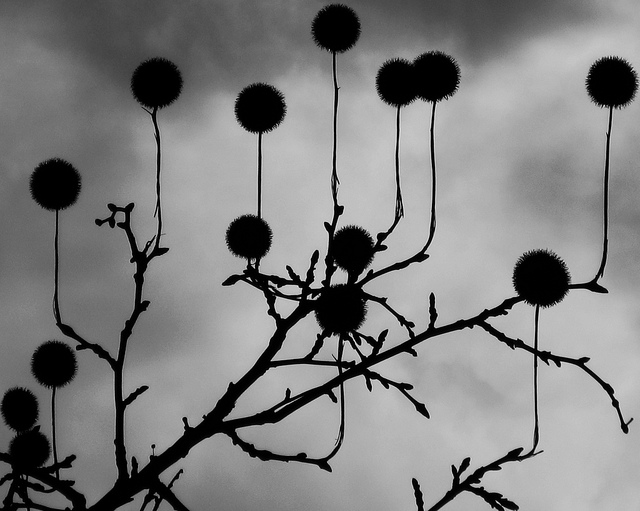
ingravidos by m o n c h o o h c n o m on Flickr (Public Domain)
This is particularly true for photos where there are just one or two elements of the photo that are impossible, while the rest is grounded in reality.
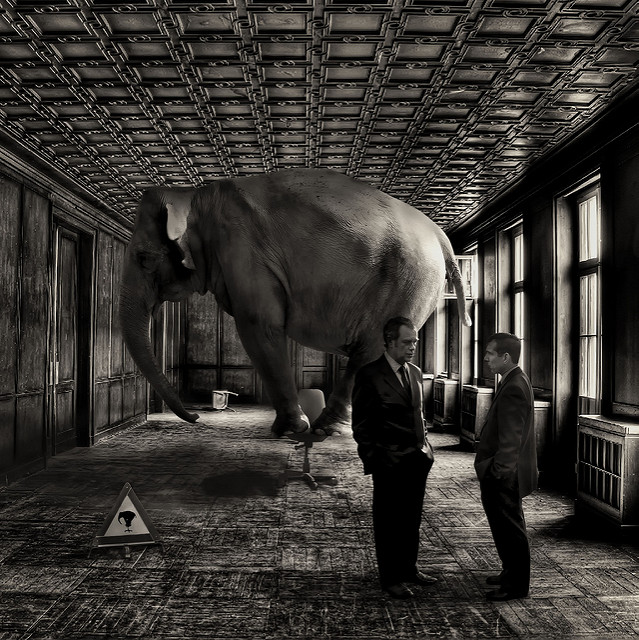
Afterwards Tom and Eric weren't exactly sure at which point during their discussion the elephant had entered the room by David Blackwell. on Flickr (licensed CC-BY-ND)
An impossible photo can be achieved in-camera via clever framing. Or shooting in a dark environment and lighting each part of the scene separately. But generally impossible photos tend to be a combination of both in-camera work and post-processing (compositing).
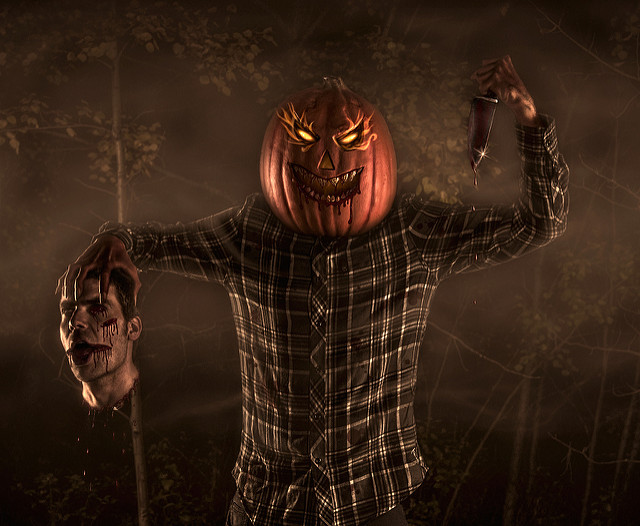
Self portrait - Who's carving who? by MattysFlicks on Flickr (licensed CC-BY)
Getting as much right in-camera as possible makes the compositing process easier. For example, for a photo of someone walking on water, having them actually walking in very shallow water makes it easier to create a realistic composite than if they are walking on solid ground.
Multiple exposure
Probably one of the most popular photography tricks is that of multiple exposure. This is where you add the brightness of one photo on top of another photo.
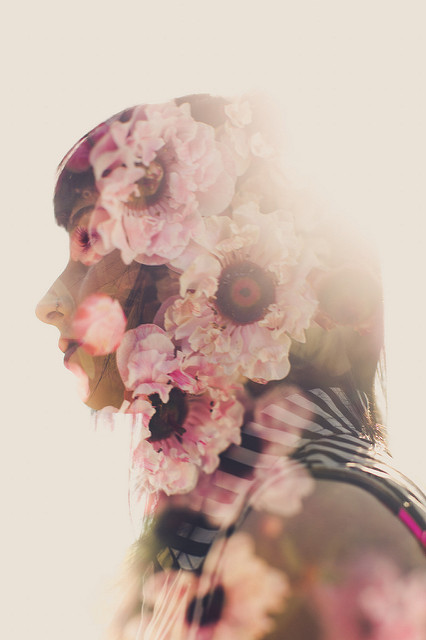
Day 79/365 — 03/20/2014: Digital Double Exposure by Brandon Nguyen on Flickr (licensed CC-BY)
So, you take a photo of a dark subject against a bright background, e.g. any backlit subject. Then you take a second photo of a different subject. Where the second photo overlaps the bright area of the first image there will be no (or little) effect as the area is already bright. But where the first photo was dark, the second photo shows through, as the bright areas of the second photo show up against the dark background.
You can create multiple exposures using image editing software by overlaying one image on top of another and using the screen blend mode. However, most digital cameras feature a multiple exposure mode built in. Indeed, this technique actually is known from the very early days of photography, and can easily be achieved with almost any film camera too.
Untitled by Richard P J Lambert on Flickr (licensed CC-BY)
Painting with light
Photography is all about capturing light. But you don't have to use only static light sources. Nor do you need to photograph only reflected light. So long as ambient light levels allow, you can take a long exposure photograph and move the light source during the exposure, thus painting with light.
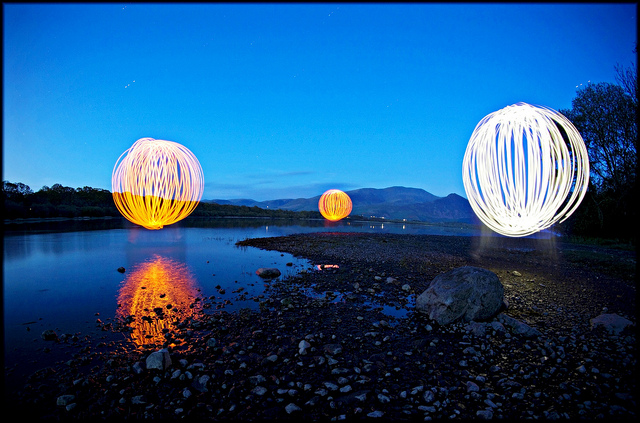
Light balls by Alex Matravers on Flickr (licensed CC-BY-ND)
You can't really achieve this technique during the day as the sun is too bright for a long exposure. While you could used ND filters for a daylight long exposure, you would need an extremely powerful light source for it to have any observable effect on the resulting image. So basically you're restricted to shooting at night / twilight or indoors.

_MG_1490 by Ashley Nadin on Flickr (licensed CC-BY-ND)
You can either paint light onto a subject, or use the light source (so long as it is a constant light source, not a flash) to draw a trail of light in mid-air. And of course, you can combine both techniques.
Underwater
Underwater photography can have quite an impact, simply because it is not common. Most photographers don't have a waterproof camera or waterproof housing for their camera. And even if you do, working underwater presents a lot of extra challenges.
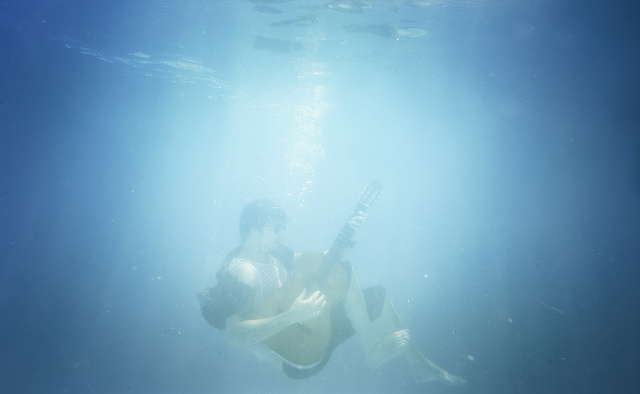
Untitled by Luis Hernandez on Flickr (licensed CC-BY)
It can sometimes be possible to create a composite photo that appears to have been taken underwater, but actually was not. But achieving this with a realistic look can be even more tricky than actually shooting underwater, due to the way things like fabrics appear in water.
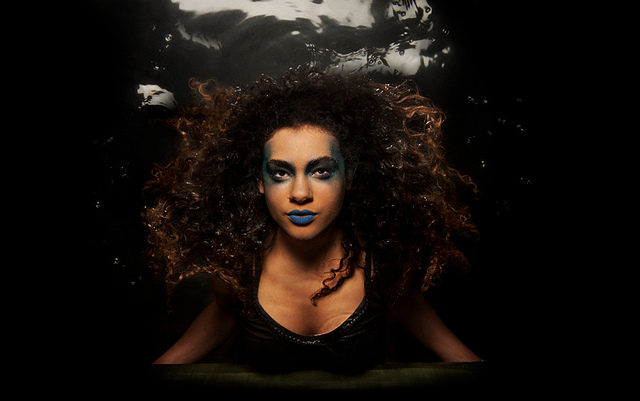
Waterdiva - 5 - 2012 by Nisha Gautam on Flickr (licensed CC-BY-ND)
You'll likely want to shoot close to the water surface, as light levels drop off rapidly as you get deeper. You may also want to consider attempting a photo that shows both above and below the water. This can be extremely tricky to achieve though, and you may want to photograph each separately and then attempt a composite later.
Anti-gravity
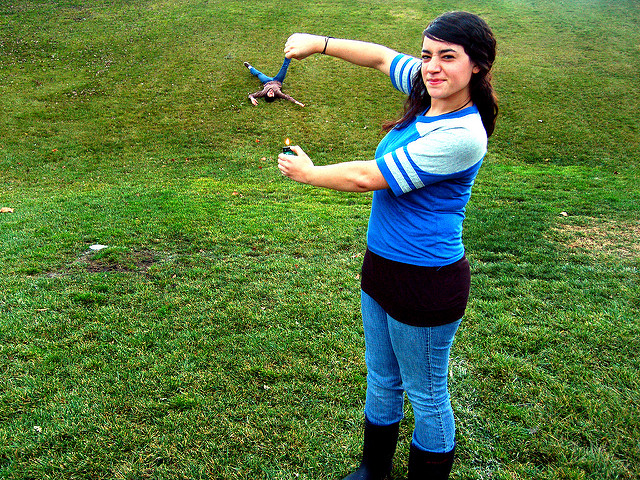
The levitation photo is a popular trick photo, which some may consider over-done. But that doesn't mean all forms of 'anti-gravity' photos are tired and cliché.
To have something floating is fairly simple - all you need is a fast effective shutter speed. This freezes the object in mid-air. With careful composition (or direction of a subject), then the item can appear to be floating rather than falling.
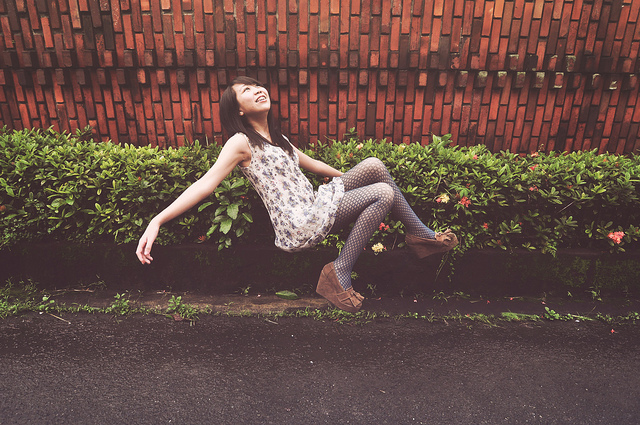
Photog3_conceptual by noreenreyes on Flickr (licensed CC-BY)
To achieve a fast effective shutter speed you can obviously use a fast real shutter speed. Most cameras go to 1/4000s, and some even faster, which is more than good enough unless you're trying to freeze something really fast.
The other option is to shoot somewhere that is quite dark and use flash to freeze the image. Flash has a very quick duration, and if it is the main light source in your image, then the flash duration becomes your effective shutter speed.
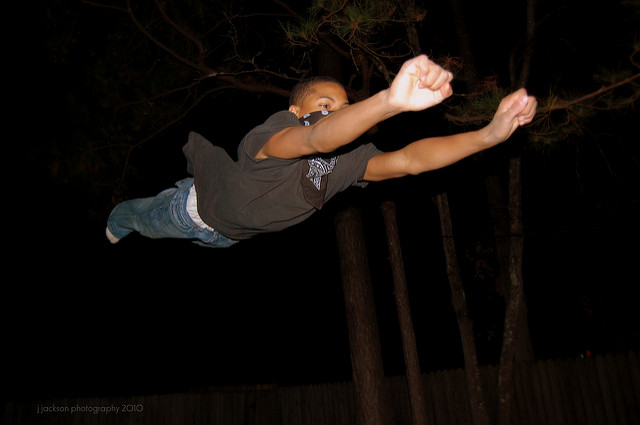
anti gravity6 by Jerald Jackson on Flickr (licensed CC-BY)
And of course, you can always take the editing option, and composite floating items into an image later.

Unearth (10/365) by Drew Selby on Flickr (licensed CC-BY)
Distortion
Normally distortion is something photographers look to avoid. Most image editing software includes controls to correct distortion. And distortion is always one of the factors looked at on lens tests. But distortion, much more than you would get in any normal lens, can be used for creative photography.
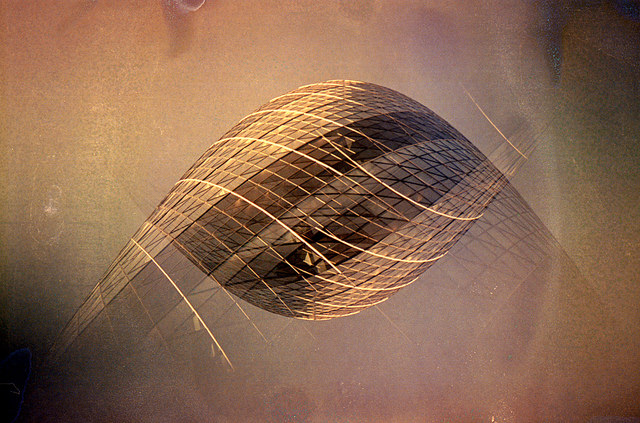
By photographing a subject through curved glass, water, or plastic, the subject will become distorted. Some parts may be shrunken, while others stretched and enlarged. You can use a glass jar, a glass filled with water, a bent plastic mirror, or anything that will give a distorted view.
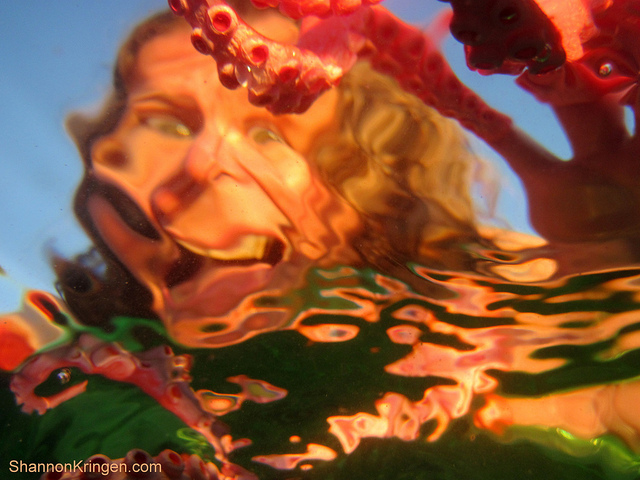
smooshie by Shannon Kringen on Flickr (licensed CC-BY-SA)
For extra effect, try composing your image to include some undistorted elements as well as the distorted view.
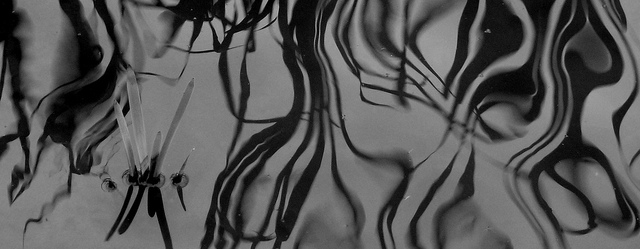
Water abstract by Andrew Hill on Flickr (licensed CC-BY-ND)
Reflection
Reflection can be used to superimpose one image on top of another when photographing a partially reflective and partially translucent material, such as a window.
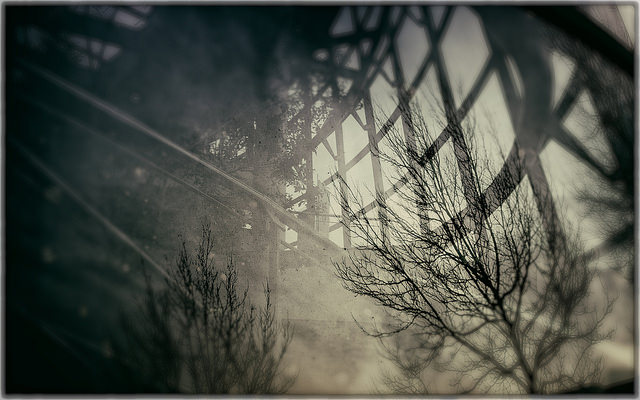
himmelwaertz by glasseyes view on Flickr (licensed CC-BY-SA)
Alternatively, it can be used as more of a framing device, with the subject in the reflection, surrounded by an unreflective surface. For example, a person reflected in a puddle in the street.
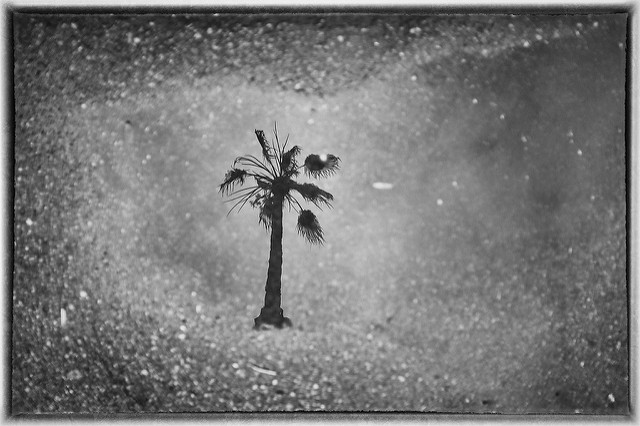
The Eusive San Diego Rain Puddle Reflection... by Patrick Merritt on Flickr (licensed CC-BY)
It can also be used for a 'simple' mirror image, where you photograph both the subject (or part of it) plus the mirrored reflection all in a single frame.
The trick with reflections is getting your camera at the right angle so that the reflection appears where you want, while also keeping the composition of the surrounding area (or view through to the other side) where you want it.
Color change
Changing the color of an image can give a very different feel. You can use a cool blue color to trick the viewer into thinking the photo was taken somewhere very cold. Or use a warm orange color for the opposite effect.

Foggy morning in Sienna by Oleg Sidorenko on Flickr (licensed CC-BY)
The simplest method of changing the color of a photo is through your camera's white balance setting. Using a much lower color temperature e.g. Tungsten white balance setting when shooting in daylight will give a strong blue cast. While using a higher color temperature, such as the 'Shade' white balance setting, will give an orange color cast.
Another option is to use colored lighting. When using artificial light, you can easily place a colored gel in front of your light(s) to get any color light you like. You may actually want to combine colored light and white balance for a stronger effect.
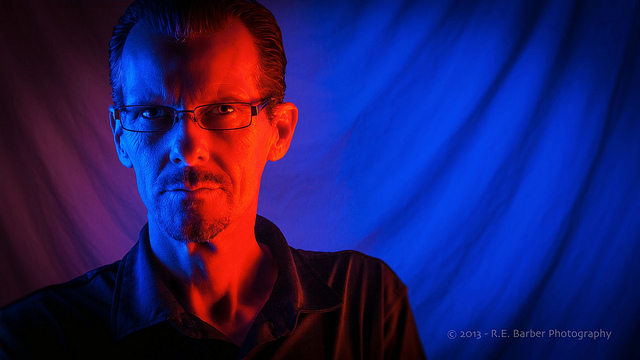
Gelling Out by R.E. Barber Photography on Flickr (licensed CC-BY-ND)
Lastly, you can always edit colors after-the-fact using image editing software. This gives you the greatest flexibility. You can change colors separately in different parts of the image, or overall for the whole image. You can alter the colors of highlights, midtones, and shadows separately. You can even swap colors around completely.
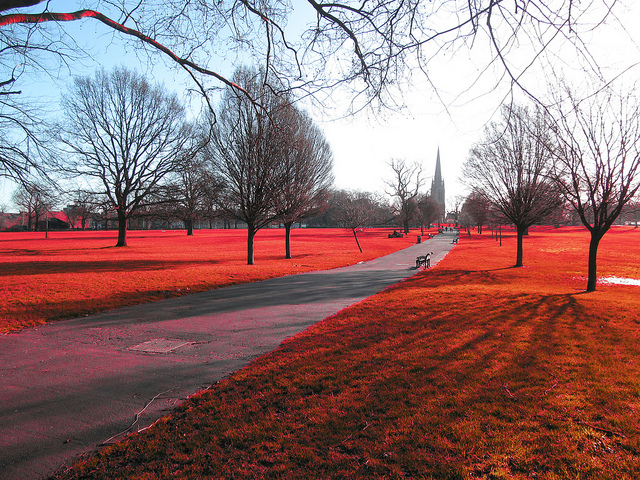
Clissold Park Hackney London 006 by DAVID HOLT on Flickr (licensed CC-BY)
There are lots of other photography 'tricks' you can experiment with, such as various slow shutter speed blur techniques, clones, light stencils, droste effect, advanced compositing, etc. But I think the ten tricks mentioned above are probably the most effective. Do you have a favorite photography trick? Why not share it below?


