Complete Guide to Neutral Density filters – Part 4 Problems & Solutions
While neutral density filters can help you capture photos or video that wouldn't otherwise be possible, they do bring with them their own set of issues you need to watch out for. This is particularly true for the stronger neutral density filters.
In this article we'll go through a variety of issues you should look out for when using your ND filter, and when deciding what ND filter to purchase. We'll also look at how to best prevent or at least minimize any problems using an ND filter can give.
Preventing light leaks
The stronger the ND filter you use, the more likely it is that you'll come across the problem of light leaks. This is where light enters the camera from some point other than the front of the lens. Normally it results in an image that looks washed out and low contrast.
With low strength ND filters any light leak is not likely to be noticeable. The amount of light coming in the front of the lens is so much higher than the amount of light leaking in from other areas that any light leaks have virtually no effect on the image.
But with a strong ND filter, the amount of light coming in through the lens is greatly reduced, while light from any leaks remains the same strength. This makes it much easier for light leaks to have an effect on the image.
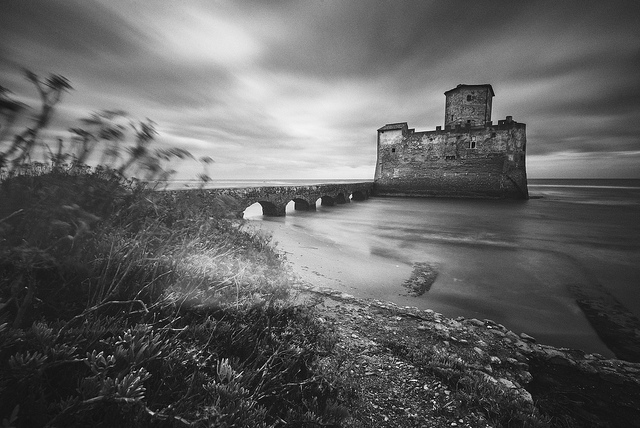
Lowa by Daniel Zedda on Flickr (licensed CC-BY) - The brighter area over the foliage on the left is caused by a light leak through the camera's viewfinder.
If you're using an SLR camera, then you should cover up the viewfinder to prevent light entering the camera through it. When you're using an ND filter for handheld work, then holding the camera up to your eye does the job. If you're using the camera on a tripod though, you may want to use a viewfinder cap, or just a piece of tape, to cover up the viewfinder during the exposure.
Adapted lenses can also cause light leaks, as light may enter between the lens and the adapter, or the adapter and the camera mount.
Some cameras also have light leaks, though generally if a camera has this problem it is discovered soon after release. And the manufacturer will then ensure that all subsequent production has the issue corrected, and offer to fix all affected cameras free of charge.
Old film cameras often have problems with light leaks, as the foam seal around the film door breaks down over time.
If you do have a light leak, you can temporarily get rid of it by covering up (e.g. with gaffer's tape) the leaky area so no light can get through. Determining where the leak is coming from can be quite tricky though - it's just a matter of trial and error, covering up different parts until the problem disappears.
Preventing flare
As well as light leaking from behind the lens, light can leak from in front of the lens and cause problems too. If you're using a slot type ND filter, light can hit the rear of the filter and then bounce off into the lens.
Just like a light leak, a strong ND filter greatly reduces the 'image' light. But it has no effect on any light bouncing off the rear of it. And so the light reflecting from the filter can have quite a strong effect.
One solution is to try and shade the filter, to prevent light hitting the back. A more permanent solution is using a filter with a foam gasket round the edge, which forms a light tight seal when inserted into the filter holder.
With a screw thread filter you don't have such a problem as the filter screws on to the lens, creating a light tight seal anyway. If you have a very loose fitting screw thread filter it may be possible that it could cause a light leak though.
Both slot and screw thread ND filters can also introduce flare the same way any other filter can. Purchasing good quality filters helps reduce the likelihood of flare caused by the filter. Try to look at reviews of any ND filter you are interested in, and check how liable to flaring the filter is.
In general a multicoated ND filter will be much better than a single coated or uncoated filter. But the quality of coatings does vary between manufacturers - just because two filters from different manufacturers are both multicoated does not mean they both have the same resistance to flare.
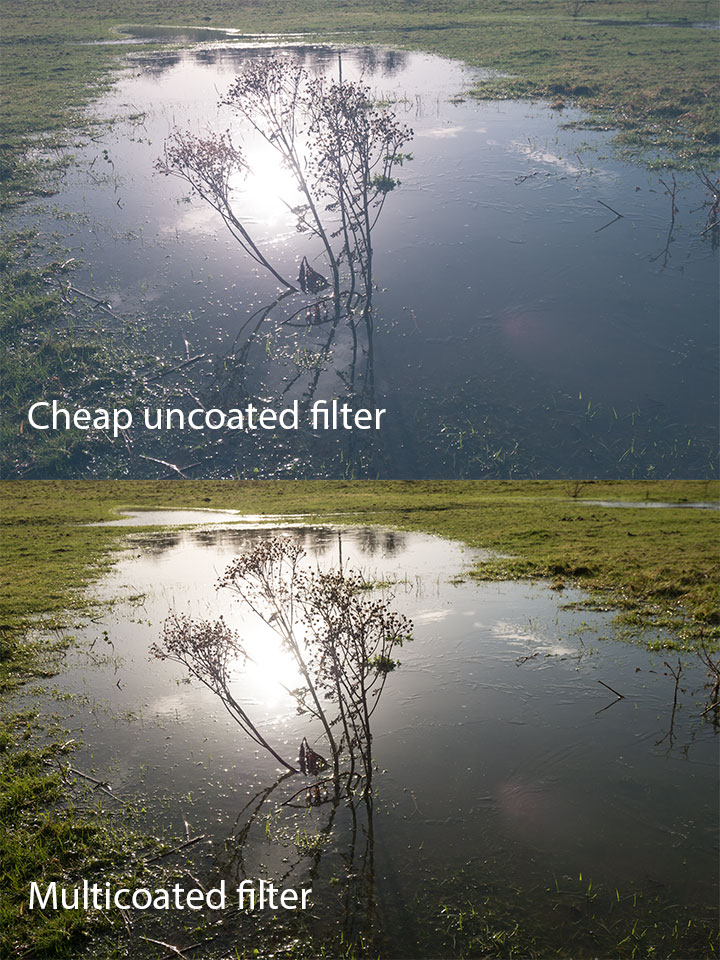
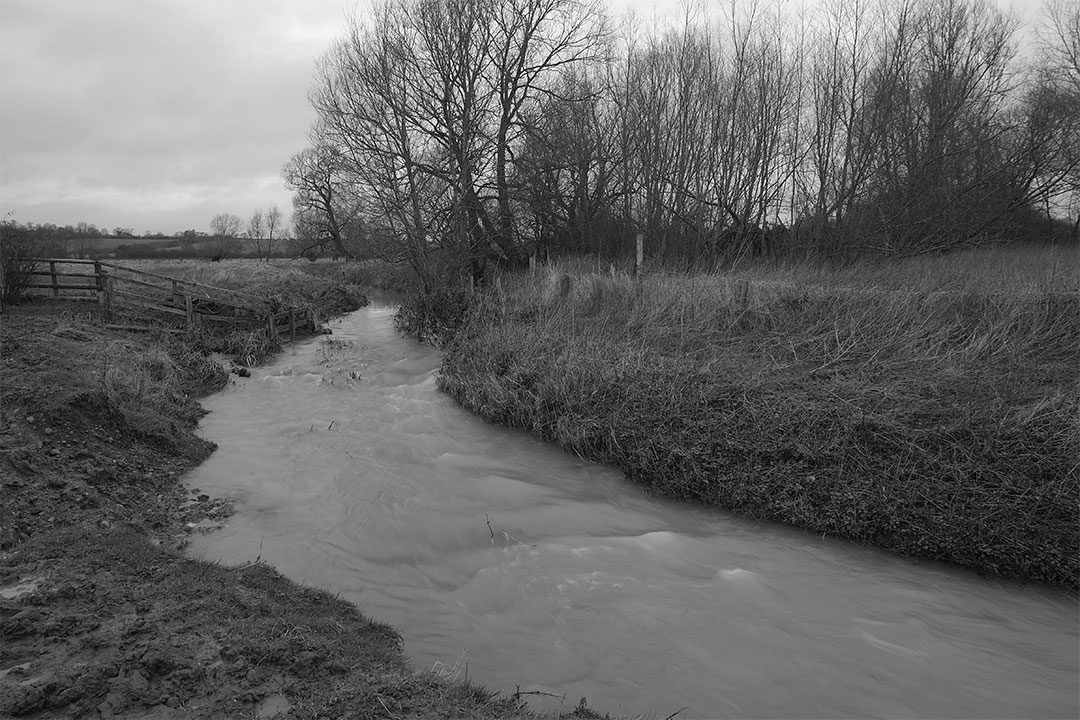
The cheap uncoated filter in this example produces a lot of contrast reducing veiling flare. You might notice there is also a purplish spot of lens flare in both images - this is due to having a light source in the frame (the sun's reflection) and would require using a two image technique to remove.
Shading the filter is also an important way of preventing flare from light hitting the front of the filter. If the sun (or any bright light source) is within your frame, then shading the lens won't help much. But if the sun is out of frame, and hitting the filter from an angle, then shading the filter can be a great help.
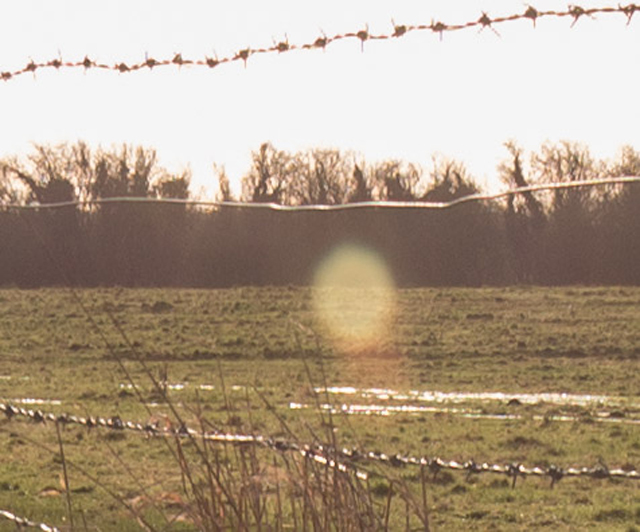
Here's a crop of an image taken with a couple of slot type ND filters, showing a small amount of flare.
For the photo this crop was taken from, I held my hand above and slightly in front of the filters & lens to shade them from the sun. This prevented the flare.
Some photographers simply use their hand or a hat held above the front of the lens to shade it from the sun. A better and easier (though more expensive) solution is to use a lens hood. If you're using a screw thread filter, and the filter is the same size as your lens' filter thread, then you can probably use your lens' normal hood.
But in the case where you're using a filter holder or stepping rings with a larger filter size, then your lens' normal hood is unlikely to fit. Instead, you have to purchase a hood that fits your filter holder or screws onto the front of your filter.
Infrared leakage
Some ND filters don't block infrared light very well. This can result in images with strong color casts, changes in tone (foliage becomes brighter), and image softness.
Just like light leaks, infrared leakage becomes more of a problem the stronger the ND filter you use. Let's say your camera normally records 1% of infrared light, and 100% of visible light. That's a 100:1 ratio of visible light to IR, so the effect of IR on an image is likely to be unnoticeable.
Now let's say you add a 10 stop ND filter, but this filter only cuts 4 stops of IR light. We're now recording 0.000625% of infrared light and 0.0009765625% of visible light. That's around a 3:2 ratio of visible light to IR - the effect of IR on the image will be very noticeable.
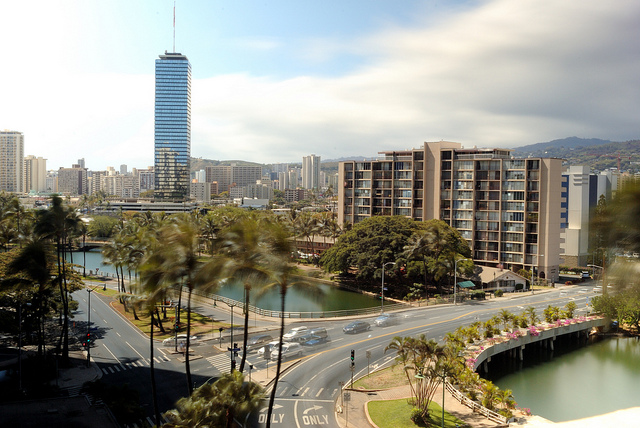
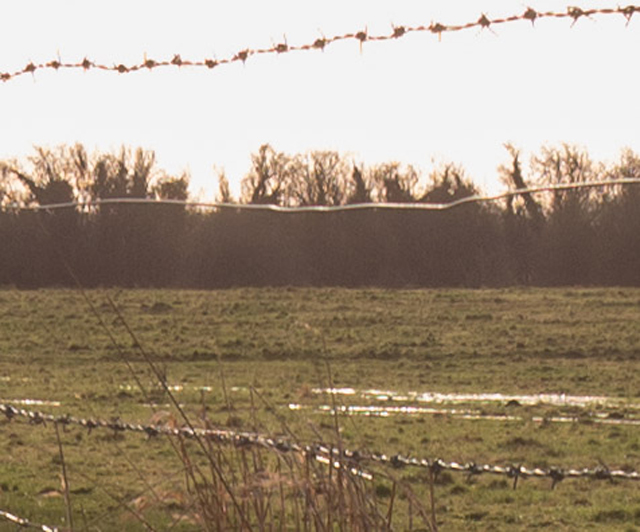
Filter Test - 1 minute Exposure by Daniel Ramirez on Flickr (licensed CC-BY) - No noticeable IR contamination.
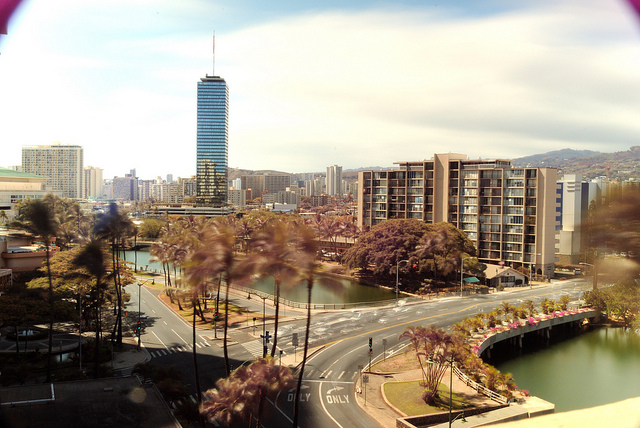
Filter Test - 4 Minute Exposure by Daniel Ramirez on Flickr (licensed CC-BY) - Some IR contamination visible, with foliage turning a brown color.
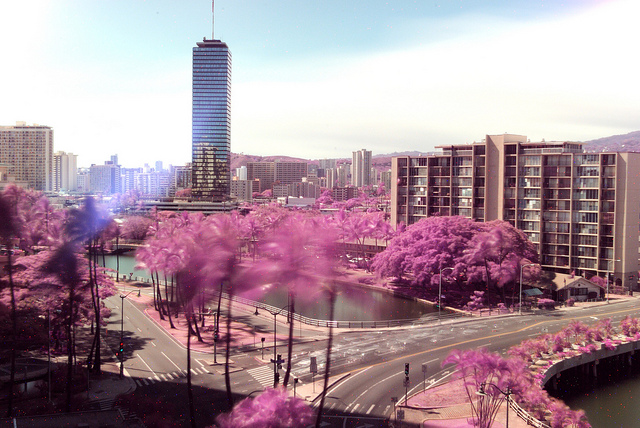
Filter Test - 11 Minute Exposure by Daniel Ramirez on Flickr (licensed CC-BY) - Heavy IR contamination visible with foliage turning bright purple.
Some plastic ND filters don't block infrared light at all, and so your image can be affected by IR leakage even with a relatively weak ND filter. With glass ND filters, you usually need quite a strong ND filter (such as 10 stops and stronger) to see much of an effect.
Different filters can vary in how much IR they leak, so it is worthwhile to try and find some reviews to check for this issue before purchasing. There are quite a few ND filter models that are specially designed to cut IR. These models sell at a premium to standard 'IR leaky' models - you will need to decide for yourself whether they are worth the extra cost or not.

The Tiffen Apex series are examples of ND filters specifically designed to block IR light
Alternatively, you can purchase a separate IR cut / hot mirror filter to greatly reduce the amount of infrared that gets through to the image sensor. These filters are pretty expensive, and it means adding another filter in front of your lens, which could cause vignetting and flare issues. These filters can have issues of their own as well - some don't work well on wide angle lenses, others have color casts.
Incorrectly rated ND filters
A problem you're most likely to come across with cheaper ND filters is that their rated density doesn't match up to what they give you in real life. They may actually be stronger or weaker, which can cause problems if you're trying to calculate the correct exposure settings based on the filter's strength.
Reading reviews of any filter you're interested in can help you find out the true rating of a particular model before purchasing. If you have a filter you've already purchased, you can just run a test. In a place with controlled lighting (generally indoors but outdoors on a cloudless day will work too) take your base exposure without the ND filter. Add the filter and adjust the exposure by the number of stops the filter is rated as reducing exposure by.
If you shoot in RAW format, you can open both these images in your RAW editor, and adjust the exposure setting on one image until it matches the other image. Make a note of how much exposure adjustment is needed, then add / subtract this from the rated number of stops to get the real number of stops the filter reduces exposure by.
For example, if I had a 3 stop ND filter, I would take a base image with no filter, then reduce the shutter speed by 3 stops and take another photo with the ND filter. If when comparing the RAW images, the base image needed -0.3EV of exposure compensation to match the image taken with the filter, then that would tell me that the filter was actually a 3.3 stop filter.
In practice a small difference, such as one third of a stop, doesn't matter that much. The resulting image if 1/3 stop underexposed will still look around the correct exposure. Some filters may have a larger difference, such as 1 stop, which does need to be accounted for.
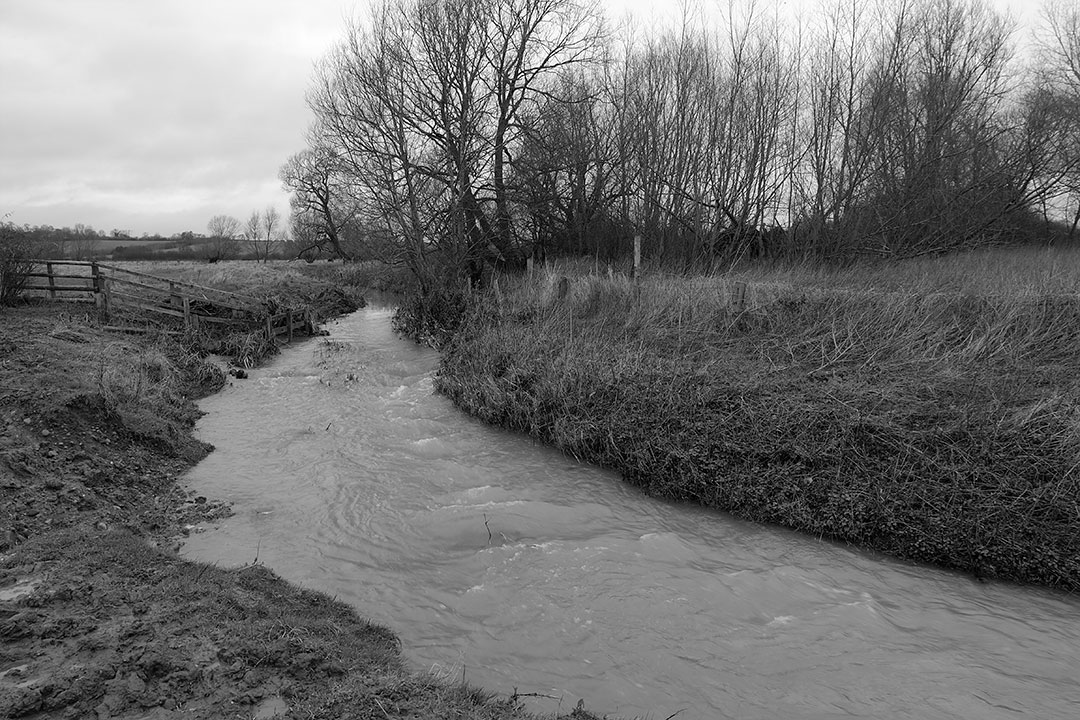
Base exposure with no filter
Cheap 3 stop ND filter and exposure adjusted by 3 stops in camera. The resulting image is about 1/3 stop underexposed compared to the base image, though it is difficult to be exact as the contrast is also reduced with this low quality filter. So the filter is more like a 3 1/3 stop filter than the 3 stop filter it is rated at.
Most ND filters are near what they are rated at. If you have a filter that is off, you just need to remember the actual rating when setting the exposure.
Color casts
You'd expect that a neutral density filter would be neutral in terms of color, but unfortunately that is not always the case. The stronger the ND filter, the more likely you are to get a color cast affecting the image, but some cheap low strength ND filters have visible color casts as well.
The color cast may be purple, red, or blue. Even expensive brand name filters have color casts in their stronger ND filters. Normally the color cast can be fixed by setting the white balance.
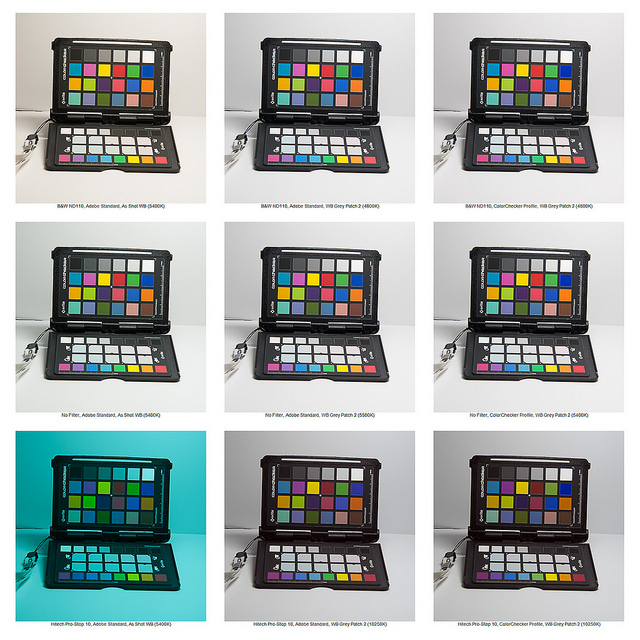
The 10 Stop ND Filter Colour Cast Conundrum by Andrew Stawarz on Flickr (licensed CC-BY-ND) - Left column shows color casts of two ND filters (and no filter for comparison). Middle and right column shows the same images after setting white balance.
But in some cases, with low quality filters, the color cast may be so strong that it can't be corrected. In this case the filter is not completely useless - you can still use it for black and white images.
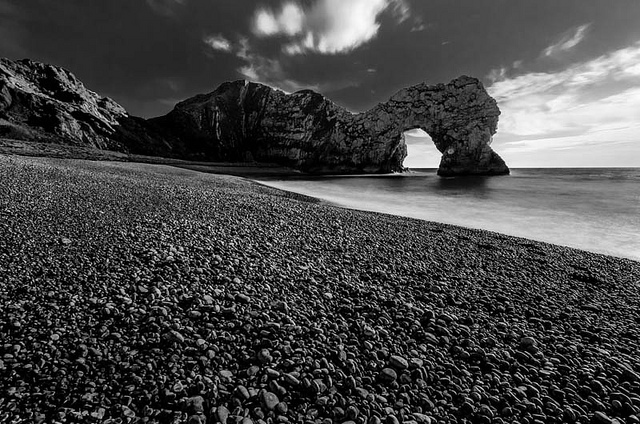
Weymouth with Welding Glass 4 - BW by Bushtography on Flickr (licensed CC-BY) - Welding glass was used as a cheap ND filter for this image. The strong color cast of the welding glass is not a problem for B&W images like this.
Again, make sure you read reviews of any ND filter you are considering. Check to see what people say about the color cast, and how easy it is to correct.
Vignetting
Neutral Density filters often increase vignetting (darkening in the corners of the frame) compared to the bare lens. With most filters the vignetting is not too bad, and can easily be corrected in most image editing software.

Driftwood + Surfer at Playa Jacó by Kyle Kress on Flickr (licensed CC-BY-SA) - The photo has fairly strong vignetting due to the use of a stacked ND filter and polarizer for a longer exposure time.
Some cheaper ND filters may introduce quite a bit of vignetting though. The more you have to brighten the corners of the image to remove vignetting, the more image noise will show up in those areas that have been brightened. So make sure you check reviews of ND filters to ensure the amount of vignetting is not problematic.
And that concludes this series of articles on ND filters. I hope you now better understand how to use them, why you'd want to use them, and what to look out for when purchasing them. Just be sure to read reviews of any ND filter you are considering, as quality between different models (even from the same manufacturer) varies quite a bit.


Hi! I read the whole article because I’m trying to solve an ND filter mystery with my camera. I’m using a Sony A99II and I want to do some portraits with flash in broad daylight. For that I bought some NDs K&FConcept brand because they look like we’re of an aceptable quality and affordable. I have some slotted P-Sized and 1 ND2-400 variable. They all work great on my 16-35mm 2.8 & 24-70mm 2.8. But anything after or grater than 70mm renders it unusable. I’m trying it in a 85mm 1.4 and in an 70-200 2.8 G2. The results are blurry, unsharped, with sort of a mix of out of focus and some sort of motion blur even on tripod and or speed above 1/200th. This even happens at low or weak ND settings. I can’t find a thread talking about this problem. I even seen videos of people using these filters for lenses like mine without any problems. Is there a way you could share some light about the issue? Thanks in advance!