Introduction to Extreme Macro Photography
Extreme macro photographs show super close-up views of items, revealing details that cannot be seen by the naked eye, and opening up a new world of subjects.
Standard macro lenses 'only' go to 1:1 or 1:2 magnification. Extreme macro refers to images taken at magnifications greater than 1:1. To get these images requires more than just a standard macro lens, but the equipment doesn't necessarily have to be expensive.
In this article I'll look at some of the options available if you want to be able to capture extreme macro photos. And I'll also cover how to deal with some of the issues that come up when shooting at such high magnifications.
Using bellows or extension tubes
Bellows and extension tubes allow you to move the lens further away from the camera body. This results in a smaller portion of the image projected by the lens falling on the image sensor. And so a higher magnification image is captured.
Think of it in the same way as a projector - move the projector further away from the wall, and the image projected on the wall gets larger. Move the lens away from the image sensor and the image projected on the sensor gets larger in the same way.
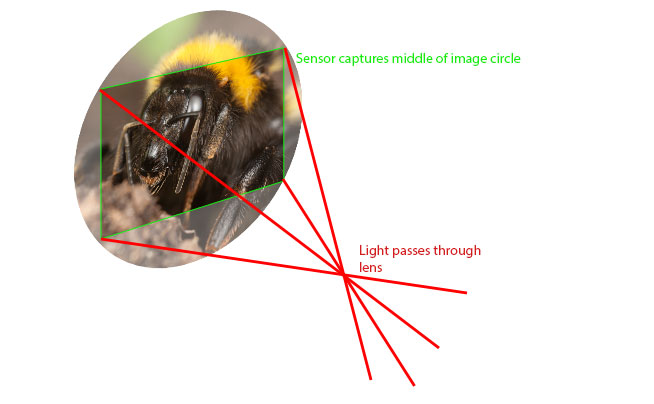
A standard lens without any extra extension will project an image circle slightly larger than the sensor
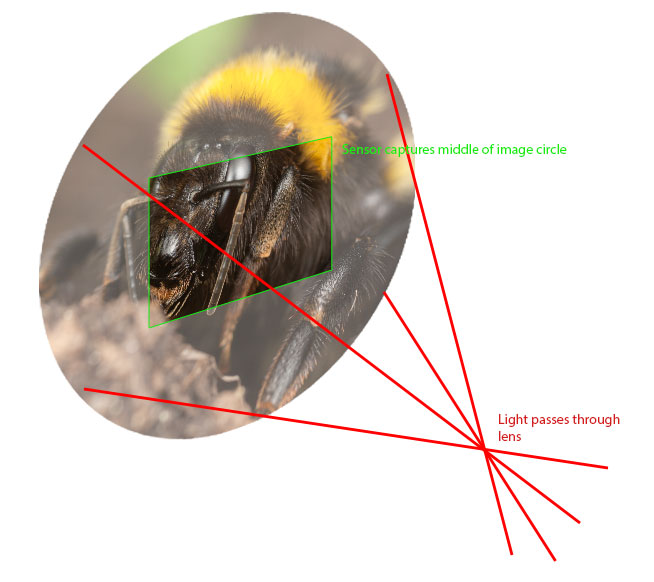
By adding extension the image circle projected at the sensor will be much larger, and so a magnified image will be captured. Note that the camera may need moving closer to or further from the subject after adding the extension to keep focus at the same point on the subject.
The effect of extension depends on the focal length of the lens you are using. The shorter the focal length, the greater the effect. A 24mm lens focused at infinity only needs 24mm of extension to provide a magnification of 1:1. Whereas a 100mm lens focused at infinity would need 100mm of extension to provide the same level of magnification.
If using extension tubes with a standard lens mounted normally, I would suggest using a short focal length macro lens (e.g. 50mm - 60mm). Some macro lenses shorten their focal length as they are focused closely. So a 60mm macro lens when at its minimum focusing distance may actually only have a 45mm focal length. Add 45mm of extension, and the lens will now give a 2:1 magnification ratio. Wide angle lenses can sometimes work well, but the working distance is often too small.
macro by Andrew Cheal on Flickr (licensed CC-BY-ND) - extension tubes and 28-80mm lens
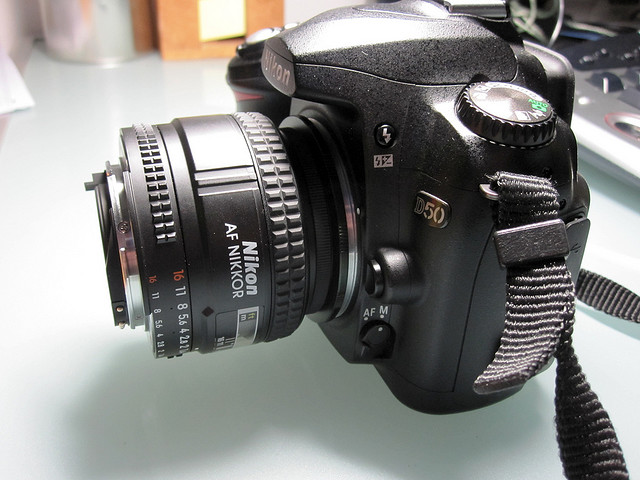
If you are working with an automatic lens (one where the aperture can only be changed while the lens is connected to a camera), then look for extension tubes with contacts that retain communication between the lens and the camera. This ensures that you can frame your image with the lens wide open, then the camera can stop the aperture down when you take the shot.
If you are working with a manual lens, then you can use either extension tubes or bellows. Bellows allow you to easily change the extension distance as you shoot by extending or contracting the bellows. Whereas with tubes you have to add and remove them when you want to change the magnification. Tubes also restrict you to a fixed range of extension lengths.
One potential problem with bellows is that the minimum amount of extension they provide (that is, when the bellows are fully closed), can be quite high. For example, if the bellows when fully closed provide extension of 50mm, that means if you were using a 24mm lens with them then you'd be restricted to magnifications of 2:1 and higher.
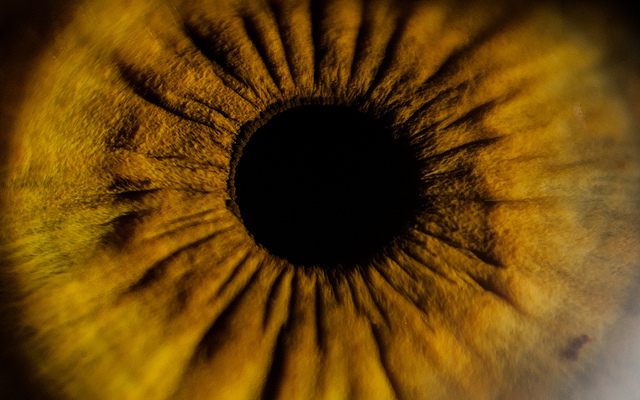
Human iris by ☰☵ Michele M. F. on Flickr (licensed CC-BY-SA) - captured using bellows
As I mentioned briefly earlier, a potential issue with using wide-angle lenses with extension tubes or bellows is that the focus distance between the lens and your subject can be extremely small. Add too much extension and the focus point can be inside the lens!
Using a reversing ring
A reversing ring allows you to mount a lens to your camera the wrong way round. You use the filter threads at the front of the lens to screw the lens onto the adapter.
Reverse ring monstrosity by Alex Lomas on Flickr (licensed CC-BY)
As with extension, the focal length of the lens determines what sort of magnification you can achieve. A reversed 50mm lens will give a 1:1 magnification ratio. While a 24mm lens when reversed will give a 2:1 magnification. The shorter the focal length, the greater the magnification.
Reversing a lens can be used in combination with extension tubes or bellows to give greater magnification still.
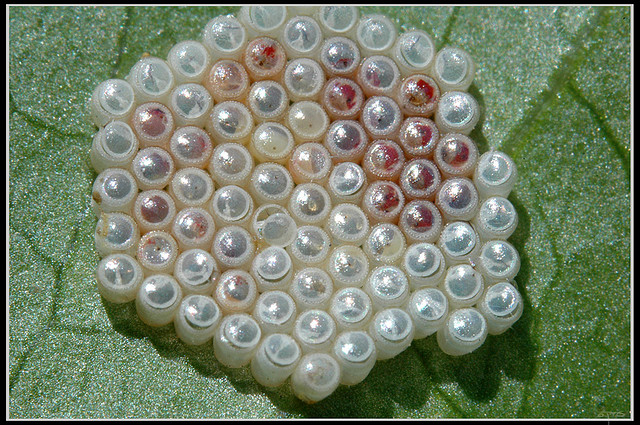
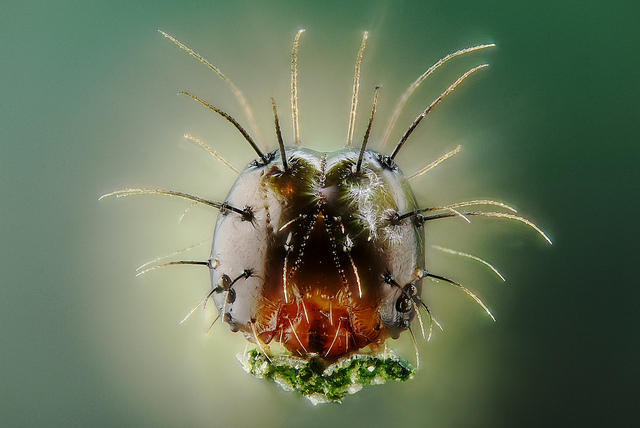
Nezara viridula, Egg raft - תריסית ירוקה, תטולת ביצים by Eran Finkle on Flickr (licensed CC-BY)
Using a reversing ring is only really suited to fully manual lenses. There is no communication between the camera and the lens, so the camera cannot tell the lens to stop the aperture down when it comes to taking the photo. You need to set the aperture manually on the lens itself.
Most modern lenses don't allow you to easily manually control the aperture. However, there are a plethora of old manual lenses that do allow you this control. And thankfully they can be picked up very cheaply second-hand.
Having said that, it's not impossible to use automatic lenses for reverse lens macro, just not as convenient as a fully manual lens. See here for more information: Macro & Close-up Photography using a Reversed Lens: Controlling the aperture.
Hola by Johannes Viloria on Flickr (licensed CC-BY) - taken with a reversed 18-55mm kit lens
Using a Specialist Macro Photo Lens
As far as I'm aware, there's only one macro lens designed for taking photos at magnifications greater than 1:1 without the use of any additional accessories. That lens is Canon's MP-E 65mm f/2.8 Macro-Photo lens.
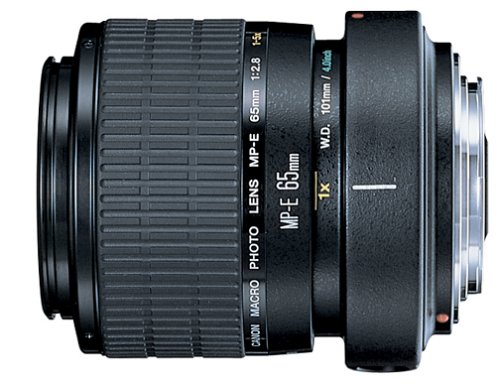
Basically the lens consists of a reversed 65mm lens with a variable length extension tube. This allows you to capture images with magnifications from 1:1 up to 5:1. It is quite expensive, and essentially you are paying for the convenience.
You can easily 'zoom' in rather than having to swap tubes in and out, and it's easier to use than bellows too. It offers automatic aperture control, meaning you can focus with the lens wide open at f/2.8 (giving a bright image in the viewfinder), and the camera will stop the lens down to your selected aperture (e.g. f/8) only when you press the shutter.

Scratch, Dinged: Everything's Shiny, Not to Fret by KellarW on Flickr (licensed CC-BY) - focus stacked image taken using the Canon MP-E lens
Using Enlarging Lenses
Enlarging lenses are designed for creating print enlargements of film negatives. They are quite small lenses, with no focusing mechanism. However, they can be adapted for taking photos with.
The majority of enlarging lenses use an M39 mount. This can be easily converted to an M42 mount using a cheap adapter ring. And M42 adapters can be found for almost every camera system.

Using an enlarging lens on a DSLR camera
The lenses can be used mounted straight to the camera, with extension tubes, bellows, or with a focusing helicoid (essentially a variable length extension tube). Just like standard lenses, the longer the focal length, the more extension between the lens and the camera you'll require to get into extreme macro territory.
Enlarging lenses can also be used reversed, and it is often actually recommended to use them reversed when working at magnifications above 1:1.

Broad-Nosed Weevil | Ericydeus lautus (LeConte, 1856) by Donald Jusa on Flickr (licensed CC-BY) - focus stacked image taken using a reversed 50mm enlarging lens and extension tubes
Thanks to the fact that very few people are shooting film and creating their own prints at home, enlarging lenses are available fairly cheaply second hand.
Using Microscope Optics
If you want to get really extreme with your macro photography, consider low magnification microscope optics. 5x or 10x is fairly low magnification for a microscope, but much greater magnification than you'll get with any lens designed for use with a camera. (Well, other than a couple of the Olympus OM Macro Photo lenses, but they aren't really 'normal' lenses).
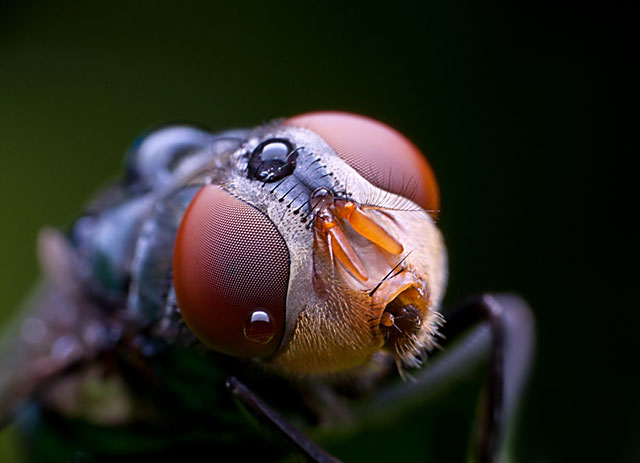
Young caterpillar portrait by Gilles San Martin on Flickr (licensed CC-BY-SA) - focus stacked image taken using a Nikon microscope objective
You'll find there are 2 types of microscope objectives - infinity and finite. Infinity objectives require mounting in front of a lens (e.g. in front of a standard 100mm or 200mm lens). Finite objectives require mounting on bellows or extension tubes. In either case you'll need a specialist adapter to allow mounting the lens.
At this level of magnification you're best dealing with static subjects and the camera mounted on a secure platform with a focusing rail that offers very fine adjustments. Focus stacking can then be used to make up for the extremely limited depth of field you get at such high magnifications.
Which option is best?
If you're just looking to try out extreme macro photography without spending too much, I'd suggest trying a 50mm enlarging lens or an old manual 24mm lens. Then add some cheap extension tubes and a reverse adapter. This will allow you to capture images at a range of magnifications by using the lens with varying amounts of extension, and by using it mounted normally or reversed.
If you already own a macro lens for your camera, then instead you might want to consider purchasing some auto extension tubes that retain communication between the lens and camera. This won't get as high magnification as using a reversed 24mm or 50mm enlarging lens with extension, but is easier to use.
With a manual lens you must either stop the lens down when it comes to taking the image, or frame your shots with the lens already stopped down. Using the lens already stopped down reduces the light the camera receives, making it more difficult to see through the viewfinder. Whereas with an automatic lens and auto extension tubes you can frame the image with the lens wide open, then the camera will automatically stop the lens down to the desired aperture when you press the shutter.
If money is no object, then a Canon camera with the MP-E 65mm lens and a macro twin flash will provide excellent extreme macro photos with the maximum convenience. That's not to say it is easy to use, just easier to use than the alternatives.
Focus distance and lighting
When working with extreme magnifications you'll find that there is very little working distance between the front of your lens and the subject. This is especially true if you're working with a wide angle lens.
This, in turn, makes lighting the subject very difficult. Light can sometimes be blocked from hitting the subject by the camera and lens, because you have to have them so close. And when combined with small apertures and light loss from extension, getting enough light to capture a good exposure without blur from camera shake can be very difficult.
Example of working distance with a reversed 50mm enlarging lens and extension tubes
Of course, if you're photographing a static subject with the camera on a tripod, this is not too problematic. You can just use a slow shutter speed and don't need to worry about shake from hand-holding the camera.
But for handheld work or moving subjects (such as insects, flowers blowing in the breeze), the very short working distance is more problematic. While it depends on your setup, with many setups an on-camera flash will not light the subject properly because the lens blocks the light from the flash (or the flash just fires above the subject). You'll likely need to make use of flash that is mounted / positioned near the front of the lens.
There are three options you have here:
- Macro Ring light
- Macro Twin light
- Small flash unit(s) on flexible arms
A Macro ring light or twin light attaches to the front of the lens. By having the light right on the end of the lens it makes it possible to light the subject despite the minimal working distance.
A Macro twin flash positions the flash heads very close to the subject
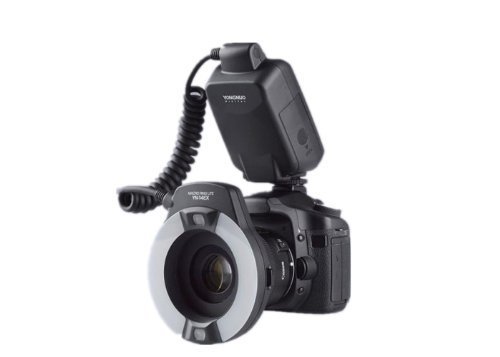
Yongnuo YN-14EX Ring Flash
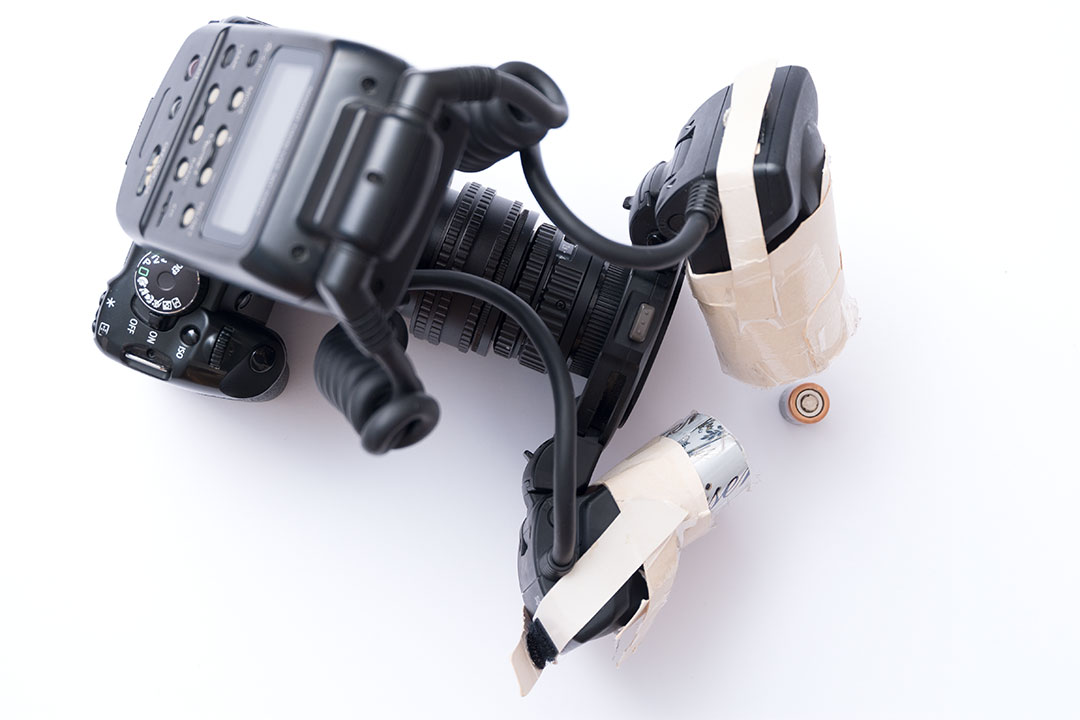
Using small flash(es) on a macro flash bracket arm(s) allows you to position the flash so that it is next to (or near to) the lens, close enough to light the subject. This setup gives you more power than a twin flash or ring flash and more flexibility. If using a twin arm setup, you could point one flash at the subject and have another pointed at the background.

Macro Flash Bracket by ohnedich on Flickr (licensed CC-BY)
However a macro flash bracket is also more cumbersome and heavy (with the flash units attached) than a twin flash or ring flash. If you extend the lens nearer or further from the camera, then you'll need to adjust your flash position. Whereas with a twin flash or ring flash mounted on the end of the lens, it's always in the correct position.
Another benefit of macro twin flash and ring flashes over using a flash on a bracket is that some models offer a focusing light, typically not found on standard flashes. This provides a continuous light source, which gives you a brighter view through the viewfinder, making it easier for you focus. When you press the shutter to take the photo, the focusing light switches off and the flash fires, so it doesn't affect the image at all.
I would always recommend using a flash rather than continuous lighting for handheld extreme macro. Flash has a very short duration (around 1/1000s and faster), which acts as your effective shutter speed, minimizing any motion blur. Whereas with a continuous light source, such as an LED ring light, you need a much slower shutter speed, meaning you are much more likely to get an image with blur from camera shake.
Dealing with ultra shallow DoF
Using aperture
Depth of field at extreme macro magnifications is very thin, making it difficult to get much of a subject in focus. Typically you will want to use an aperture setting of around f/8 - f/16 to maximize the depth of field.
However, you should note that diffraction softening can occur at small aperture settings. While using a very small aperture (such as f/16) maximizes the amount of the image in focus, small details in the image can become soft. You have to decide what's more important to you - pixel level sharpness or more of the image appearing in reasonably sharp focus.

European Garden Spider (Araneus diadematus) Aperture f/10 With Tubes by Kevin Cole on Flickr (licensed CC-BY)

European Garden Spider (Araneus diadematus) Aperture f/22 With Tubes by Kevin Cole on Flickr (licensed CC-BY)
Optimizing focal plane placement
Even at small aperture settings, depth of field will still be very thin. So it is important to place the plane of focus to get as much in focus as possible. Doing this can somewhat limit your compositions, but in the majority of situations it's a worthwhile trade-off.
The plane of focus is flat, and parallel to your camera's image sensor. Depth of field extends slightly in front and slightly behind the plane of focus. By carefully aligning the plane of focus with your subject you can optimize the focus so that it passes through as much of the subject (or at least the most important parts) as possible.
For example, lets say you're photographing a bee and want both its mandible and eye nearest you in focus. If you shoot down on the bee at a high angle, the plane of focus may go through the mandible, but then behind the eye.
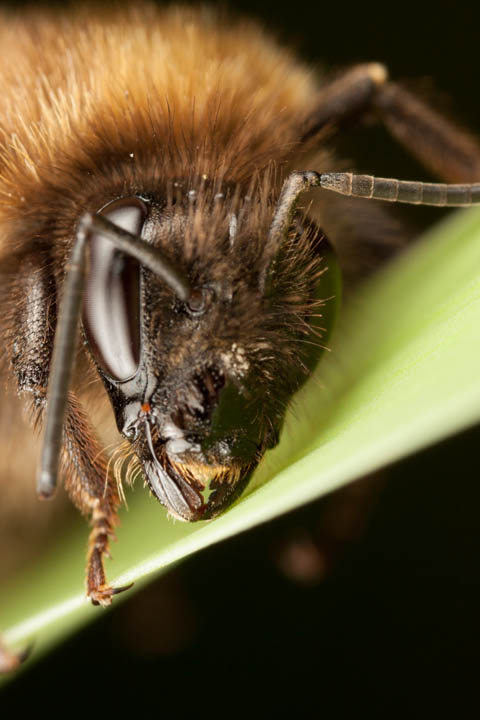
Bee portrait where focus plane is placed such that it goes through the mandible and below / behind the eye
Instead you can move the camera (or the bee) so you are shooting at an angle parallel to the eye and mandible. Now the focus plane can cut through the mandible and up through the eye, putting both in sharp focus at the same time.
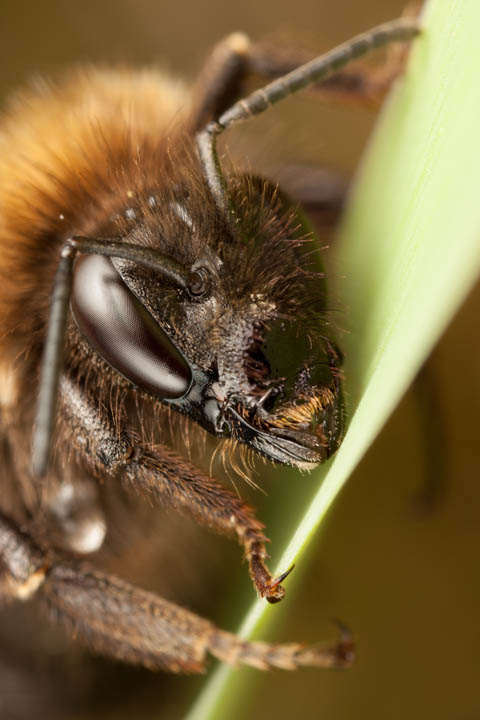
Bee portrait where focus plane is placed such that it goes through the mandible and through the eye, putting both in focus
Focus Stacking
Another option for maximizing depth of field is focus stacking. For this technique you take multiple shots of the subject, with the focus moved slightly further forward or further back for each shot. The images can then be combined to bring together the in-focus sections of each image, giving a single image with a much larger depth of field.
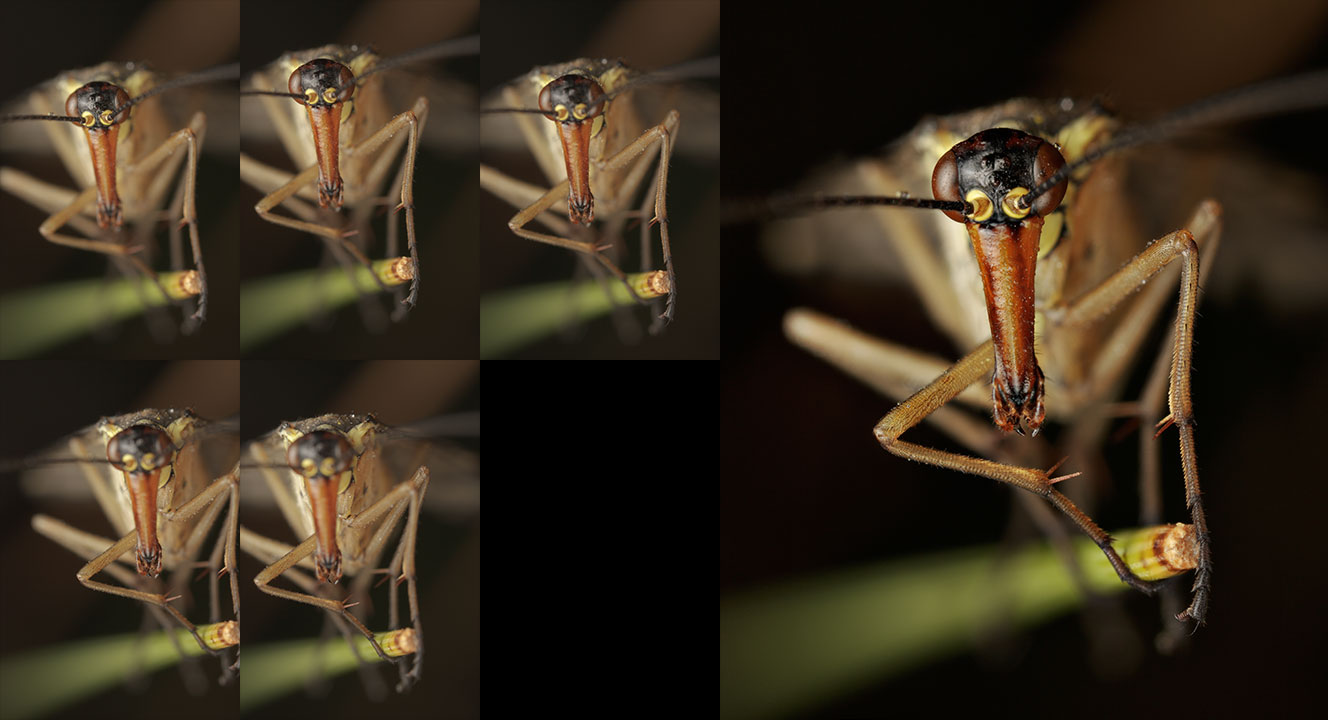
Example of a handheld manually blended focus stacked image made from 5 frames
Focus stacking works best with static subjects, and the camera / lens mounted on a sturdy tripod with focusing rail. Or even better, using bellows where the rear mount can be moved. You can then perform small and precise movements of the camera to shift the focus for each shot.
It can be used for handheld shots too, but you'll typically only be able to stack a few shots when shooting handheld.
Focus stacking software such as Combine ZP or Zerene Stacker can be used to blend the images together. Or you can do it manually using layer masks in software such as Photoshop or GIMP.
I hope this has given you a good introduction on getting started with extreme macro. It is definitely not easy to get good extreme macro shots. You will need patience and to take a lot of shots just to end up with one or two good ones. But stick with it and you can capture great images that reveal the hidden details not normally seen.
If you're interested in learning more about extreme macro photography, I highly recommend you visit Extreme Macro. That site has many detailed articles on extreme macro photography and goes into great detail on the various methods through which it can be achieved.


