Five things to pay attention to for better photos
Nowadays everyone is a photographer. I don't mean that in a condescending way, but rather as a matter of fact. The cost of shooting with a digital camera is much less than it was with film, and almost everyone has a camera built into their phone they can use.
A lot of people like to just point and shoot with their cameras. And there's nothing wrong with that. But with just a little bit of knowledge and effort they could be capturing much better images than they take at the moment.
In this article I'm going to look at five things people often don't pay attention to when taking a photo. But by paying attention to these things, you can easily end up with a much better photo than a simple point and shoot image that had no thought put into it.
Pay attention to the lighting
A mistake many people make, especially people taking photos while on vacation, is taking the majority of their photos around the middle of the day. During the day, especially in the summer, which is when most people go on vacation, the light from the sun is very harsh. It creates bright highlights and dark, hard edged shadows.
You can get good photos at this time of day, but for the types of photo most people like to take, they'd be much better off shooting at a different time, or just making a couple of small adjustments to how they are shooting.
For portrait photos, when the sun is high in the sky, the eye sockets become deep in shadow, giving your subject 'raccoon eyes'. The head also casts a strong shadow over the neck. This type of lighting is just not great for a nice portrait photo.
One solution is to simply move your subject into the shade. Ideally position your subject and yourself so that the background behind them is also in shade. Maybe add a little flash, or a silver reflector close to your subject, just enough to make your subject a bit brighter and pop out from the background a bit more.
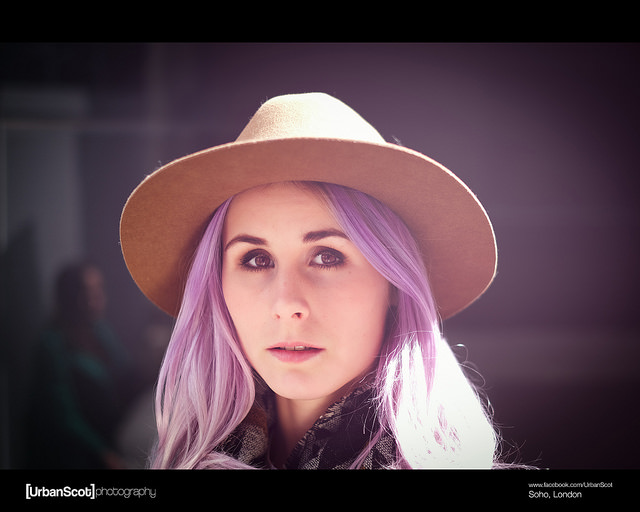
Street Portrait 025/100 Hela by Peter McConnochie on Flickr (licensed CC-BY-ND)
Another solution, so long as the sun is not directly overhead, is to simply have your subject face away from the sun, while still standing in the sunlight. The whole of their face will now be shadow, but by adding some flash or a reflector you can brighten it up nicely. The sun behind them acts as a nice backlight / hair light. And since your subject is looking away from the sun, they won't have squinty eyes.
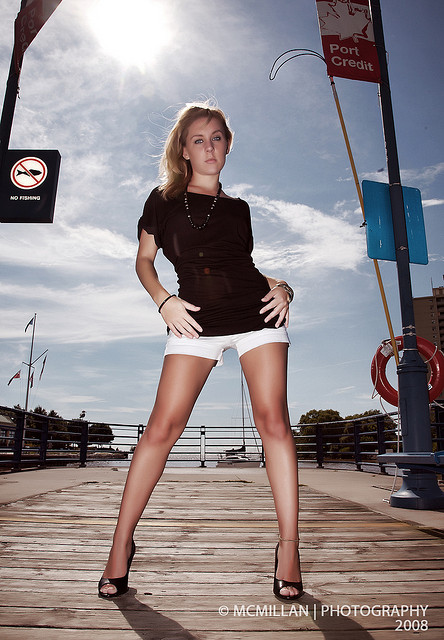
IMG_4673-2 by mmmou812ic on Flickr (licensed CC-BY)
When adding flash, bear in mind you need to keep your shutter speed below your camera's maximum flash sync speed - typically 1/250s. If the shutter speed is too high, (which it can be on bright sunny days), make sure you are shooting at the lowest ISO setting. Use a smaller aperture setting or add a neutral density filter in front of your lens to cut down some of the light.
For immovable subjects, such as architecture and landscape, try and shoot them during the golden hour, that is the hour around sunset or sunrise. The light is softer, the direction of light is often better for bringing out texture and revealing detail, and the warm color of the light are all much better at this time of day. (And golden hour is a great time for shooting portraits too).
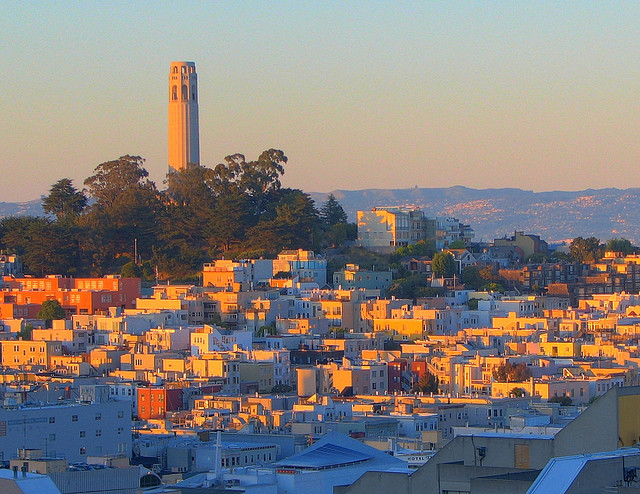
Telegraph Hill Golden Hour by runner310 on Flickr (licensed CC-BY)
For cities, shooting the blue hour, that is the hour after sunset or before sunrise is also very rewarding. Buildings and cars have their lights on, but the sky retains some color rather than just being plain black. You'll very likely want a tripod to deal with the slow shutter speeds you'll need due to the relatively low levels of light at this time of day.

Telegraph Hill Dusk by runner310 on Flickr (licensed CC-BY)
If you normally have dinner with your family around sunset, see if you can arrange to have an earlier or later dinner instead, so you can have the evening golden hour for photography. Try getting up early, and going out before everyone else to capture the morning golden hour. Even if you're on vacation and your movements are dictated by the rest of your family, try and see if you can arrange to have at least one sunrise or sunset period for your photography.
Pay attention to the background
When photographing a subject it is all too easy to center your concentration on the subject, and miss everything else that is happening in the frame. For a good photo you also need to pay attention to the environment around your subject, both the foreground and the background.
Is a portrait taken in the park with someone in the background throwing litter in a bin that great? Or a portrait where someone has a pole behind them, looking like it is emanating from their head? Even if the background is just a group of people out for a walk through the park you decided to shoot in, a cluttered background can distract your viewer's attention from this subject. Thankfully decluttering an image before you take it is usually pretty simple. (Decluttering can be done after taking an image, but it is nearly always much easier and faster to get it right when taking the shot).
The first thing to do, if your subject is a person, is simply to ask them to move. They might only need to move a couple of steps to move into a spot where they are in better lighting and / or you can frame them with a better background behind them.
Try and choose a relatively plain background, such as a wall, a bush, or leafy trees. Keep your subject as far away from the background as possible. Use a 50mm or longer focal length. Choose a large aperture, such as f/2.8. And get as close to your subject as possible. This will give you a nicely blurred background with a sharp subject that stands out.
Boss by Olgierd Rudak on Flickr (licensed CC-BY)
For static subjects, of course, you can't really do any of that. What you can do, however, is to carefully choose the position and angle you photograph the subject from so as to minimize any distractions.
Sometimes it isn't really possible to get a full view of a subject without something distracting being included in the frame. If this is the case (well, actually, this is a good thing to do generally anyway), try and capture some detail shots. Getting in closer helps you eliminate distracting elements, while still allowing you to capture details that show the subject without actually showing the whole of the subject.
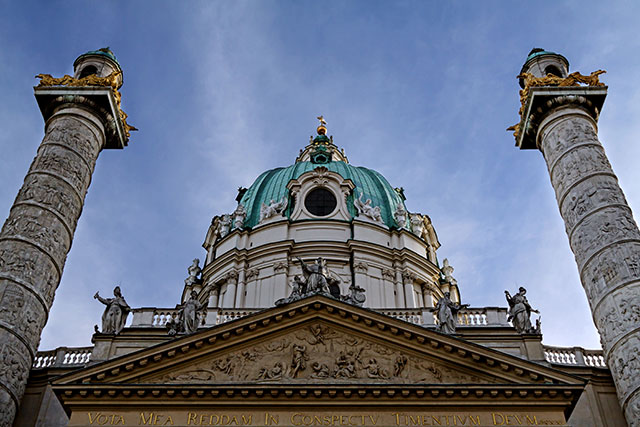
Karlskirche, Wien by Dominik Bartsch on Flickr (licensed CC-BY)
Pay attention to the focus
Particularly with DSLRs and MILCs, which can offer quite a shallow depth of field, it can be easy to end up with a shot where the focus isn't where it should be. This can be down to a number of factors:
- Not setting focus on the subject correctly
- The photographer or subject moved between the time they locked focus and the photo was taken
- Trying to focus on a subject that is closer than the lens' minimum focusing distance
- The camera or lens didn't focus properly
That above list is in order of what the most probable cause of the focus problem is. While cameras and lenses do sometimes miss focus, the problem is much more likely to be operator error.
If you're using in camera in auto area AF (which is the default mode for most cameras), you need to switch it out of that, and into single point or single area AF. In auto area AF mode your camera decides what to focus on. But how can your camera know what the most important part of the image is? It can't. You need to take control, and set the autofocus point over your subject yourself. That way you know the camera will focus on the part of the image that is important to you.
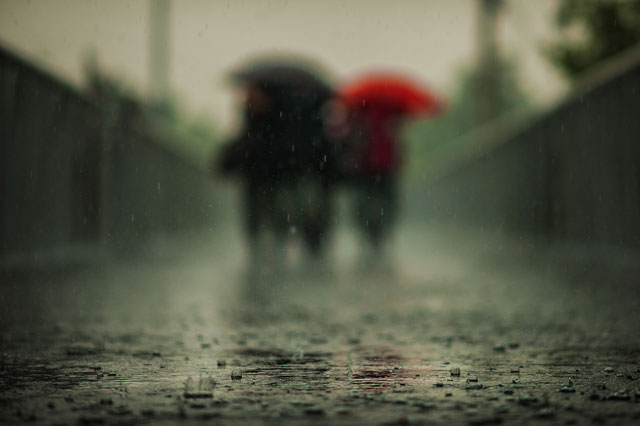
Red Umbrella by Jonathan Kos-Read on Flickr (licensed CC-BY-ND)
When shooting a moving subject, make sure you are using continuous focus mode rather than single shot. Track the subject with your camera, keeping the focus point over the subject, to ensure they stay in focus as you shoot. This eliminates any delay between the focus being set and the image being taken, as the camera is continuously adjusting the focus to ensure the subject stays in focus.
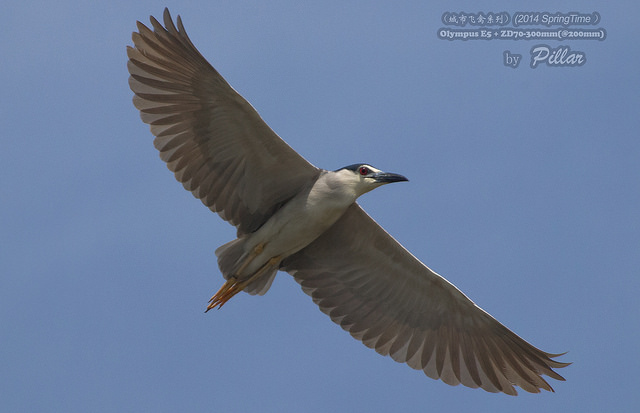
black crowned night heron by Pillar1984 on Flickr (licensed CC-BY-SA)
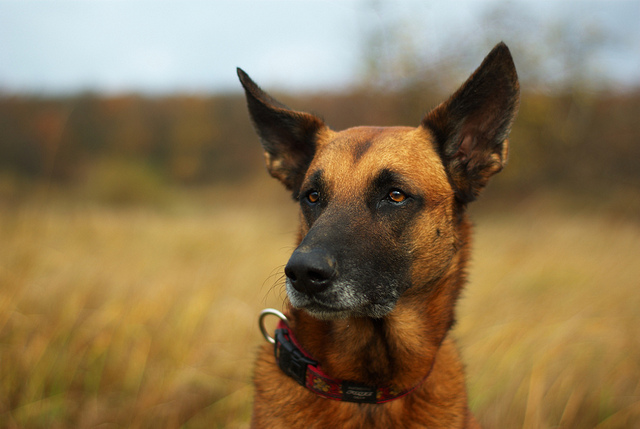
For portraits (whether human or animal) you want to set the focus on the nearest eye. We are always naturally drawn to the eyes first. If the eyes are out of focus, the whole image doesn't look right.

Kamryn by Donald Windley on Flickr (licensed CC-BY-SA)
For group portraits use a small aperture (e.g. f/8) and focus around the middle of the group. This should give enough depth of field to put everyone in reasonably sharp focus.

Group Shot by Jayel Aheram on Flickr (licensed CC-BY)
For a landscape you typically want to get as much of the scene in focus as possible. This means setting your focus point about one third of the way into the scene, and using a small aperture such as f/8. This maximizes your depth of field, giving an image that is sharp from the foreground to the distance.

Amalfi, Campania, Italy by Giuseppe Milo on Flickr (licensed CC-BY)
Pay attention to the shutter speed
Most people take their photos in full auto mode, and don't actually pay attention to any of the camera settings. And even those of us who do choose to take some control over our images often just shoot in aperture priority mode, leaving the camera to work out the shutter speed.
Now, there's nothing wrong in shooting in aperture priority mode. But you need to also pay attention to the shutter speed that the camera chooses. If the speed it chooses is too slow, you can end up with a blurry image.
On the vast majority of cameras, when you half press the shutter button, then the camera will show the shutter speed it has chosen in the viewfinder (or LCD). As a very general rule, to avoid blurry images when hand holding a camera, you want a shutter speed of at least one divided by twice the focal length of the lens you are using. For example, if you're using a 50mm lens, you want a shutter speed of at least 1/100s.
Simply check that the shutter speed chosen by the camera is fast enough before you press the shutter fully to take the photo. If not, then increase the ISO or use a wider aperture setting until the shutter speed is fast enough to capture a sharp photo. BUT remember that adjusting the aperture also affects the amount of the image in focus.
Bear in mind that if the subject is moving, then you may need even faster shutter speeds. If you want to freeze action when shooting Sports, you'll likely need a shutter speed of 1/500s - 1/1000s.
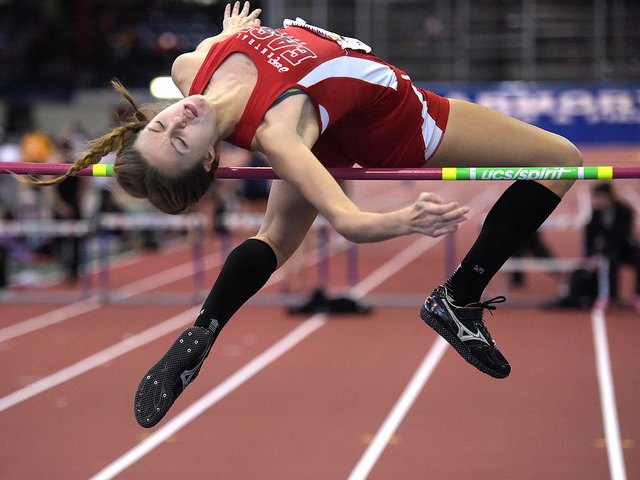
2014 Indoor Track - Bishop Loughlin Games by Steven Pisano on Flickr (licensed CC-BY)
Another way the shutter speed is often ignored, is in the creative possibilities a fast or slow shutter speed allows. We too often just think in terms of lighting, composition, and depth of field. But the length of the exposure can have a dramatic effect on the image.

Untitled by Winnie Liu on Flickr (licensed CC-BY)
A slow shutter speed offers plenty of deliberate blur options:
- Pan with the subject, keeping the subject sharp and background blurred.
- Blurred movement across a static scene e.g. moving water, clouds moving across the sky, people moving in a busy area.
- Blurring the whole image to create an abstract composition
- Combining blur and sharpness, such as panning with a subject for part of an exposure, then moving the camera randomly. Or capturing a long exposure of a scene, then zooming the lens just before the end of the exposure. Or combining a long exposure with flash to freeze movement.
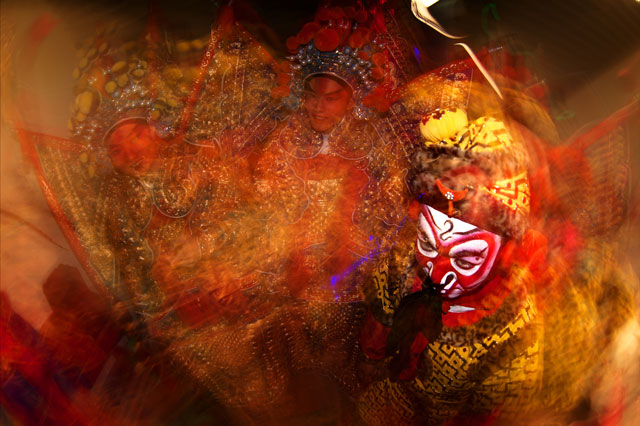
Monkey King by Jonathan Kos-Read on Flickr (licensed CC-BY-ND)
You don't need to use shutter priority mode or manual mode to get the camera to select a slow shutter speed either. Just use a low ISO and small aperture setting e.g. f/16. In bright light you might also need to add a strong neutral density filter in front of the lens.
Pay attention to the aperture setting
If you spend lots of money on an expensive camera, the leave it in full auto mode, you'll end up with the majority of your photos looking the same as if they were shot with a phone camera or a cheap compact. Images might look a bit better when viewed close-up, and images taken in low light will probably be a bit better. But in general you won't really gain a lot over using a basic camera.
You need to take control from the camera to create images that show what you want them to show. And one of the ways you can do this is through how much of the image is in sharp focus. By putting the important part(s) of the image in sharp focus, you emphasize those parts, while putting other parts of the image out of focus de-emphasizes those parts.
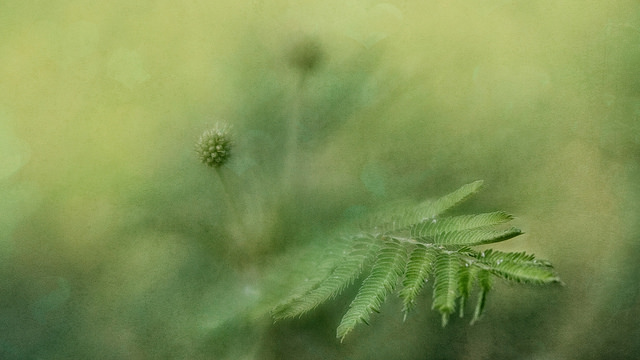
Bundleflower II (Explore June 28, 2015) by Anne Worner on Flickr (licensed CC-BY)
If you're taking a portrait photo, then the background probably isn't important (as mentioned earlier). So you can choose to use a large aperture (e.g. f/2), which will give you a shallow depth of field and put the background out of focus. Or maybe you want to show where the person works, and so the background is important. In that case you can use a smaller aperture (e.g. f/5.6) to give a larger depth of field and put the background in semi-sharp focus while keeping the sharpest focus on the subject.

AK 10-0093-014 by New Zealand Defence Force on Flickr (licensed CC-BY)
Using a shallow depth of field is a great way to take your images away from that 'point and shoot' look. However, don't use a shallow depth of field just because you can. Use the depth of field that is most appropriate to having the image convey what you want it show.
So, try to pay attention to these five things when taking a photo. If needs be, write them down as a list and look at that list each time you decide to take a photo. As with most things, after a while it will become second nature and you'll notice any potential problems without having to really think about it too much.
Thinking about these things should only take a second or two, and if there's something you need to take action on, it should only take a few seconds to change a camera setting / ask a subject to move / change your framing etc. But it can help you capture much better photographs.


