Shadow Photography Tips – Fun With Shadows
Shadow plays an important part in photography. Without it photos would look flat, lacking in dimension and texture. But have you ever thought about making shadow the main subject of a photograph?
There are lots of different ways you can use shadow as the main element of a creative photo. In this article we'll look at some ideas and tips on photographing shadows, and hopefully inspire you to try some of these ideas yourself.
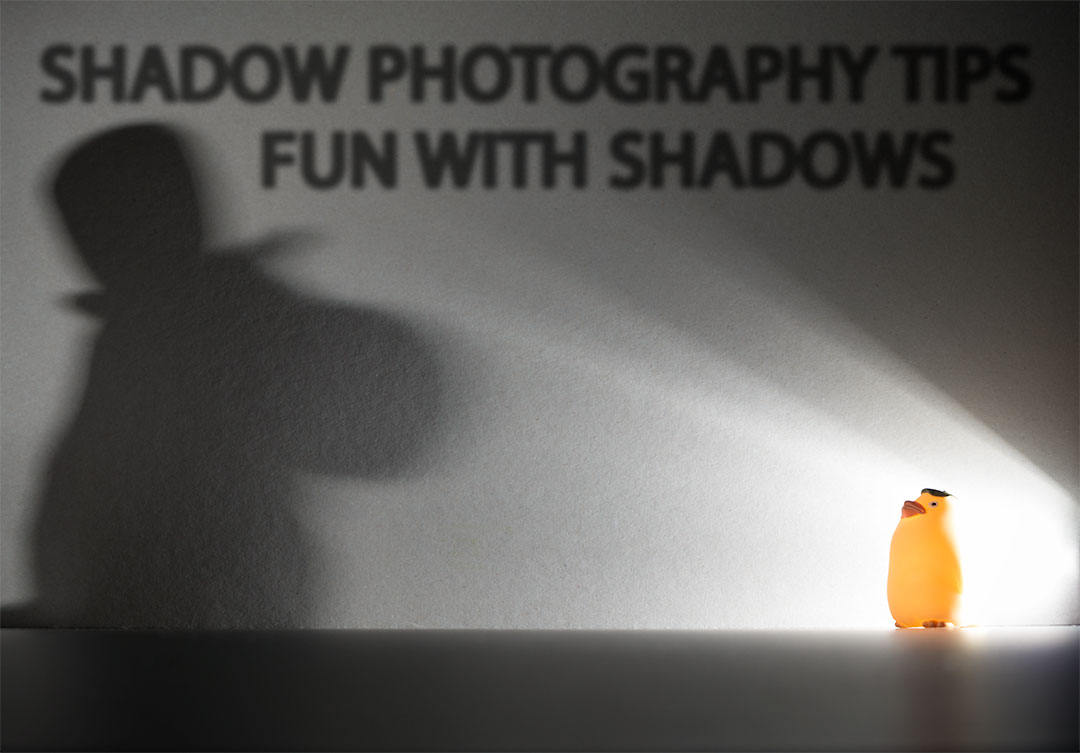
Scary shadows
A photo with a large menacing shadow encroaching on a terrified (or sometimes oblivious) person can be done quite easily, but makes for a great photo.
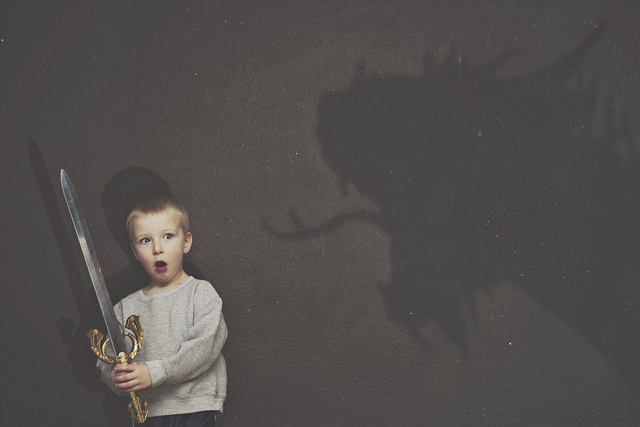
Day 27/365 - Imagination.. by Caden Crawford on Flickr (licensed CC-BY-ND)
You will need a subject that is not a shadow (typically a person) for the shadow to play off against. This also gives a sense of scale to the shadow. You also need a relatively plain, flat wall that the shadow can be cast onto. The larger the wall, the larger you'll be able to make your scary shadow.
You also want a light that you can position as needed. This allows you to control the direction of the shadows. An off-camera flash is ideal, but any positionable light will work.
The light should be positioned some distance from the subject. To create the large scary shadow, you can use a toy, a shape cut from cardboard, another person, or anything else you can think of. The closer to the light source you position your shadow object, the larger the shadow will appear.
Bear in mind that the closer to the light source / further away from the background the shadow object is, the softer the edge of the shadow will be. For shadows with a sharp, well defined edge, you will need a relatively large object to cast the shadow, so that it can be positioned further away from the light / closer to the background.
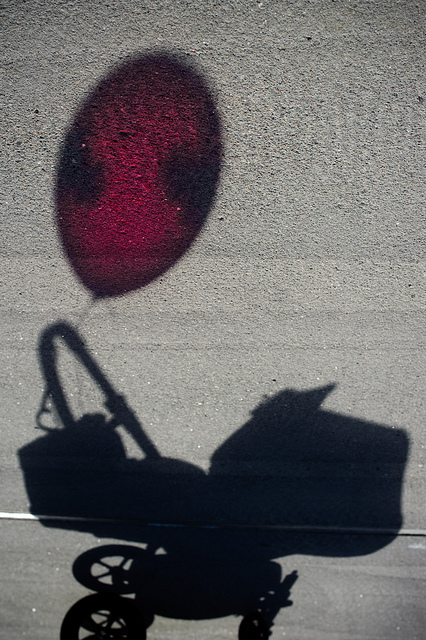
Colored shadows
Typically shadows have no color, and are just gray or black. But if you use a colored translucent material to cast a shadow, you then get colored shadows.
AC at Tjuvholmen by Miguel O. Strauss on Flickr (licensed CC-BY)
For this to work you do need a fairly translucent colored subject. Some balloons, for example, are quite thick and so will just cast a grey or very faintly colored shadow.
Suitable subjects for this type of photo are colorful umbrellas, glass, bottles, or even jelly sweets. If you have a clear glass, you always create a colorful shadow by filling it with colored water.
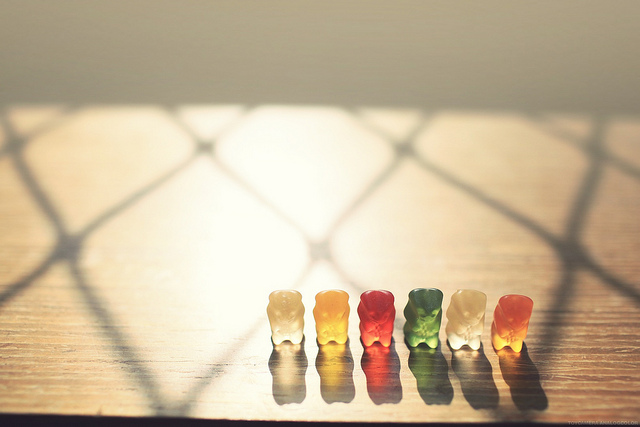
life's all that colorful because of you! by J on Flickr (licensed CC-BY-ND)
Typically for this type of photo you combine a standard shadow with the colored shadow. The colored area then contrasts against the gray / black of the rest of the shadow. This kind of photo works best on a plain, neutral colored background. If the background is colorful it will make the colors in the colored shadow more difficult to see.
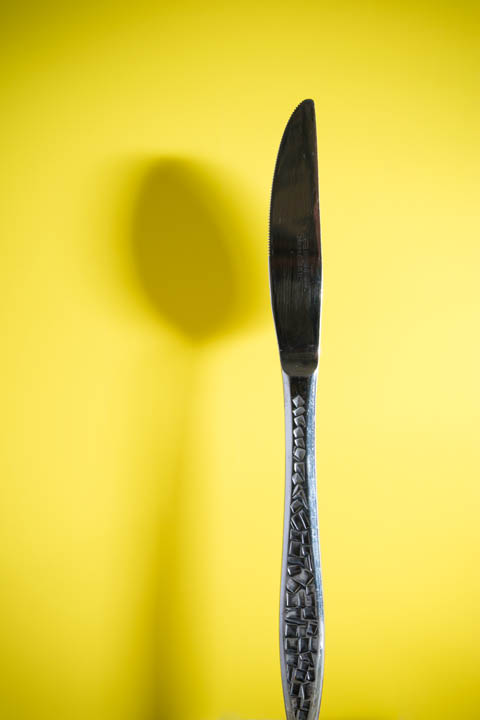
The shadow with the mind of its own
The idea for this style of photo is that you have a subject with a shadow, but the shadow is a different shape / doing a different pose to the subject.
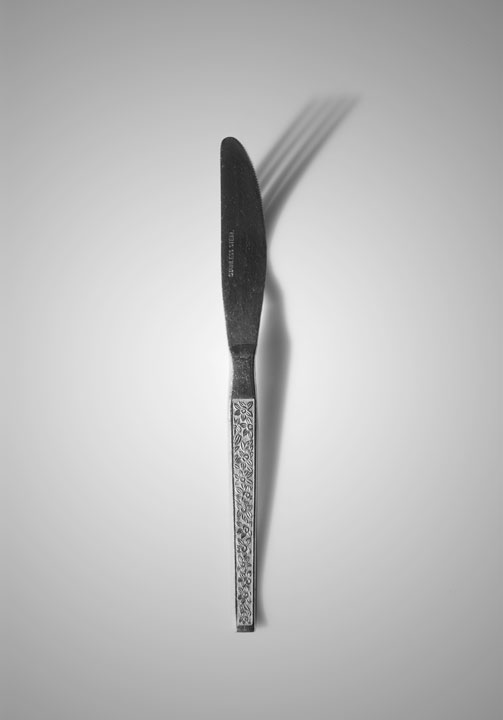
This type of photo is probably easiest achieved using image editing software, however it can be achieved in-camera with a bit of effort. For an in-camera effect, you want your light positioned some way away from the subject, and off to one side.
Position your camera, subject, and light so that when you photograph the subject its shadow does not appear in the image. Now introduce your shadow object, which you want positioned outside of the image frame, but close enough so that its shadow will be cast within the image frame. This is why you need the lighting at quite an acute angle to the subject.
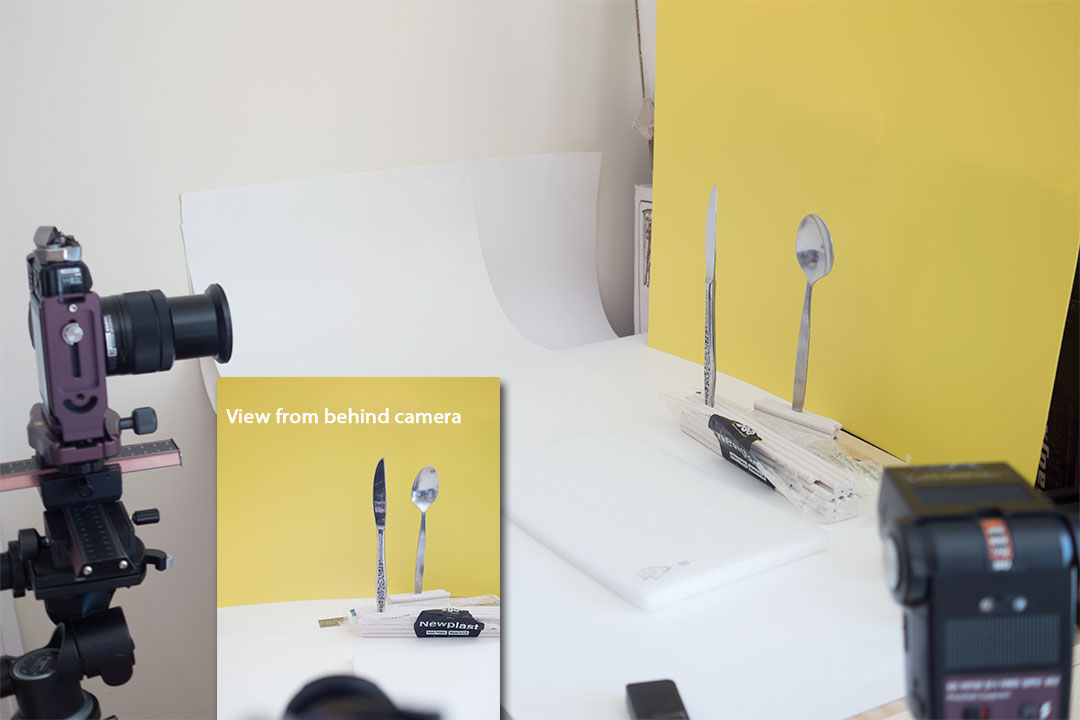
Depending on your subject, you may be able to light your subject separately from the shadow object. For example, having an additional fill light pointing down at the subject. But be careful if doing this, as if the subject looks like they are lit from a different direction than that which the shadow is falling in, then the trick is revealed.
The photo editing technique is likely to be much easier. You need your camera secured on a tripod so it won't move at all. Then take two photos - one with your subject, and another without the subject, but with the shadow you want. All camera settings and lighting should remain exactly the same for both shots.
Then take the two images into your editing software and add one image on top of the other as a layer. Then use a layer mask to carefully paint in the shadow / subject layer.
The shadow that's alive
This shot is quite easy to achieve, and just requires a little imagination. The idea is that you photograph a shadow that looks to be interacting with its surroundings.
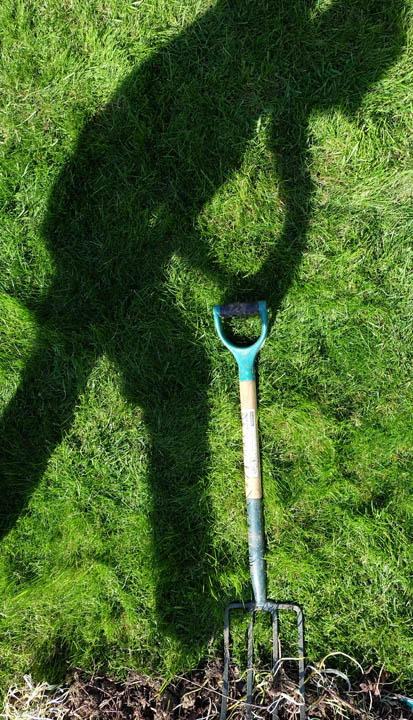
For this to work you need a flat surface for your shadow to fall on, and something for the shadow to interact with. An example might be a shadow that appears it is about to pick something up from a wall mounted shelf. Or a shadow that appears to be kicking a ball on the ground.
By keeping your light source quite far away you should be able to cast a shadow that does not appear overly large. The sun, being a long distance away, makes for a good light source for this type of photo.
Long shadows from above
This effect can create quite striking photos, but can be quite difficult to achieve with natural light. Using a low light source, such as the sun near sunset / sunrise creates long shadows. By then photographing these shadows from above, if the light is at the correct angle, the shadow(s) will take on the same shape as the subject(s) when viewed normally. At the same time the subjects can take on a shape which is not identifiable (unless it's something that you're used to looking down on).
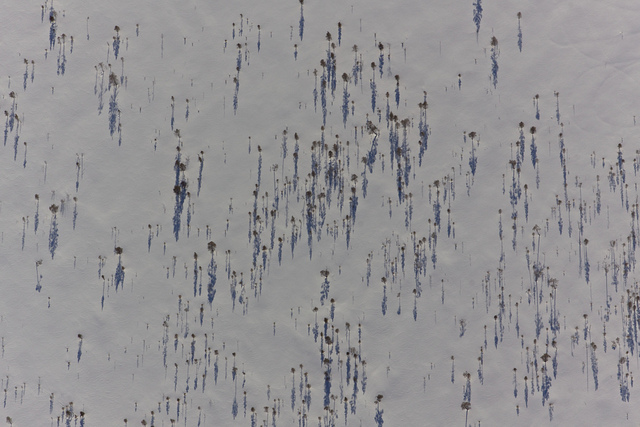
artist:nature by Thomas Hubauer on Flickr (licensed CC-BY)
When using natural light as your light source the problem is that you need to get up high to be able to shoot down. But any structure that you use to get up high will cast a shadow itself. So you need to ensure that your subjects are on the side of the structure that is not in shadow.
If you are lucky enough to take a hot air balloon ride around sunrise / sunset, that is the perfect setup for this type of photography. You can get up high and the balloon has only a small shadow footprint, which won't affect shooting straight down at all anyway.
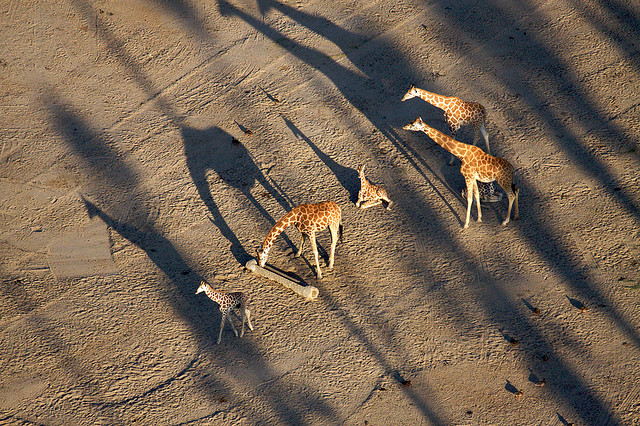
Untitled by Marcin Wichary on Flickr (licensed CC-BY)
If you are using artificial lighting, then you don't need to worry about this so much. You can just position your lighting so that it will create long shadows of the subjects without creating a shadow of whatever structure you're using to get up above the subject.
Shadows on a translucent surface
This technique is similar to a silhouette. You position your subject behind a semi-transparent surface, and then light them from behind. Their shadow is then visible through the translucent surface.
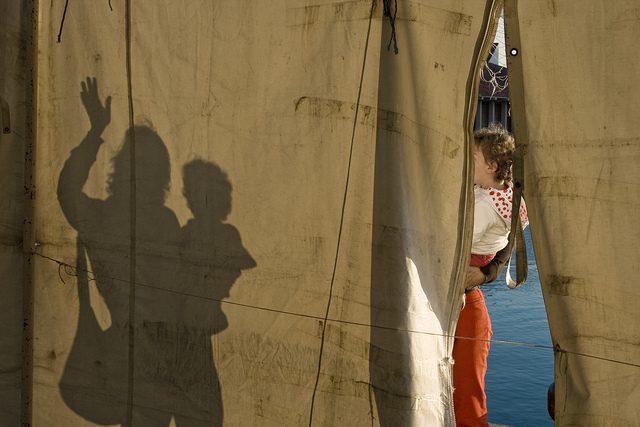
. by Garuna bor-bor on Flickr (licensed CC-BY-SA)
This can work well with tents - at night time you can photograph the tent from outside, capturing a shadow from someone inside the lit up tent. During the daytime it works the other way round - you can capture a shadow of someone outside the tent from inside the tent.
Translucent umbrellas can also work well for this effect. Or for smaller subjects you can just use a sheet of thin paper.
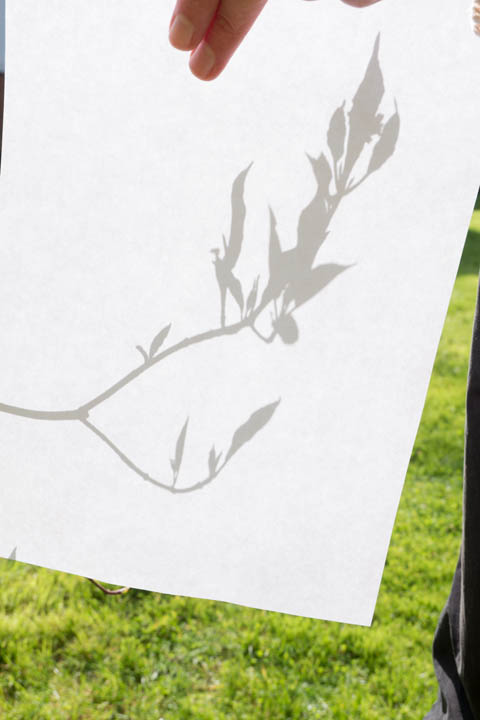
If you do use a sheet of paper for this technique, I would suggest mounting it on some sort of frame to stop it bending in the wind. On the other hand, you may like the effect that the shadow gives on a bent piece of paper, which brings me on to the next point...
Distorted Shadows
The techniques discussed so far involve using a flat surface to project the shadow on. Using a 3D surface to cast a shadow on can also give very interesting images. The shadow distorts and bends as it goes over the uneven surface, creating a very different feel to a standard shadow photo.
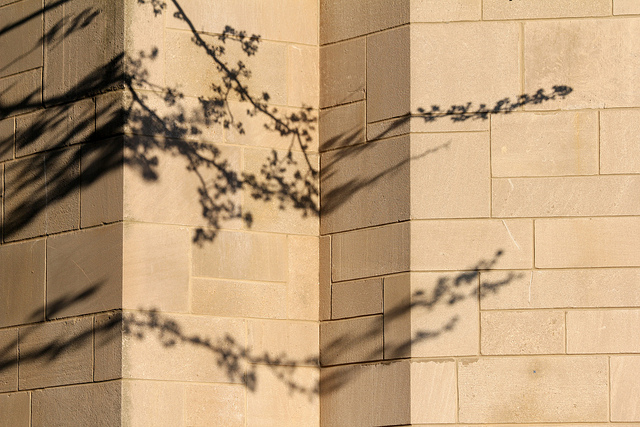
Day 81: Sumi-e by Quinn Dombrowski on Flickr (licensed CC-BY-SA)
This type of photo is particularly suited to more abstract compositions, using the distorted shadow as part of a pattern, or perhaps to break up a pattern. As with the other ideas, the position of the light in relation to the subject casting the shadow will have a big effect on how the image appears.
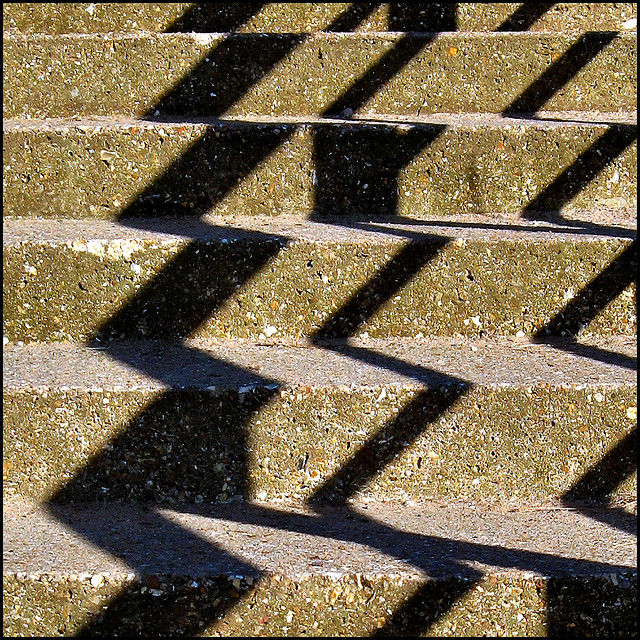
Steps and Shadows by Brian on Flickr (licensed CC-BY-SA)
So, there we have 7 ideas for making shadows the main subject (or at least a large part) of your photos. This type of photo can be something fun to play with and give you some great shots. Why not give some of the ideas here a try, and see what you can create.


Another great posting from you, all useful in filling up my head up with helpful knowledge.
I’ve even taken the time to share this on Fb 🙂