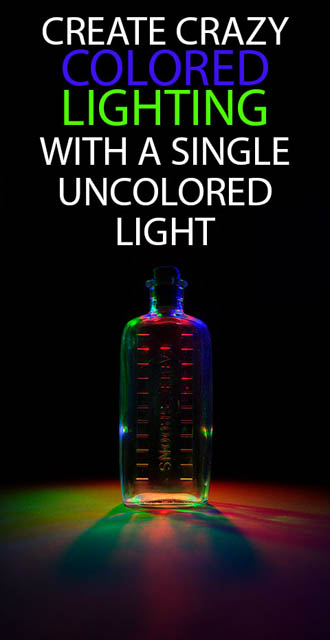
Create crazy colored lighting with a single uncolored light
In this article we'll look at how you can create unusual images that look like they were taken with red, green, and blue lights, but are actually a composite of three different images taken with any light source (colored or not).
I'll cover how to create this type of image using a technique that works in Photoshop Elements and the full version of Photoshop (CS / CC), plus two alternative techniques that you can use in the full version of Photoshop.
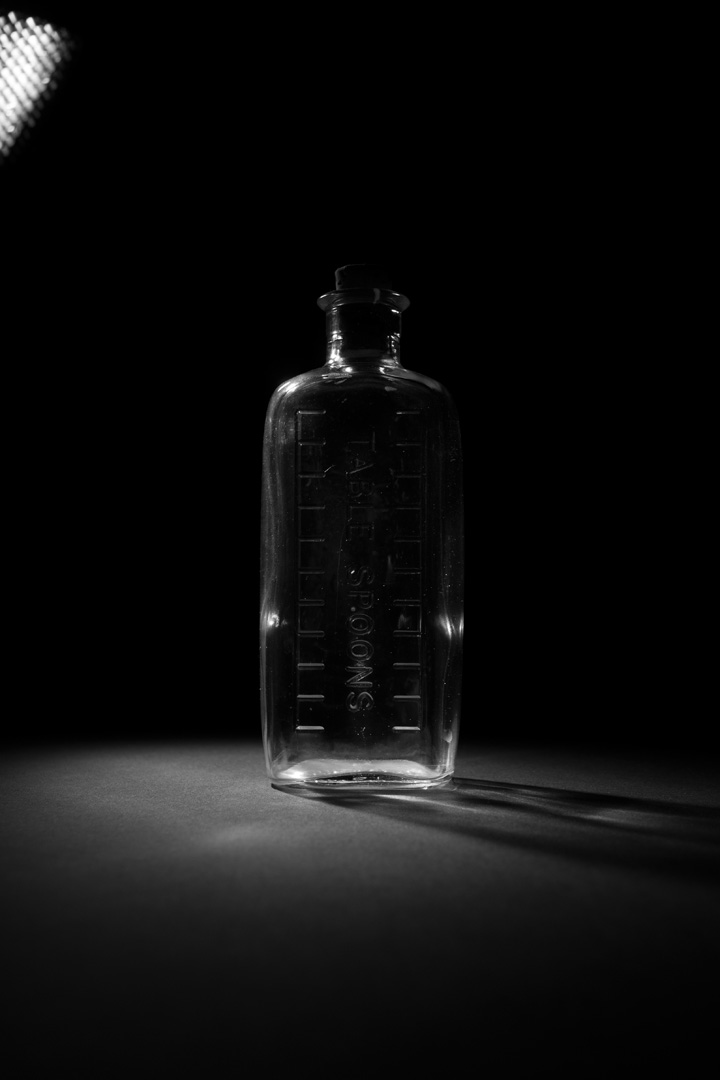
For this technique to work you need three images that are lit differently. (Actually it can be done using two, or more than three images, but for the tutorial part of this article I'll be working with three images). Your camera and subject must not move between the three images - only the lighting must change.
Set your camera up so that it won't move (use a tripod). Preferably use a remote shutter release with the camera so that you won't have to touch the camera between shots. Get your camera and subject set up how you like, then take three photos each with different lighting.
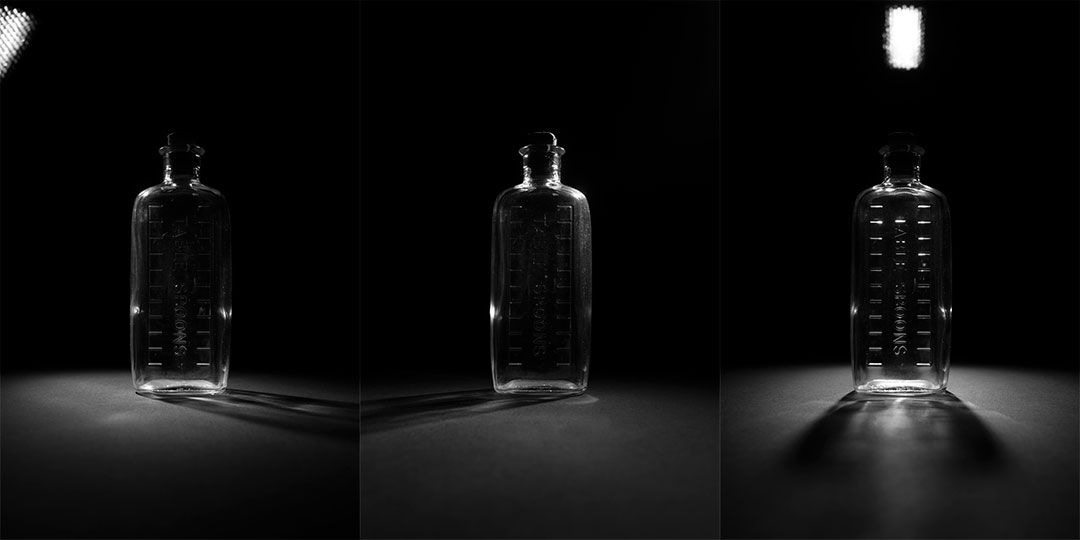
For this example tutorial I am using images shot with a flash gun, though you can use any light source you want. I took one photo with the flash behind, slightly above, and to the left of the subject. One with the flash behind, slightly above, and to the right of the subject. And one with the flash behind and slightly above the subject.
Using image editing software, we then use one of the images as a source of blue light, one as green light, and one as red light. The three different techniques I'll cover to do this are:
- Using color adjustment layers - Photoshop Elements and Photoshop CS / CC
- Using the RGB channels - Photoshop CS / CC
- Using layer blending options - Photoshop CS / CC
If you'd like to follow along with the tutorial, you can download these images to work with: DSCF0815.jpg; DSCF0816.jpg; DSCF0817.jpg.
Photoshop Elements - Using colored fill layers
Start by loading your three images as layers in a single document. There are a few different ways you can do this:
The copy & paste method of adding images as layers
For this method you first open your three images in Photoshop.
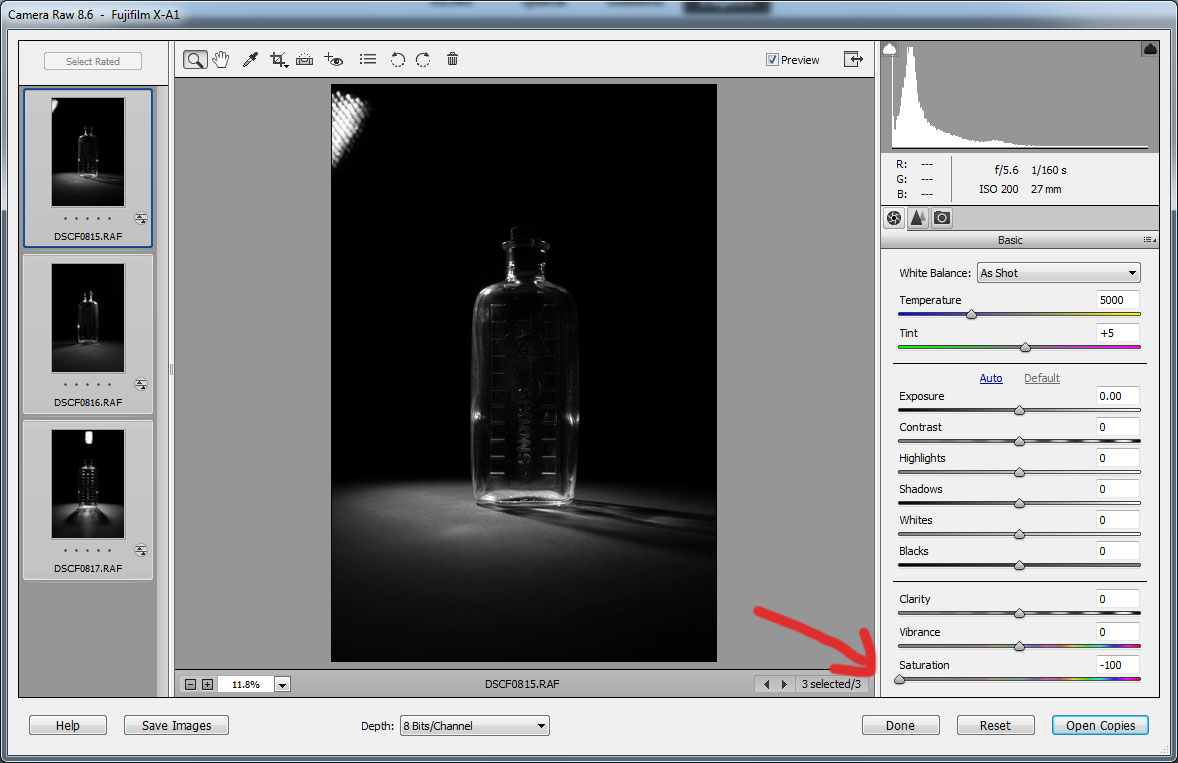
Depending on the effect you want to create, you may or may not want to desaturate each image to remove all color information. For this particular image, I do want to remove all color from each image. As I am working with RAW files, I can simply set the saturation to zero in ACR when opening the images.
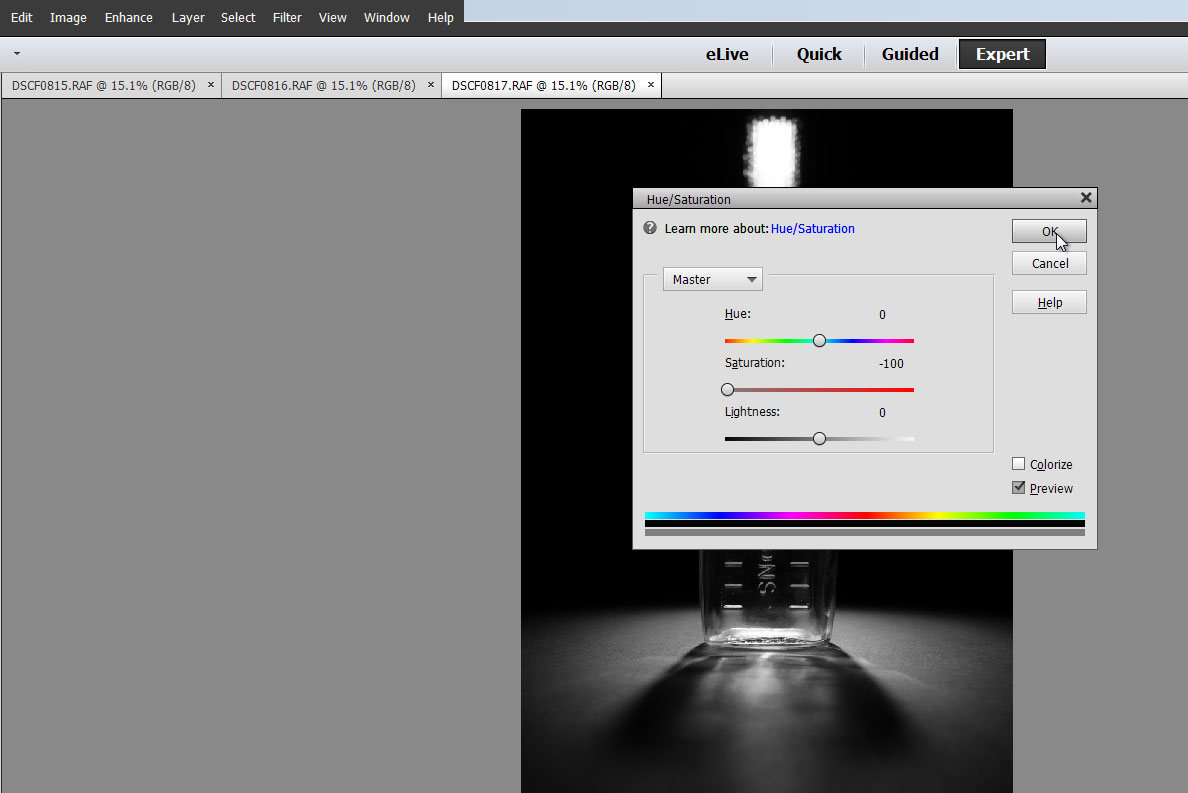
If you're working with JPEG images, then after you open you each image go to Enhance > Adjust Color > Adjust Hue / Saturation.
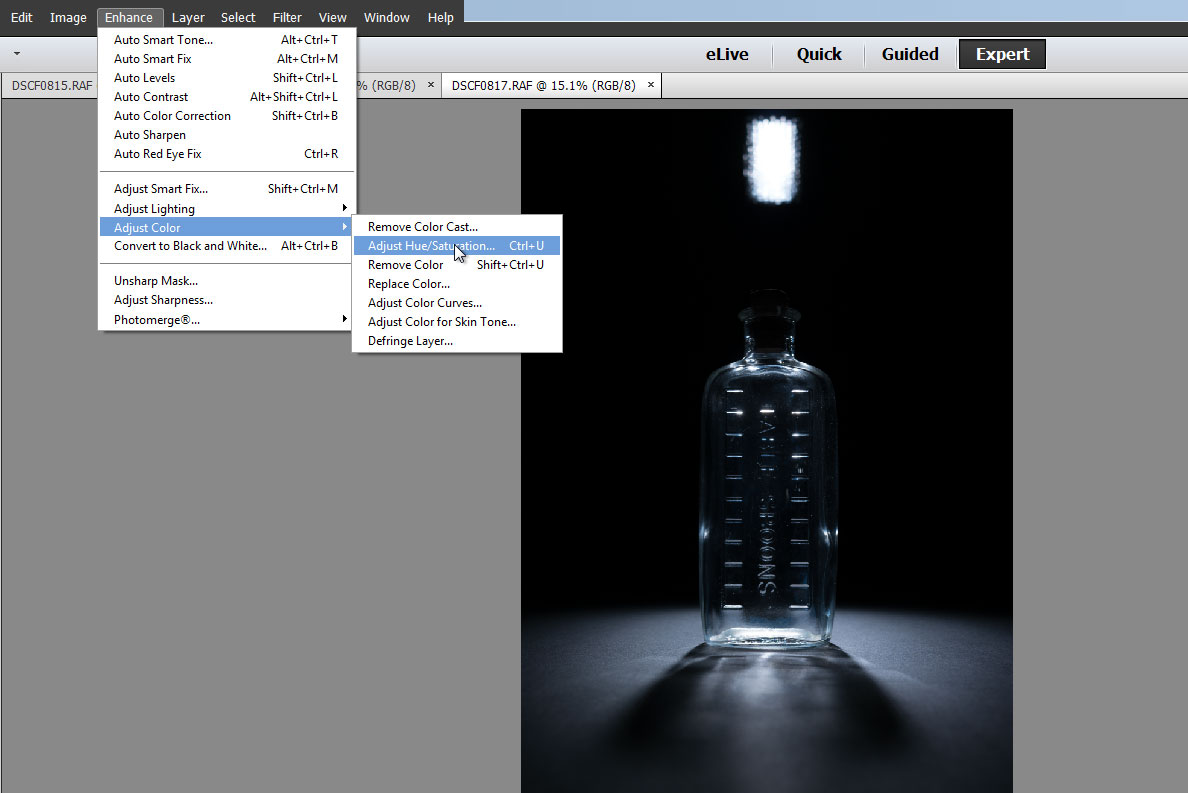
Then adjust the saturation to zero.
When you have your three images open (and destaurated if wanted), select one of the images. Go to Select > All or press Ctrl / Cmd + A. This will select the image, and a line of 'marching ants' will appear around the edge.

Now copy the image, go to Edit > Copy or press Ctrl / Cmd + C.
Go to one of your other images and paste the image you just copied. On the menu that's Edit > Paste or just press Ctrl / Cmd + V.
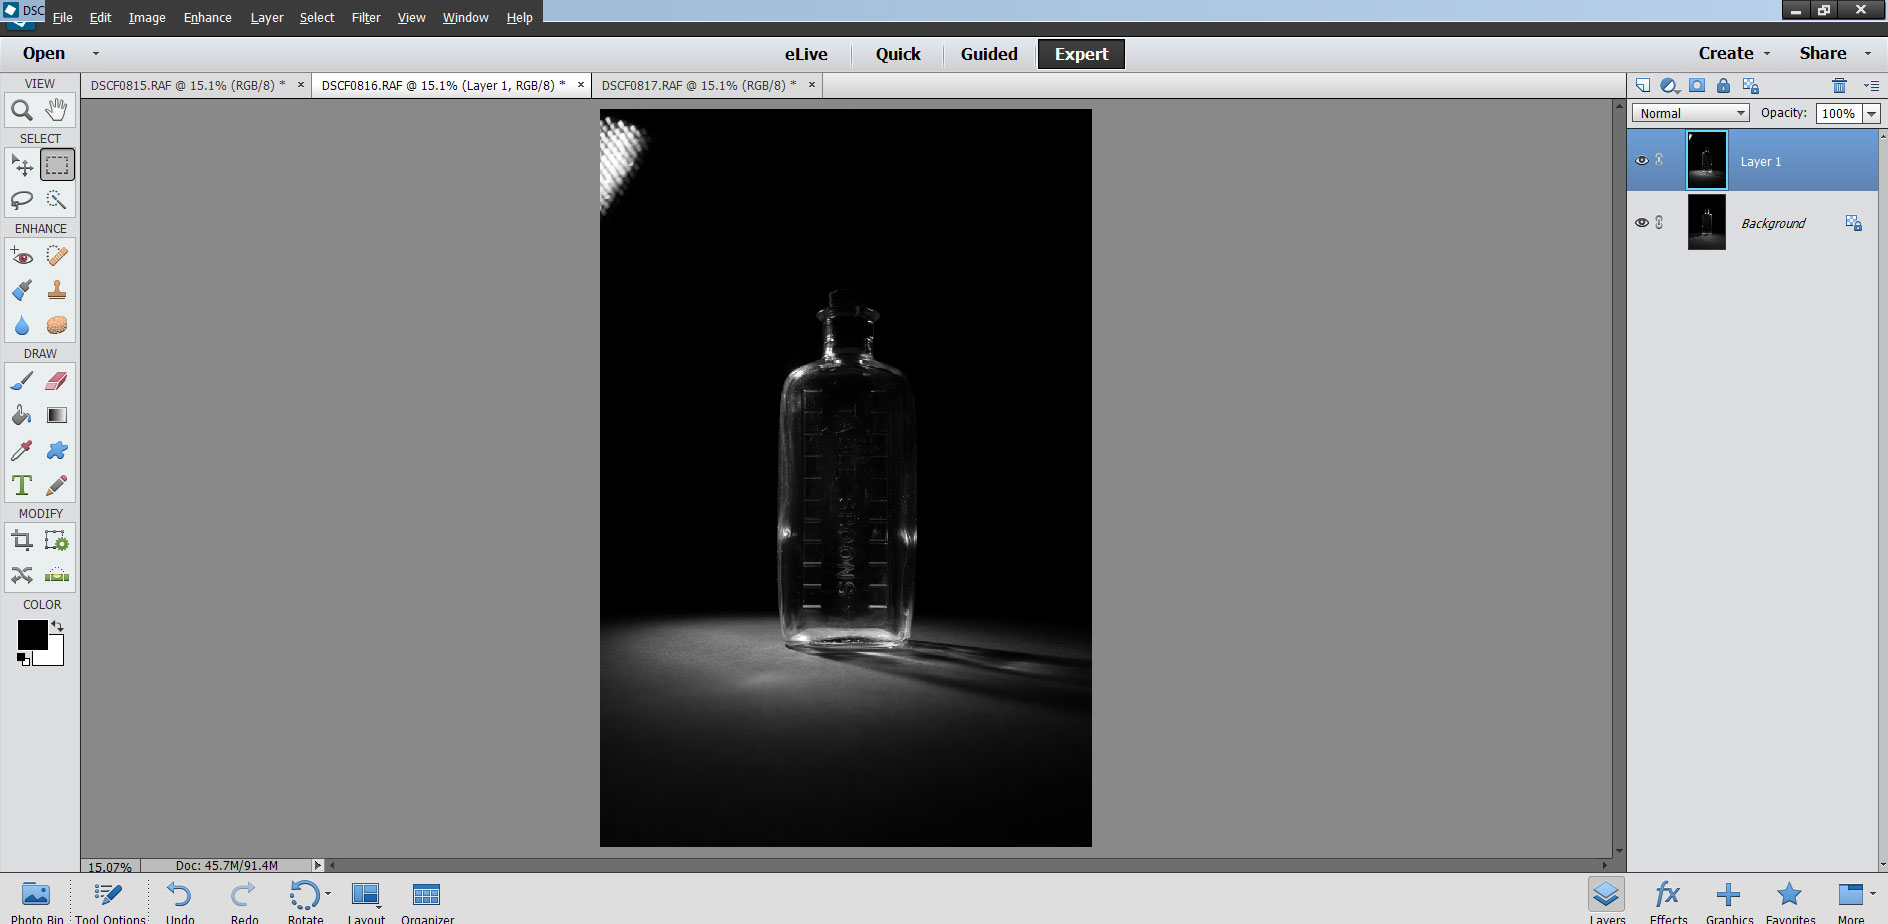
This gives you two images as layers in a single document. You may want to rename your layers, or you may not - entirely up to you. I am going to rename mine to the filenames, so if I open this document again in the future I can easily see which layer comes from which original image.
To rename a layer, just double click on the layer name in the layers palette. When done press enter or click off it to accept the name change. You can close the image that you just copied and pasted the layer from - as we have it as a layer now, we don't need the original image open.
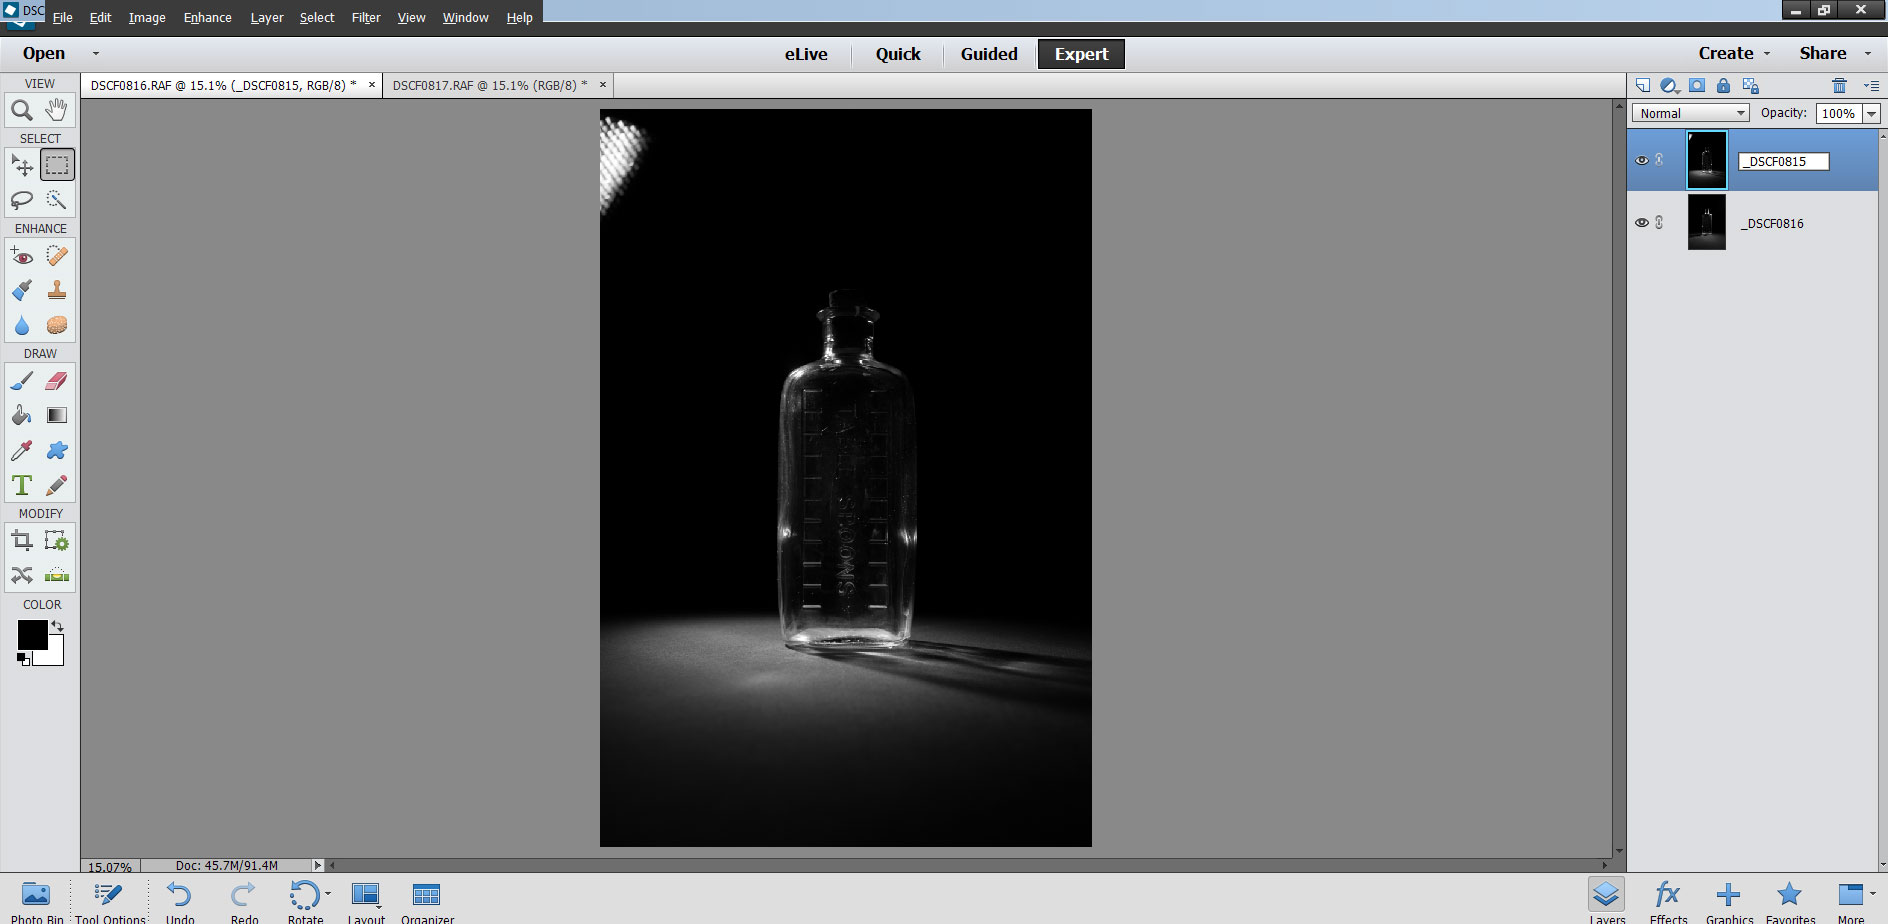
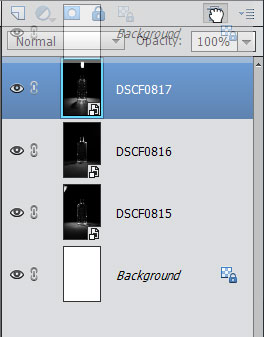
Now switch to the other image, select all, and copy it. Go back to your document that contains the two images and paste the third image in. After doing this you can close the other image. You should now have a single document with the three images as separate layers.

The 'place as smart object' method of adding images as layers
This would be my preferred method of adding images as layers to a single document. It is available with Photoshop Elements 12, but I'm not sure whether it is available with earlier versions.
The reason I prefer this technique is that it is non-destructive when working with RAW files. The layers are all smart objects. In the full version of Photoshop you can re-open them (by double-clicking on the layer thumbnail) and adjust the RAW conversion settings at any time. You can't do that in Photoshop Elements, but it still has the benefit that if you resize the document to make it smaller, then later resize to make it larger again, no information is lost.

Standard 'raster' layer (left) and Smart object layer (right) resized down to 500px height then back up to 1080px height. The smart object uses the full sized image, so no image quality is lost when resizing down then up again.
Create a new document (File > New > Blank File or Ctrl / Cmd + N) that has the same dimensions as your images. If you're not sure what that is, you can open an image normally in Photoshop, then go to Image > Resize > Image Size. This will give you the pixel dimensions, which you should note down. For my image, doing this in PSE 12 gives the pixel dimensions as 3264 x 4896 pixels.
Technically, the new document doesn't actually have to be the same size, but it should have the same aspect ratio. The Color Mode setting when creating the new document should be RGB Color (it will usually be this by default).
With the new document open, go to File > Place.

Select one of your images, then click Place (you can only place one file at a time). If you are placing a RAW image, then Camera RAW will open and you can make any adjustments to the RAW conversion you want. Press OK on the ACR dialog, then the image will be placed into your document.
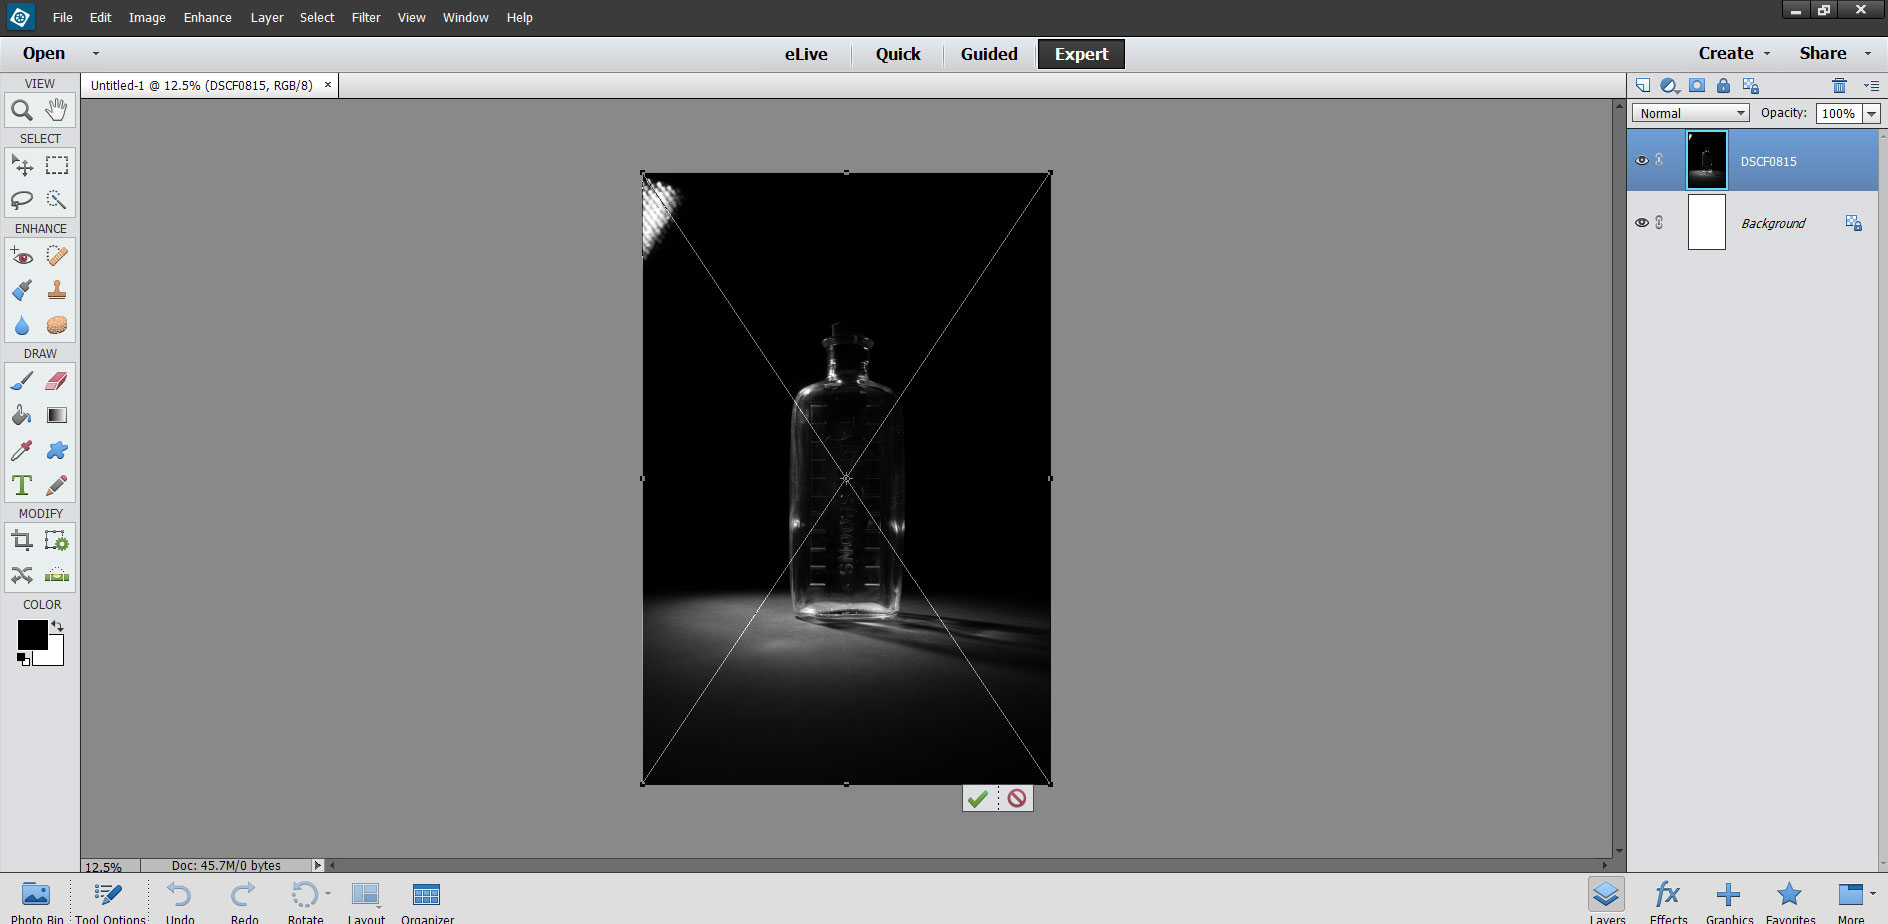
Press enter or click the tick item to accept the image placement, then repeat for the other two images. You may notice that the layers are automatically named with the filename of the image used for that layer - very nice.
After doing this you'll still have the empty background layer that the document started with. Click and drag the background layer to the rubbish bin icon above the layer palette to get rid of it.
Creating the colored lighting effect
Now we have our images as layers, we can get on with the process of creating Red, Green, and Blue layers from each of our images. This process is the same no matter which method you used to get your images as layers in a single document.
Above your bottom layer create a solid color adjustment layer.

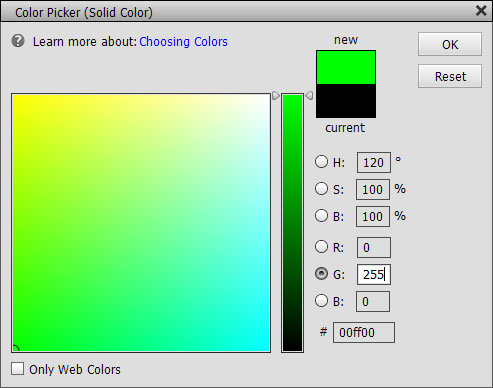
Choose a color that is pure red, green, or blue. I decided to go for pure green. The dialog allows you to set the color via the RGB values, so you can type in 0 for R, 255 for G, and 0 for B. This gives a color with 100% green (255 is the maximum value) and no red or blue. Press OK on the dialog when you've chosen your color.
You'll see in the layer palette, the color adjustment layer created above your bottom layer. The next step is to clip the color layer to the image layer. (Actually this isn't needed for the bottom layer, but it doesn't hurt to do it anyway).
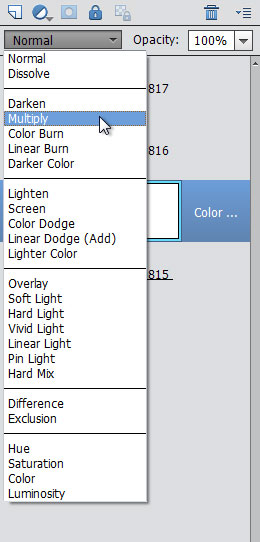
Holding down the Alt / Option key on your keyboard, hover the mouse cursor between the color layer and the image layer below it. You'll see the cursor changes like below.
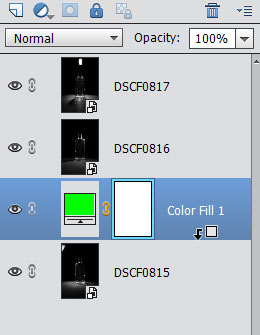
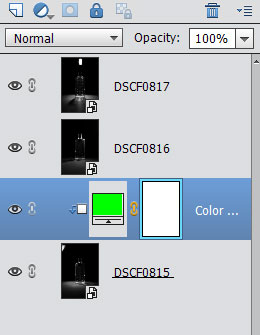
Click, and this will clip the color layer to the layer below it. This means that the color layer will only affect the layer it is clipped to. As I noted, this isn't actually essential for the bottom layer, but we'll need to do the same for other layers, where it is very important. When the layer is clipped it will become indented with an arrow pointing to the layer below that it is clipped to.
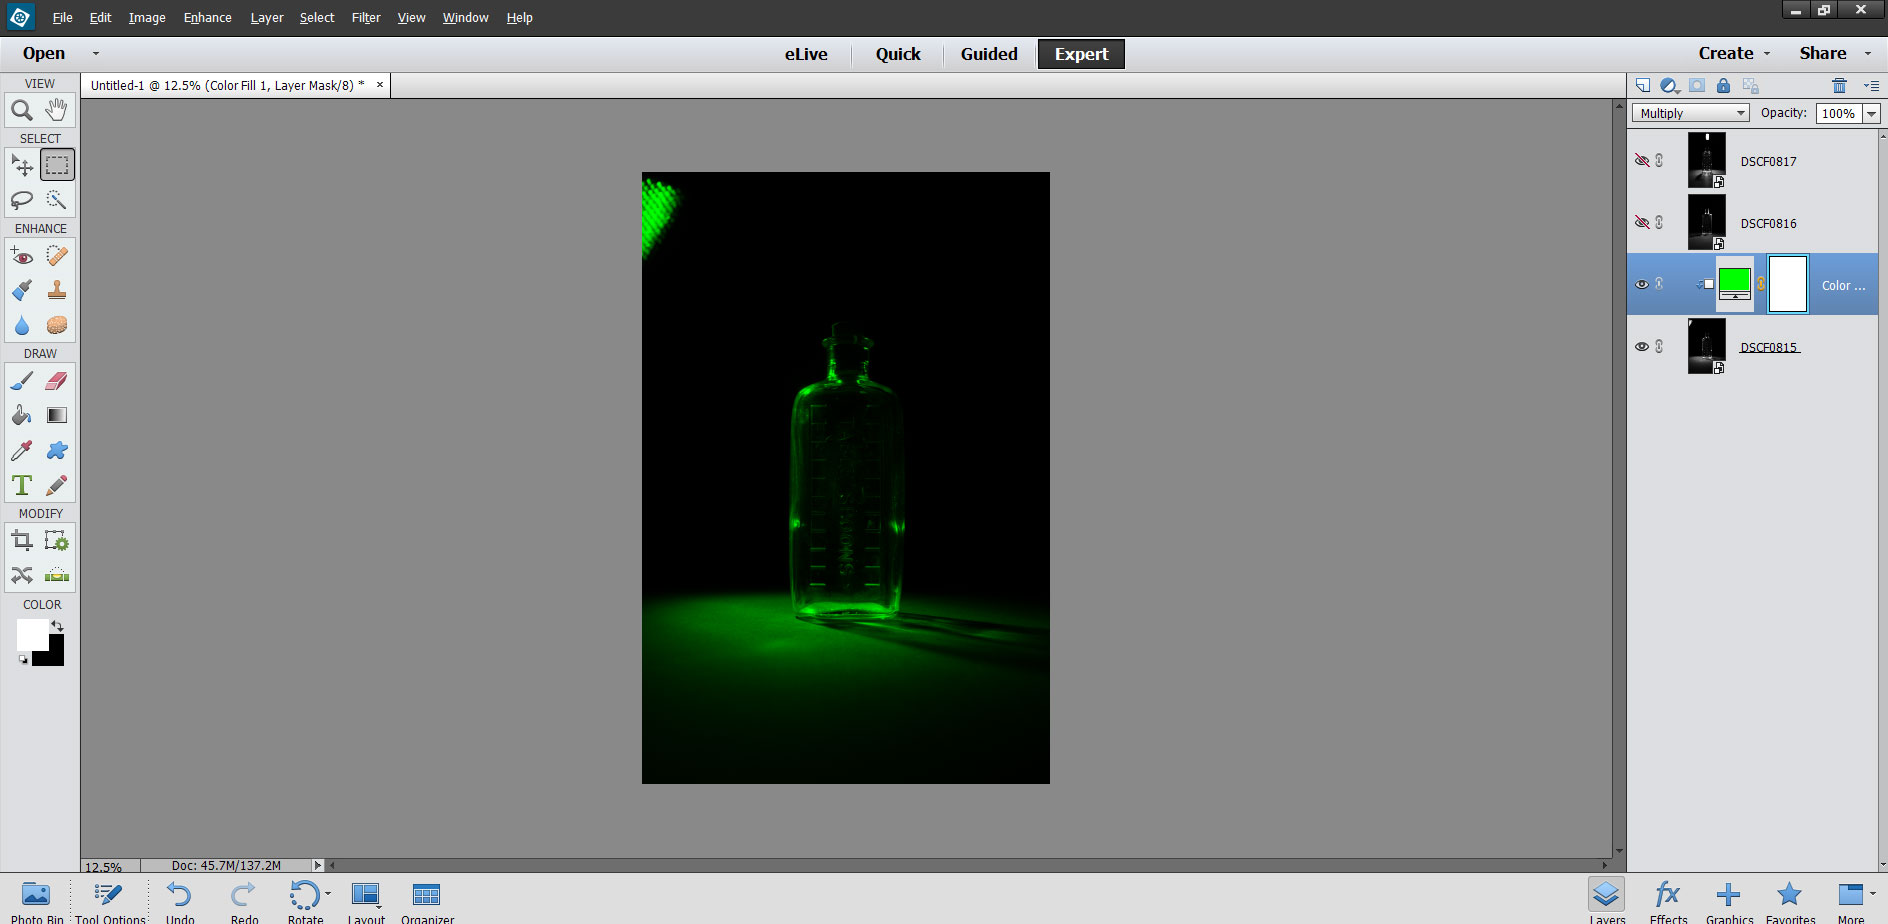
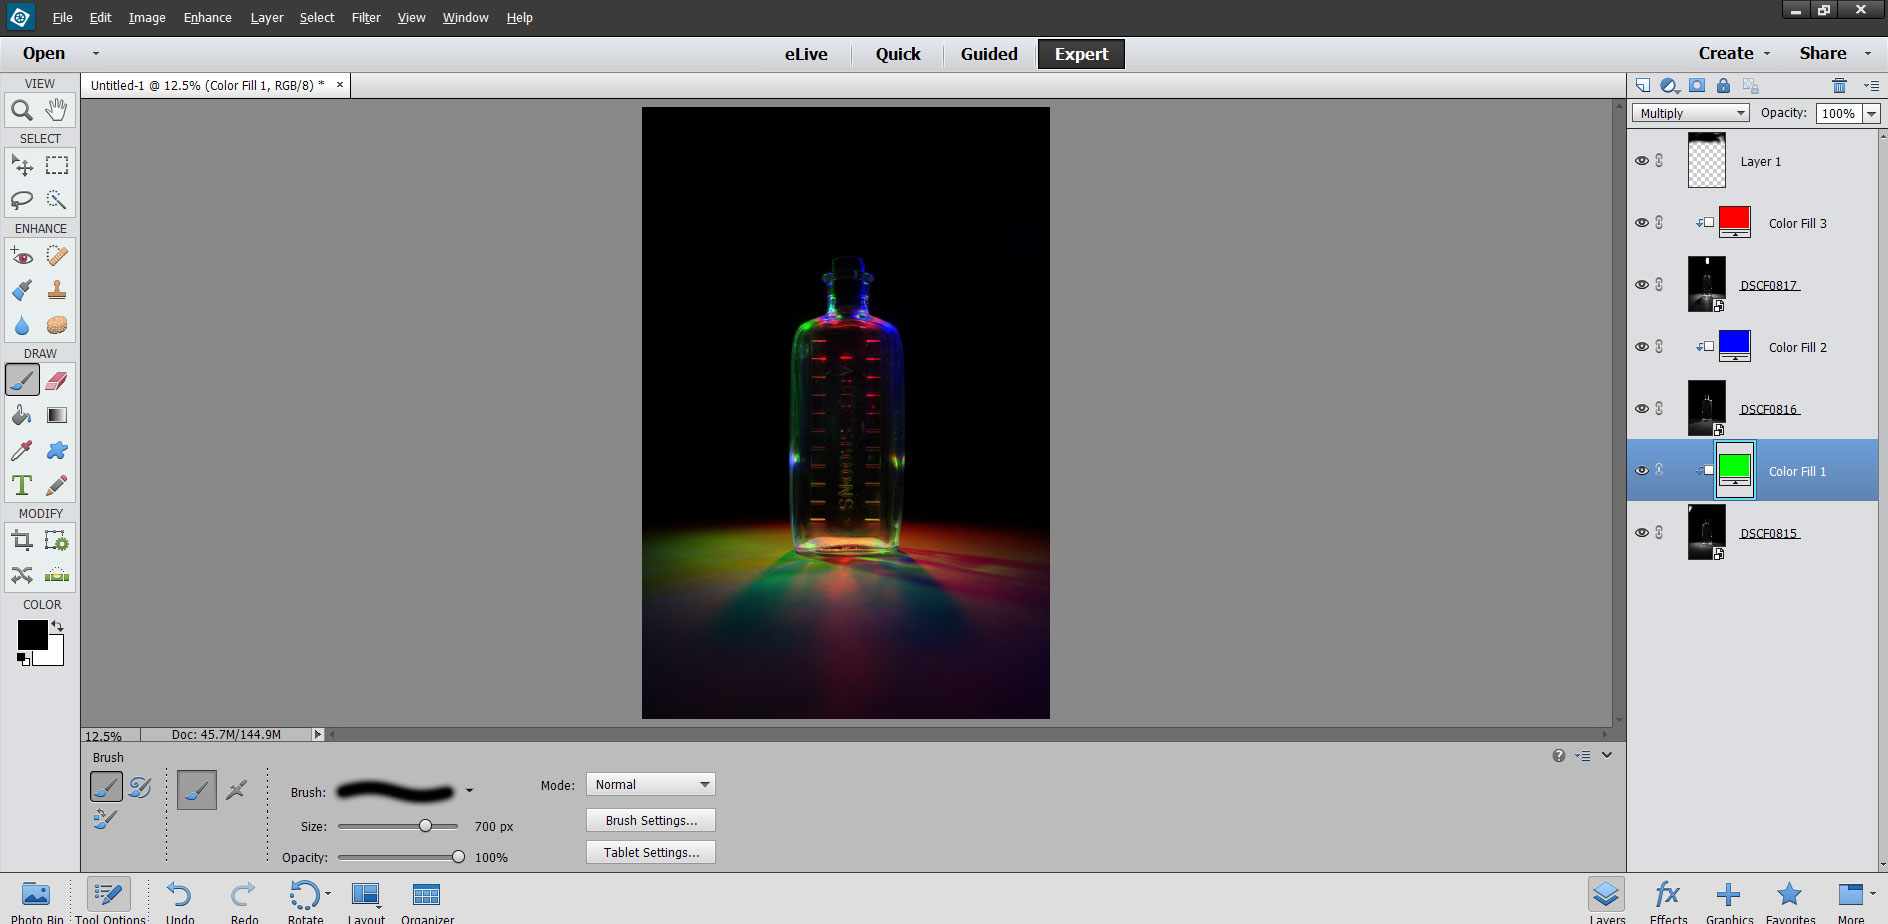
With the color adjustment layer selected in the layer palette, change this layer's blend mode to Multiply.
If you hide the layers above (click the eye icons next to the layers in the layer palette to hide them), you'll see that our bottom layer now looks like it was lit with a green light.
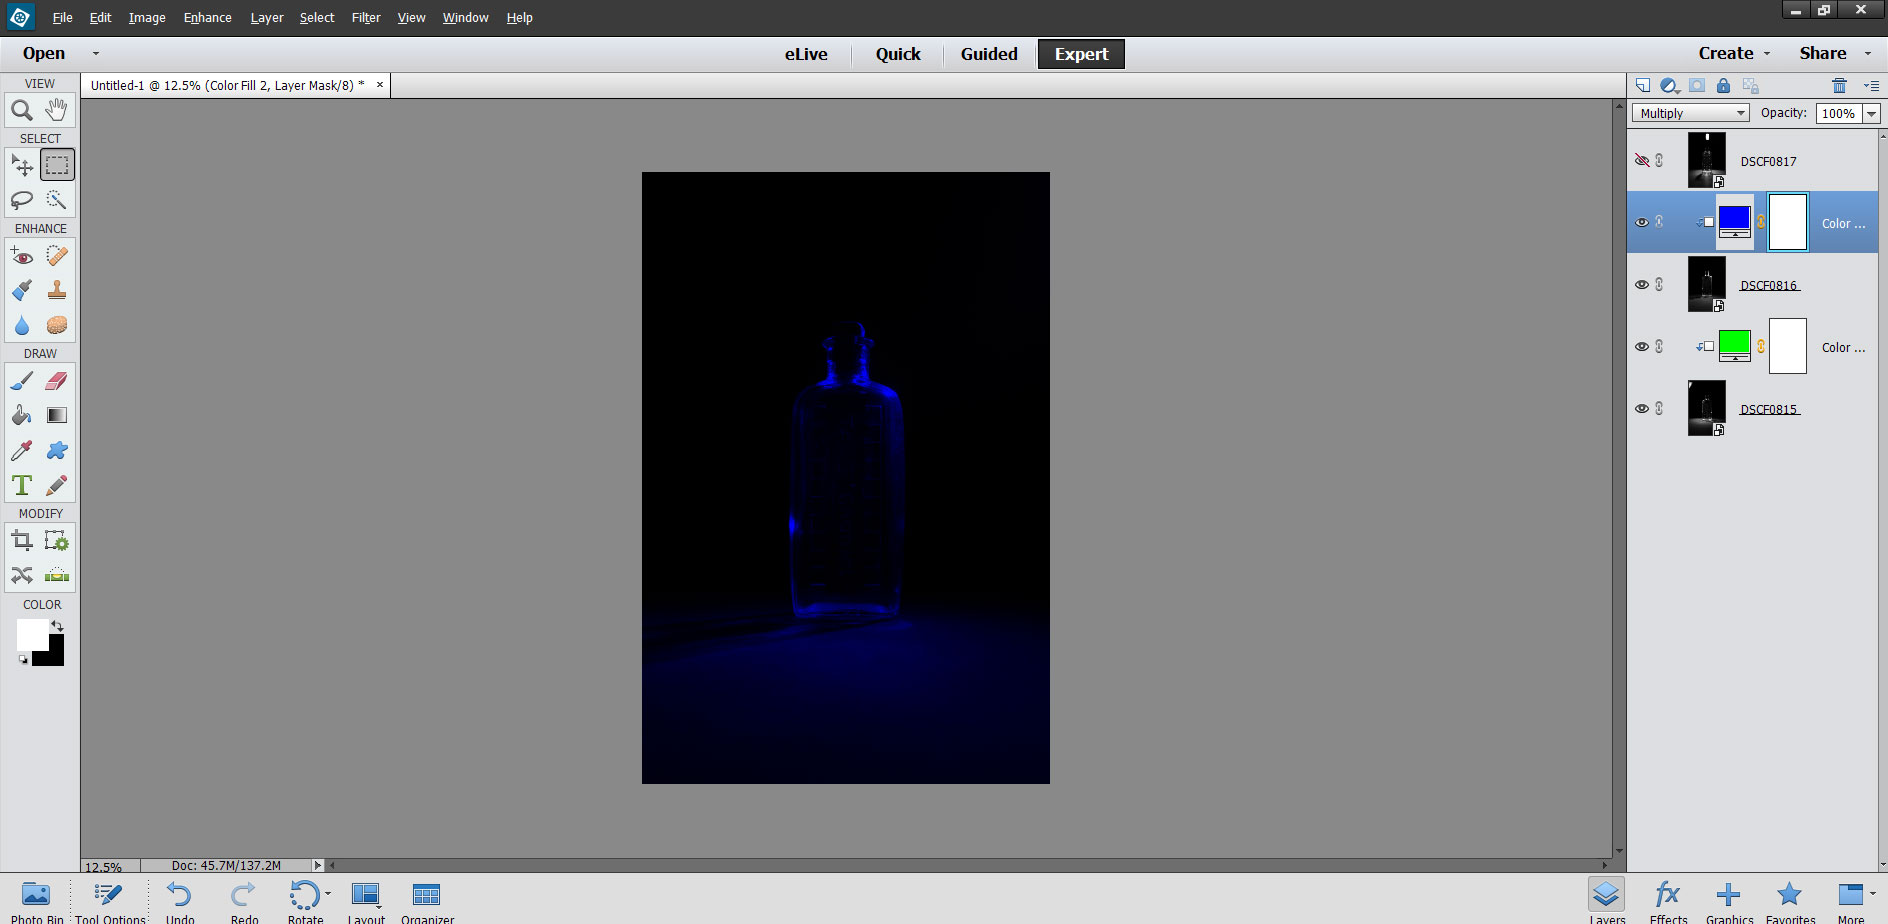
Show the layer above again, and select it in the layer palette. Create another color adjustment layer. This time I chose pure blue (R 0, G 0, B 255). Clip it to the middle image layer below it, and change its blend mode to multiply.
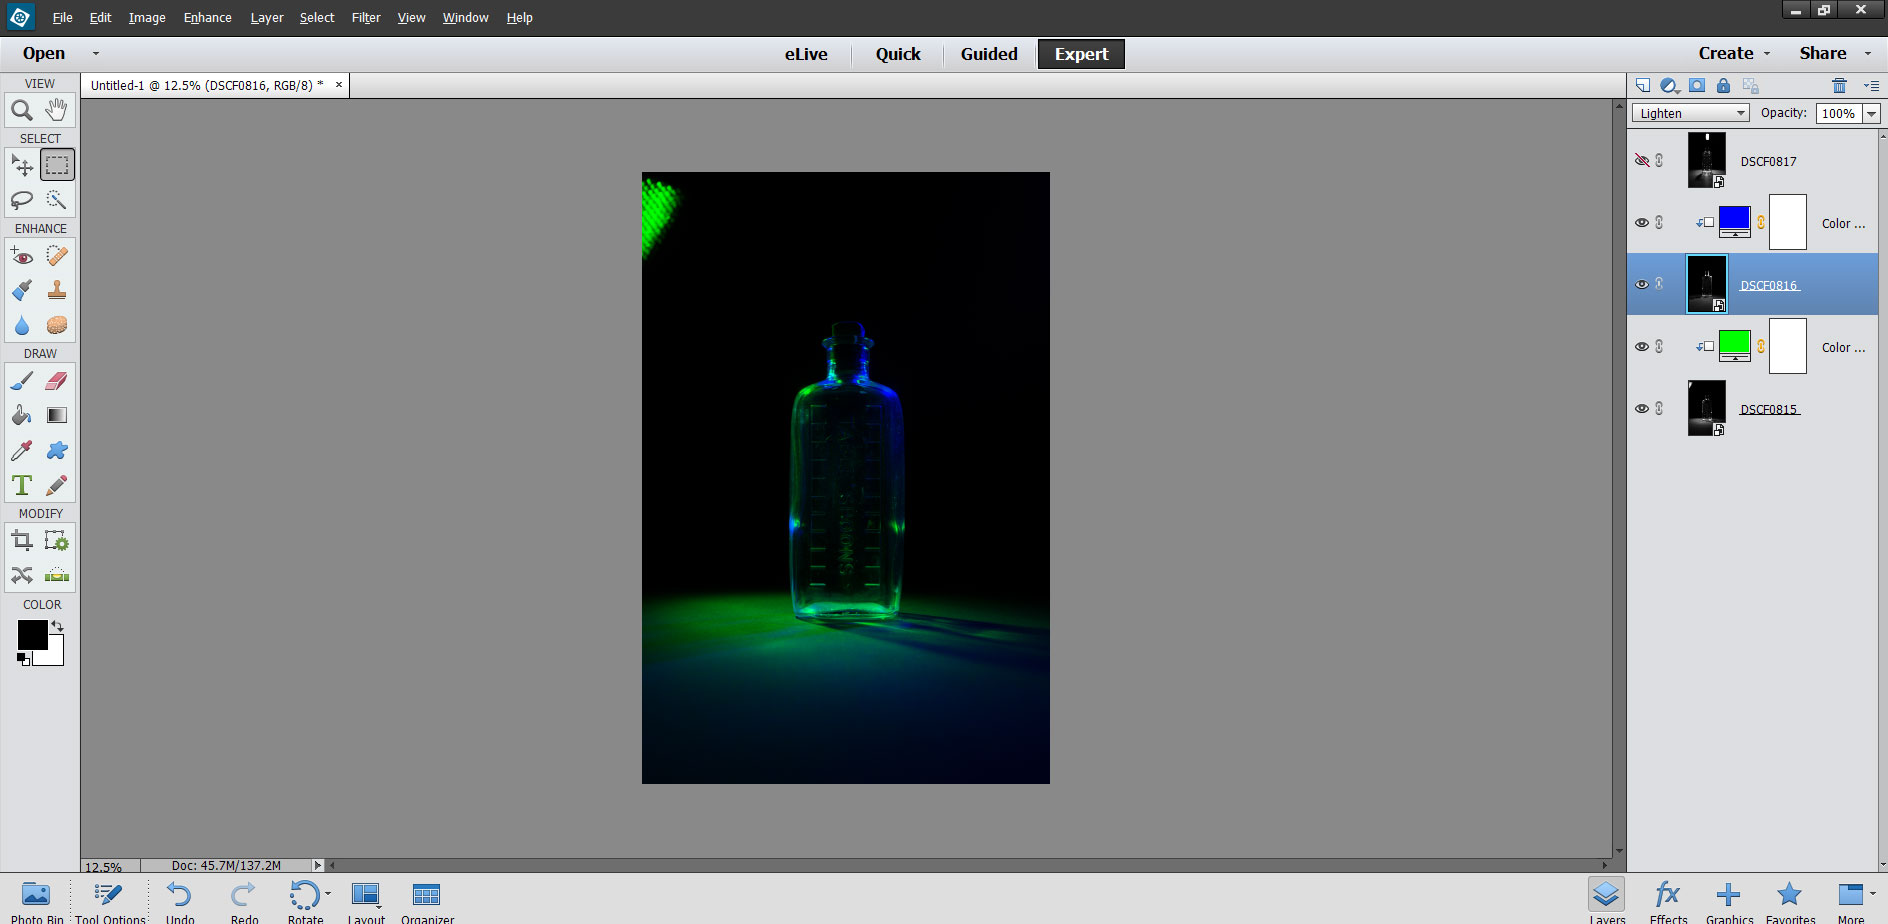
Now change the blend mode of your middle image layer to Lighten.
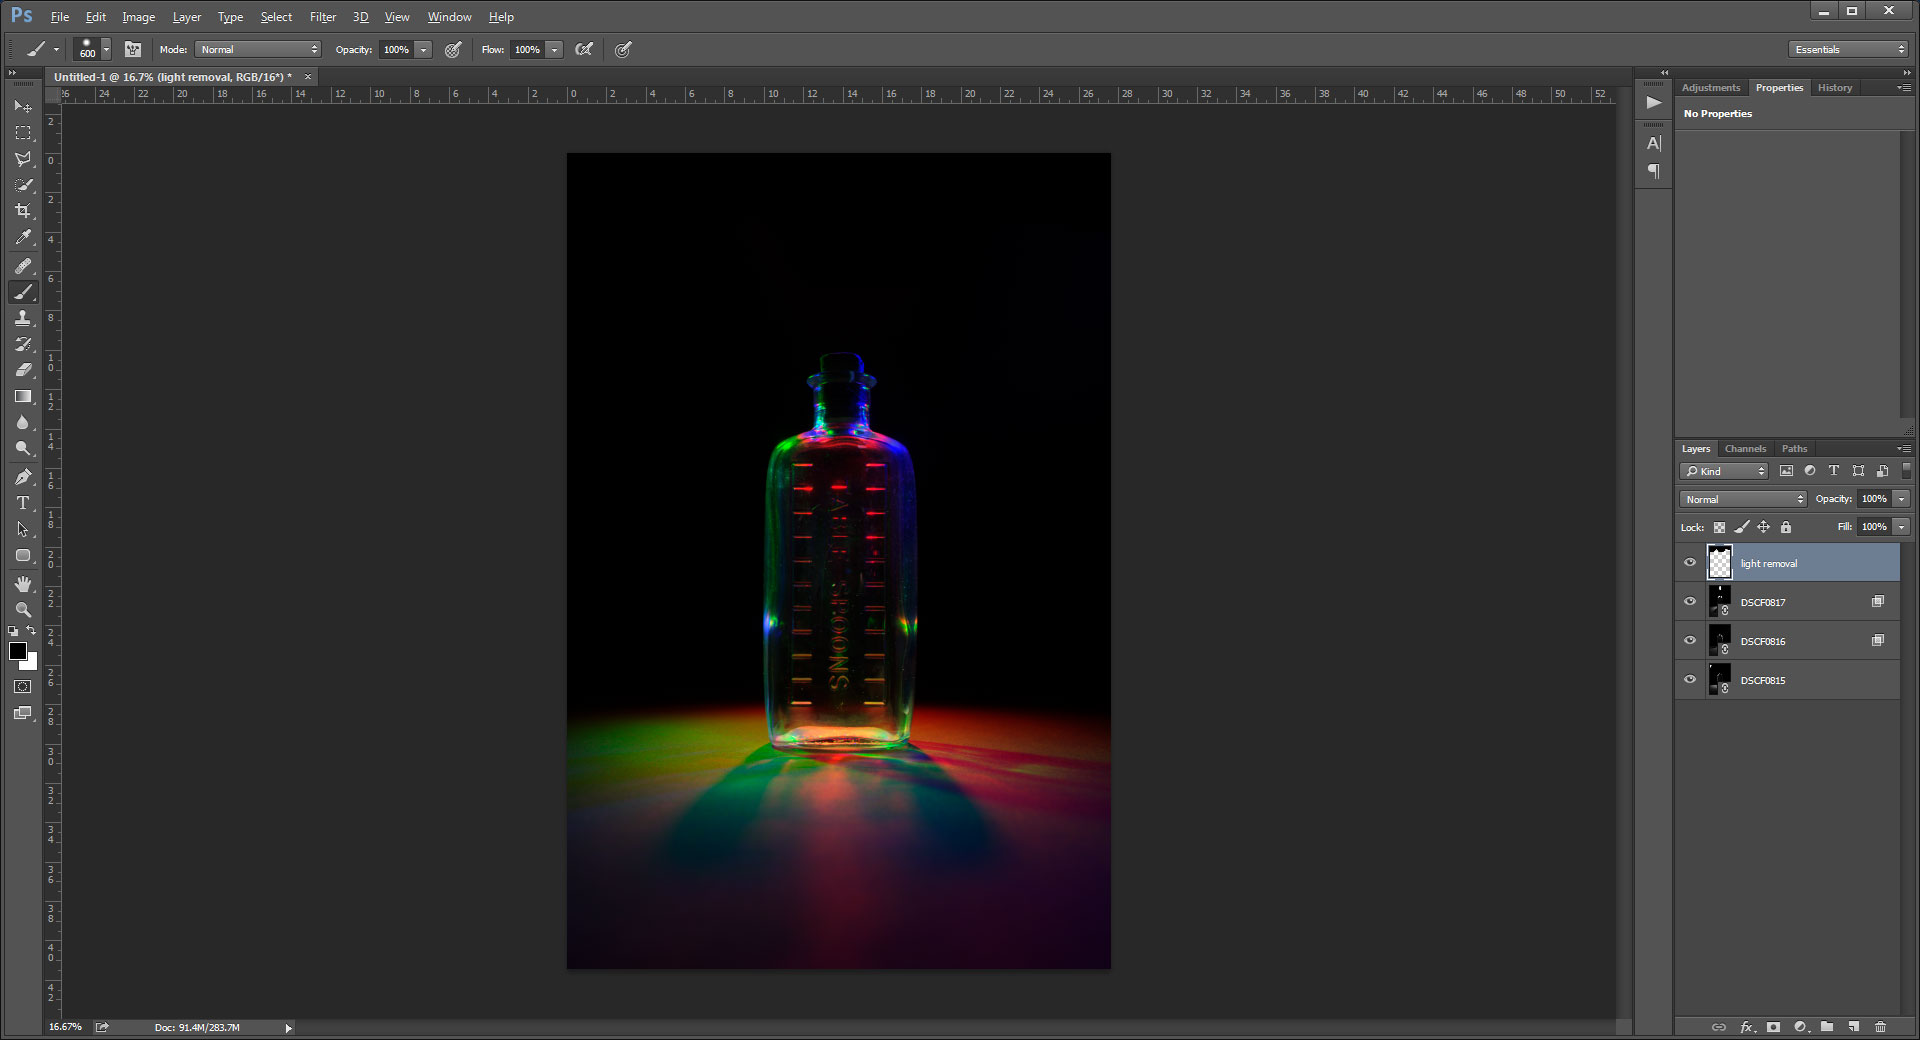
Finally we just need to do the same thing with the top image layer. Since I've used Blue and Green already, the color of the top layer should be pure red. This gives our RGB lighting image.
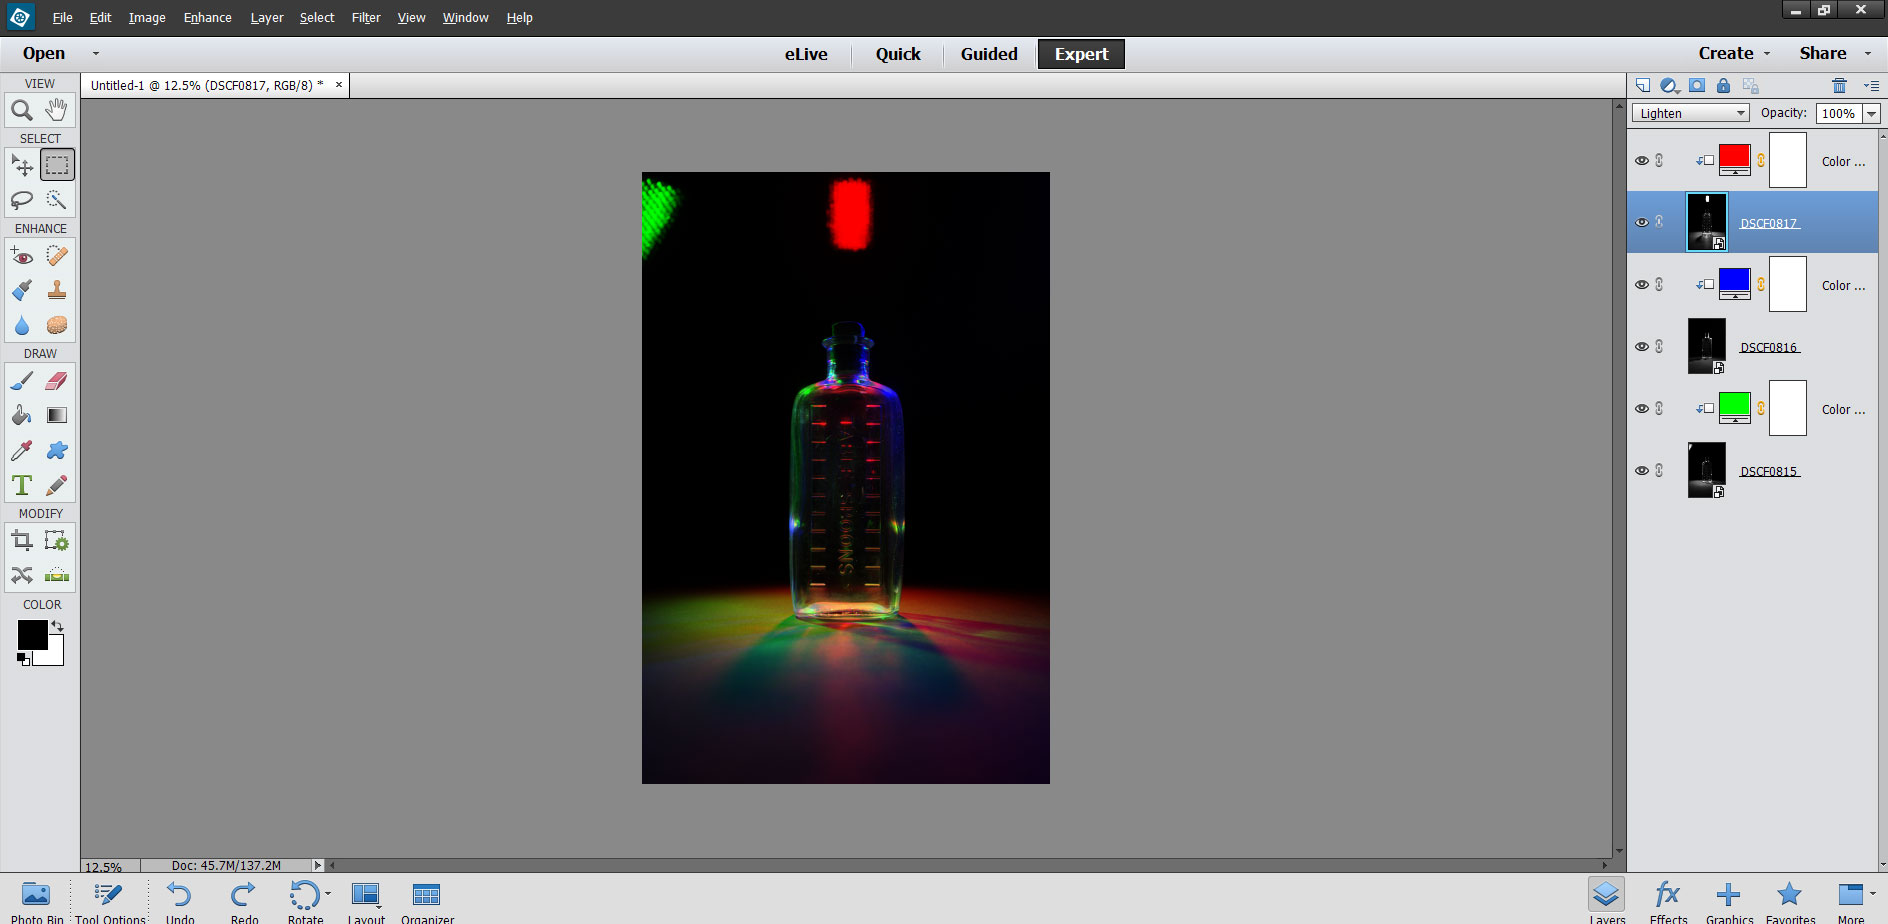
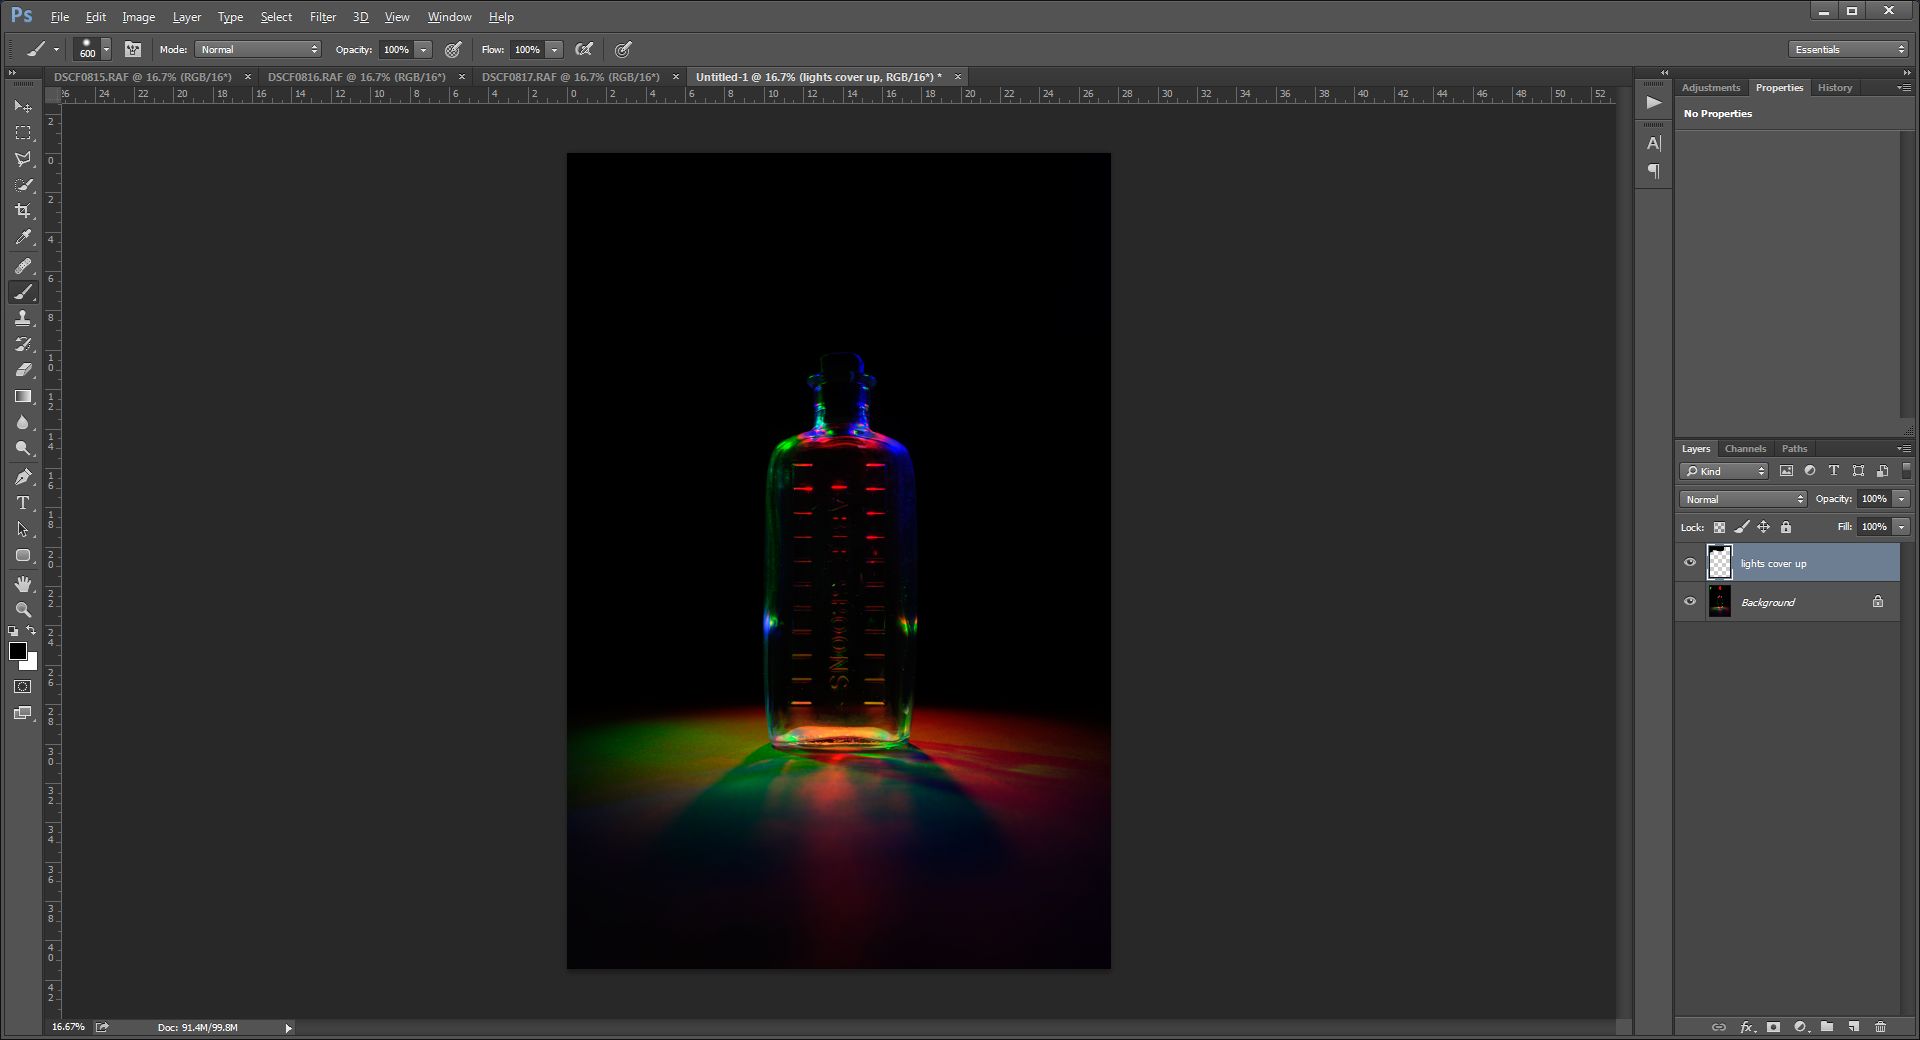
For this particular image, I have the light source (a gridded flash gun) in a couple of the shots, but I can just paint over that with black on a new layer. I also delete the layer masks for the color adjustment layers, since they're not needed.
Photoshop CS / CC - Using channels
For those of us that have been using the full version of Photoshop for many years, the most obvious way to achieve this RGB colored lighting effect is using channels. Channels aren't available in Photoshop Elements, but they have been around in Photoshop for a long time.
To start off, open all three images in Photoshop. The idea is that we'll copy each image into a channel - one into the Red channel, one into the blue, and one into the Green. If you're working on a monochrome image as I am here, you could copy and paste two of the images into two of the channels of the remaining image. However, we'll use a method that is suitable for full color images too.
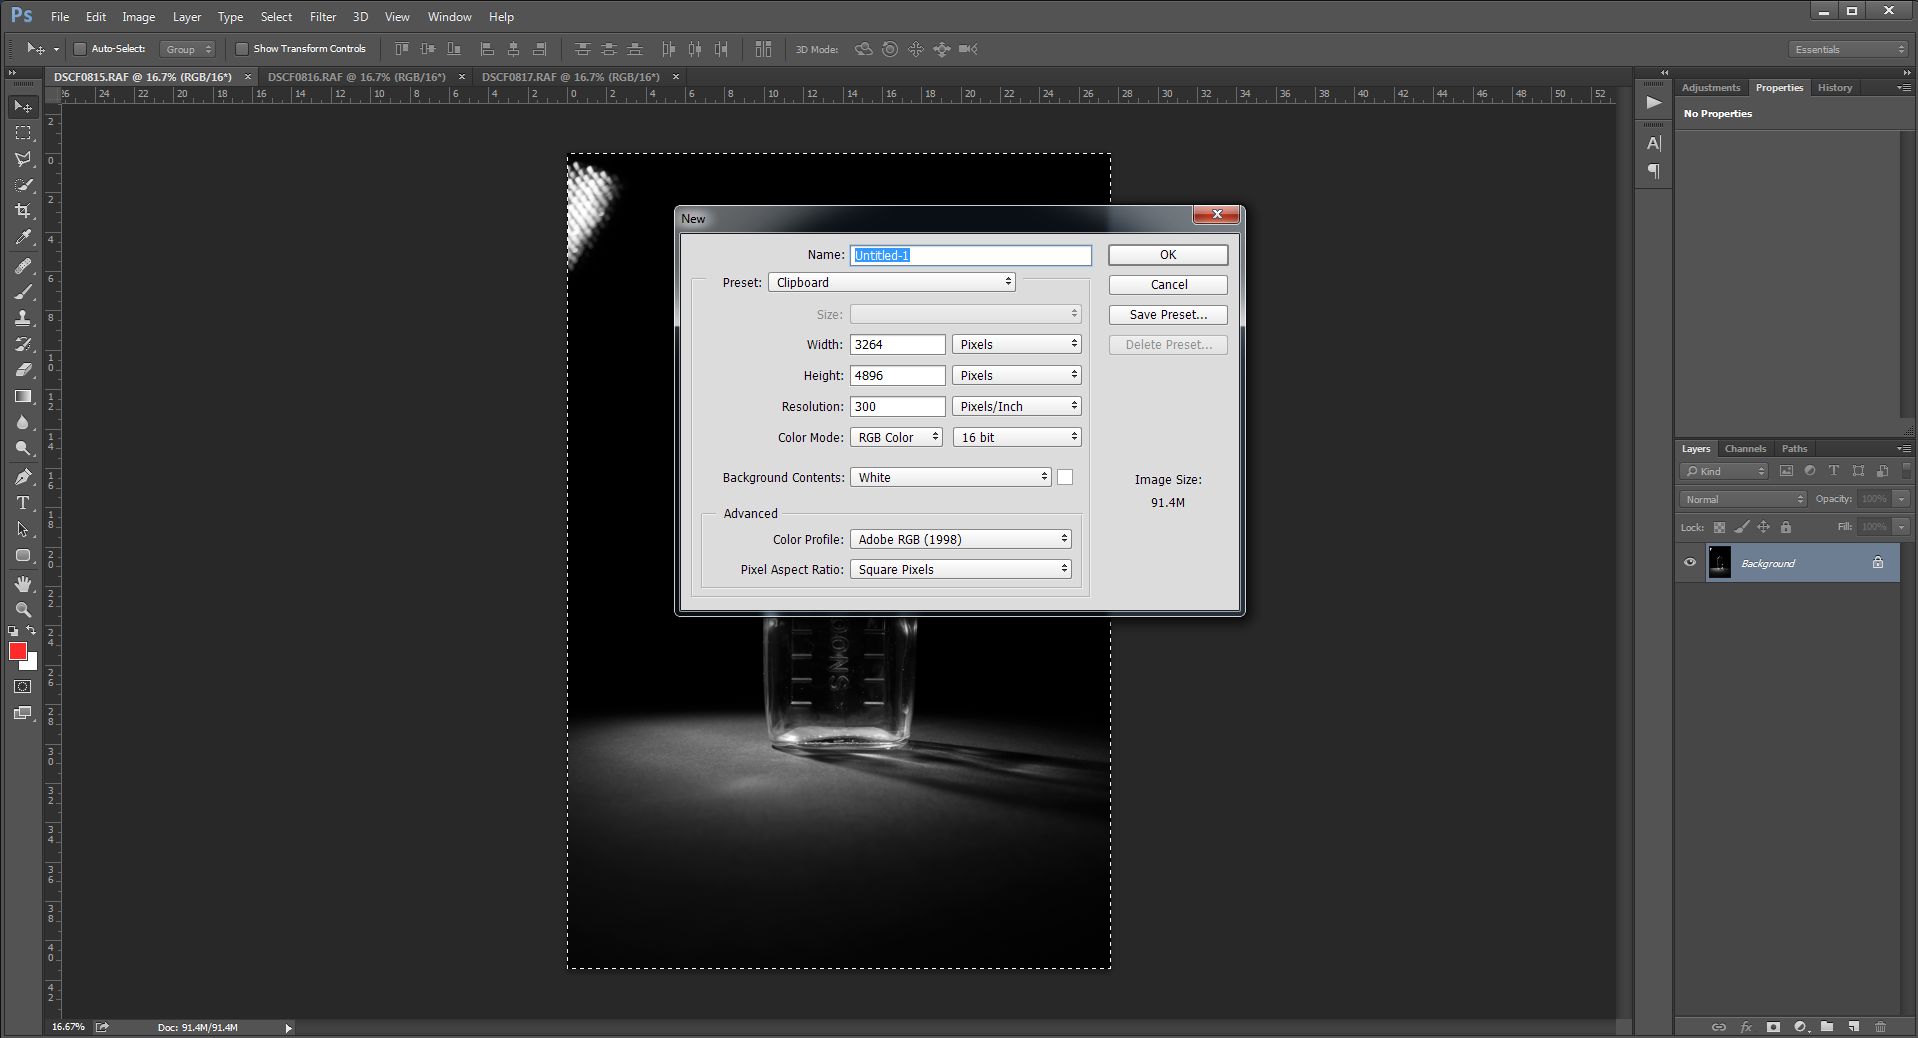
With one of your images open, select all (Select > All on the menu or Ctrl / Cmd + A on the keyboard). Then copy the image (Edit > Copy on the menu or Ctrl / Cmd + C on the keyboard).
Create a new document (File > New via the menu or Ctrl / Cmd + N on the keyboard). You should see that the new document preset is set to Clipboard, so it will create the new document at the same size as the one you just copied. Ensure that Color Mode is set to RGB Color.
Click OK, and your new document will open. Go to the Channels palette (On the menu go to Window > Channels if it is not showing). Select the channel that you want to paste your image into. In my case I am choosing green. Then paste the image (Edit > Paste on the menu or Ctrl / Cmd + V on the keyboard).
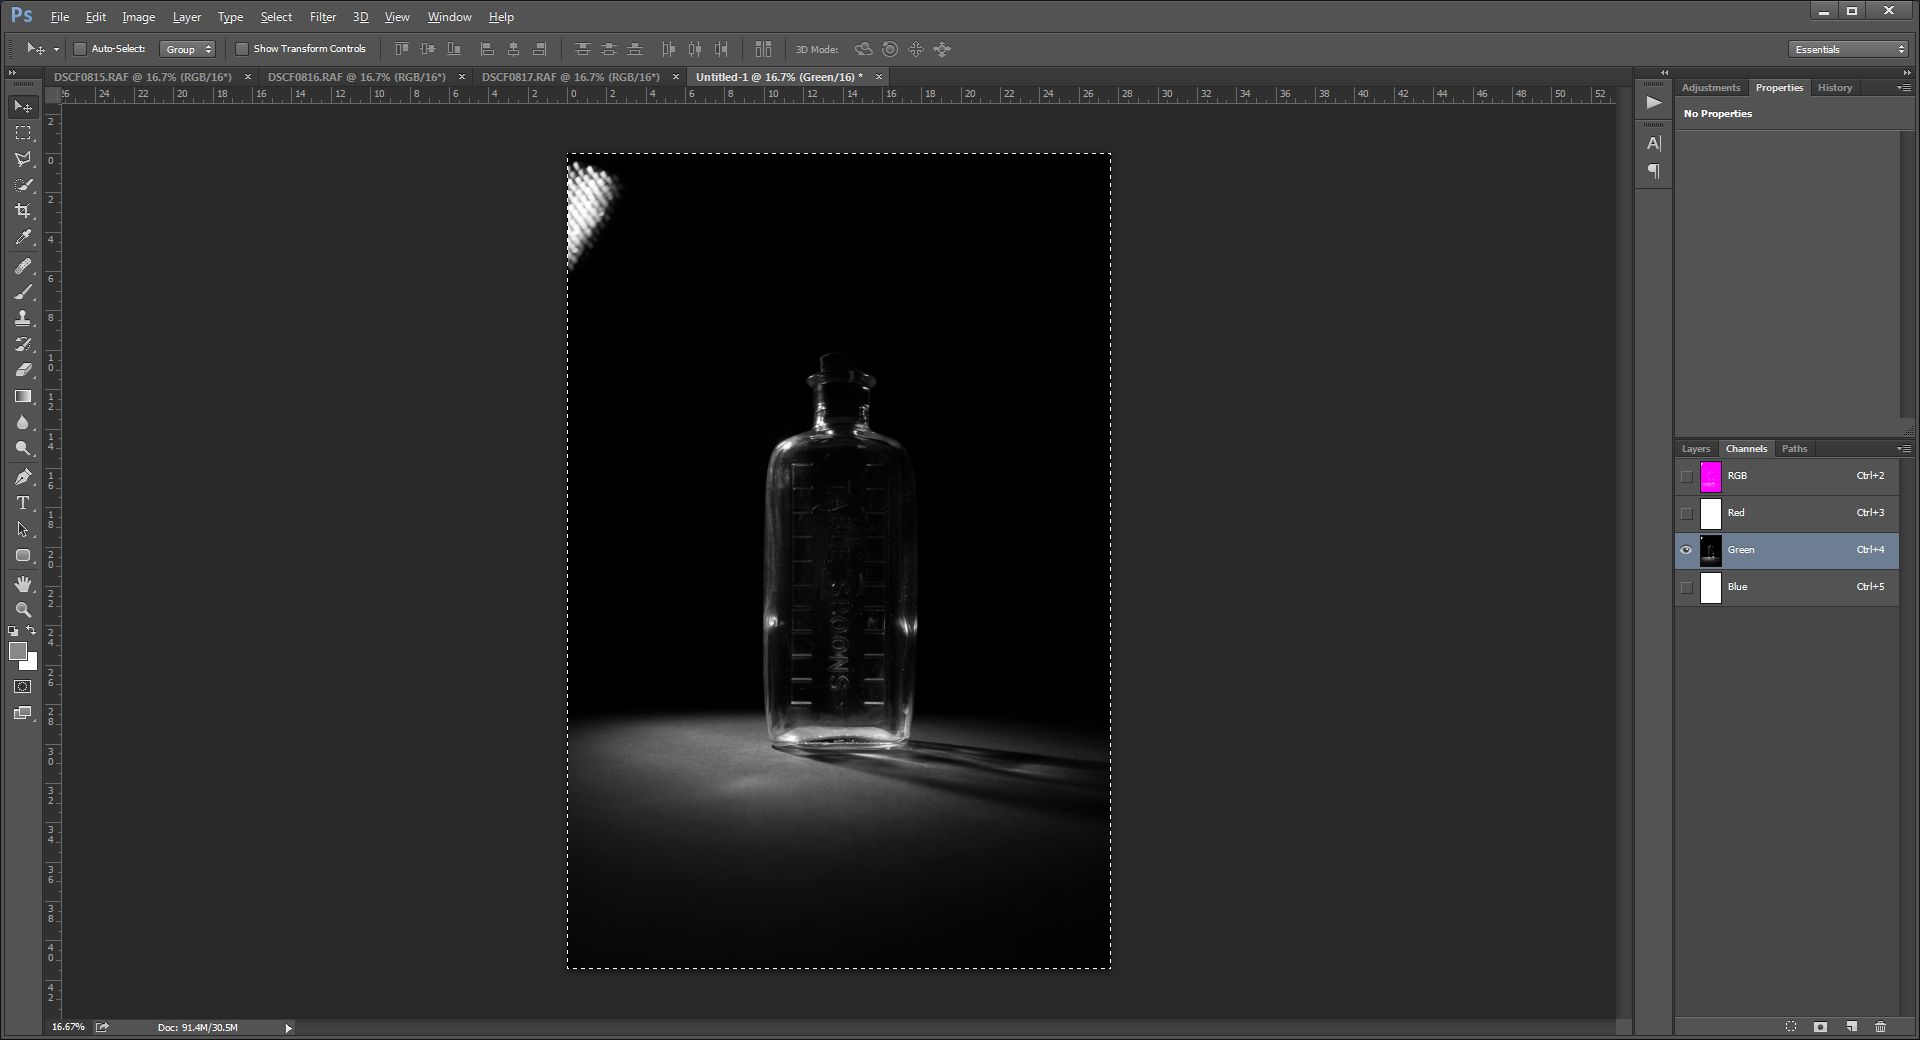
Now go back to one of the other images. Select all, and copy it. Go back to your new document, select one of the other channels, and paste the image.
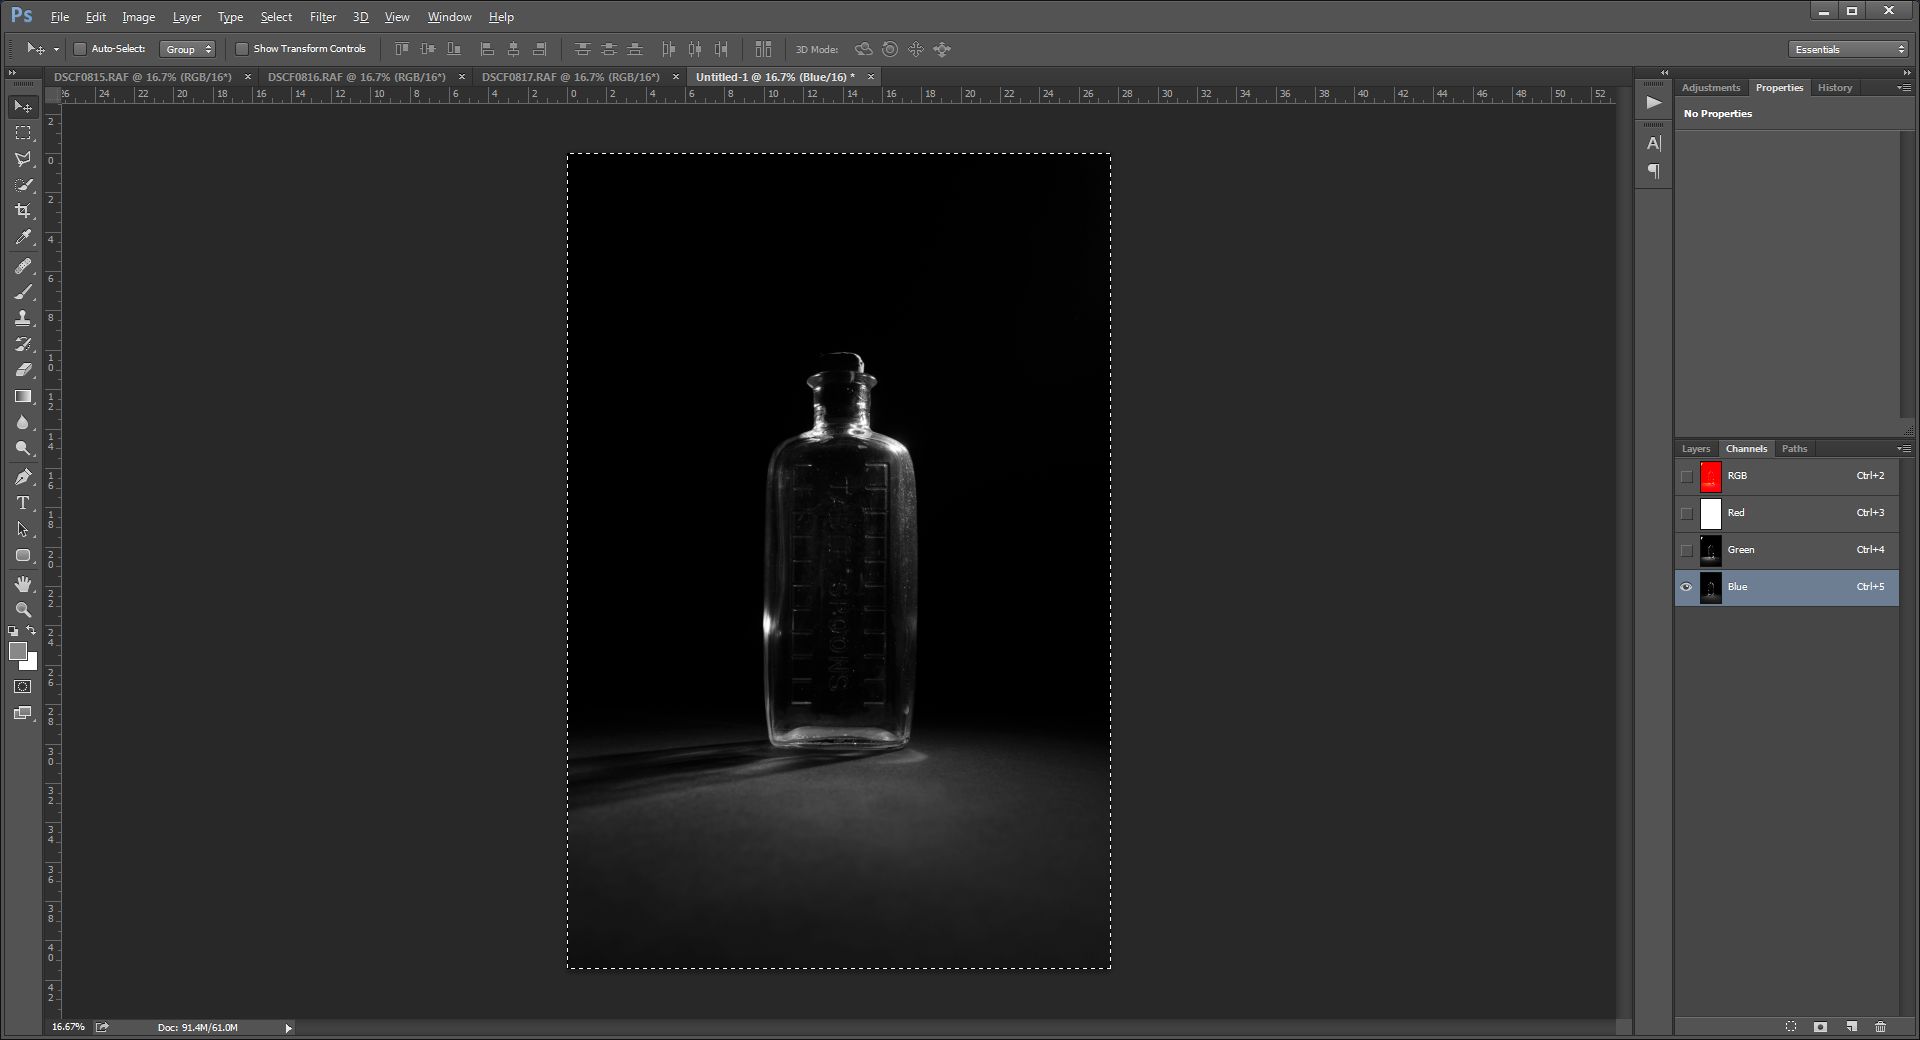
Finally, select and copy the last image, and paste this into the remaining empty channel in the new document. Click the RGB channel at the top of the channels palette to show all three channels.
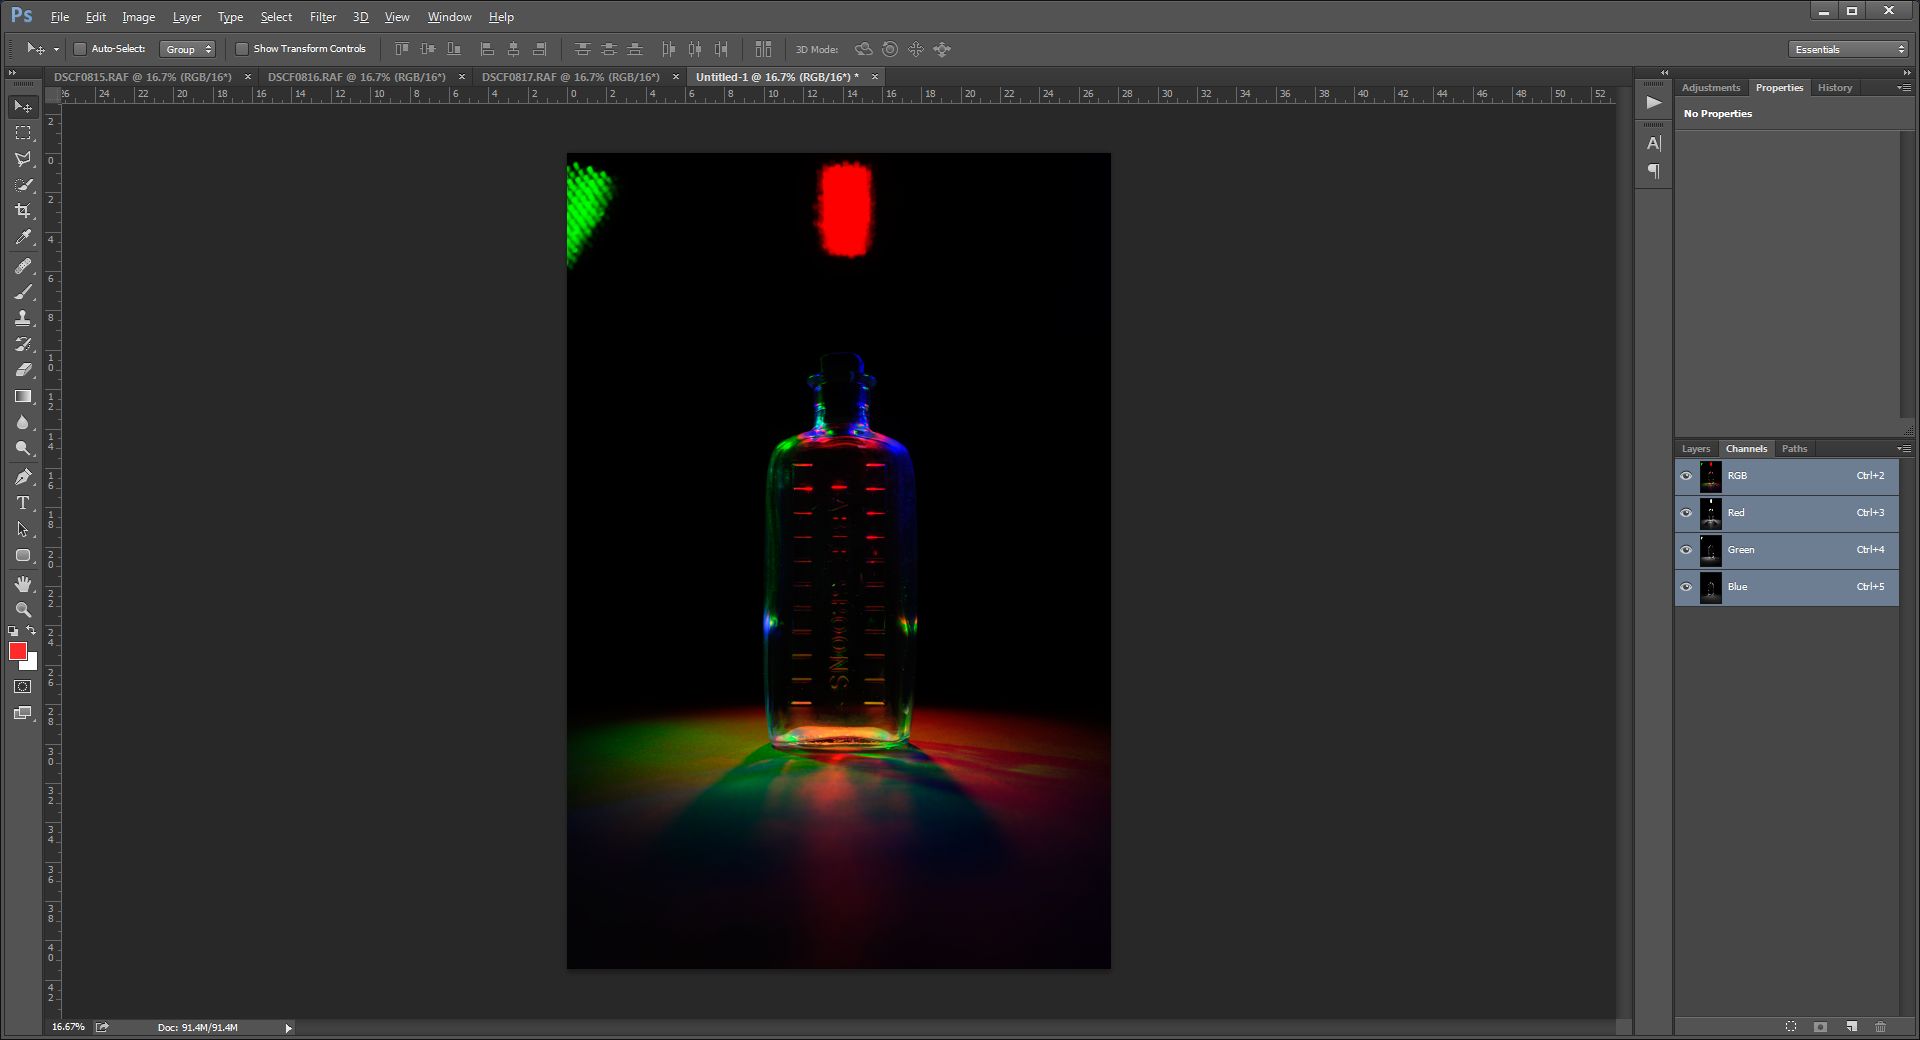
You can then switch back to the layer palette and finish the image as you would like.
Photoshop CS / CC - Using blending options
This method is based on a technique by Lee Varis: The New CC False Color Technique. It's superior to the channels method as it gives you many more non-destructive editing options. It's very similar to the Photoshop Elements technique, but doesn't require the use of any color adjustment layers, resulting in a much cleaner layers palette.
To start off with, load all your images as layers into a single image. (See the earlier Photoshop Elements section for how to copy images as layers into a single image using the copy & paste method or place as smart object method).
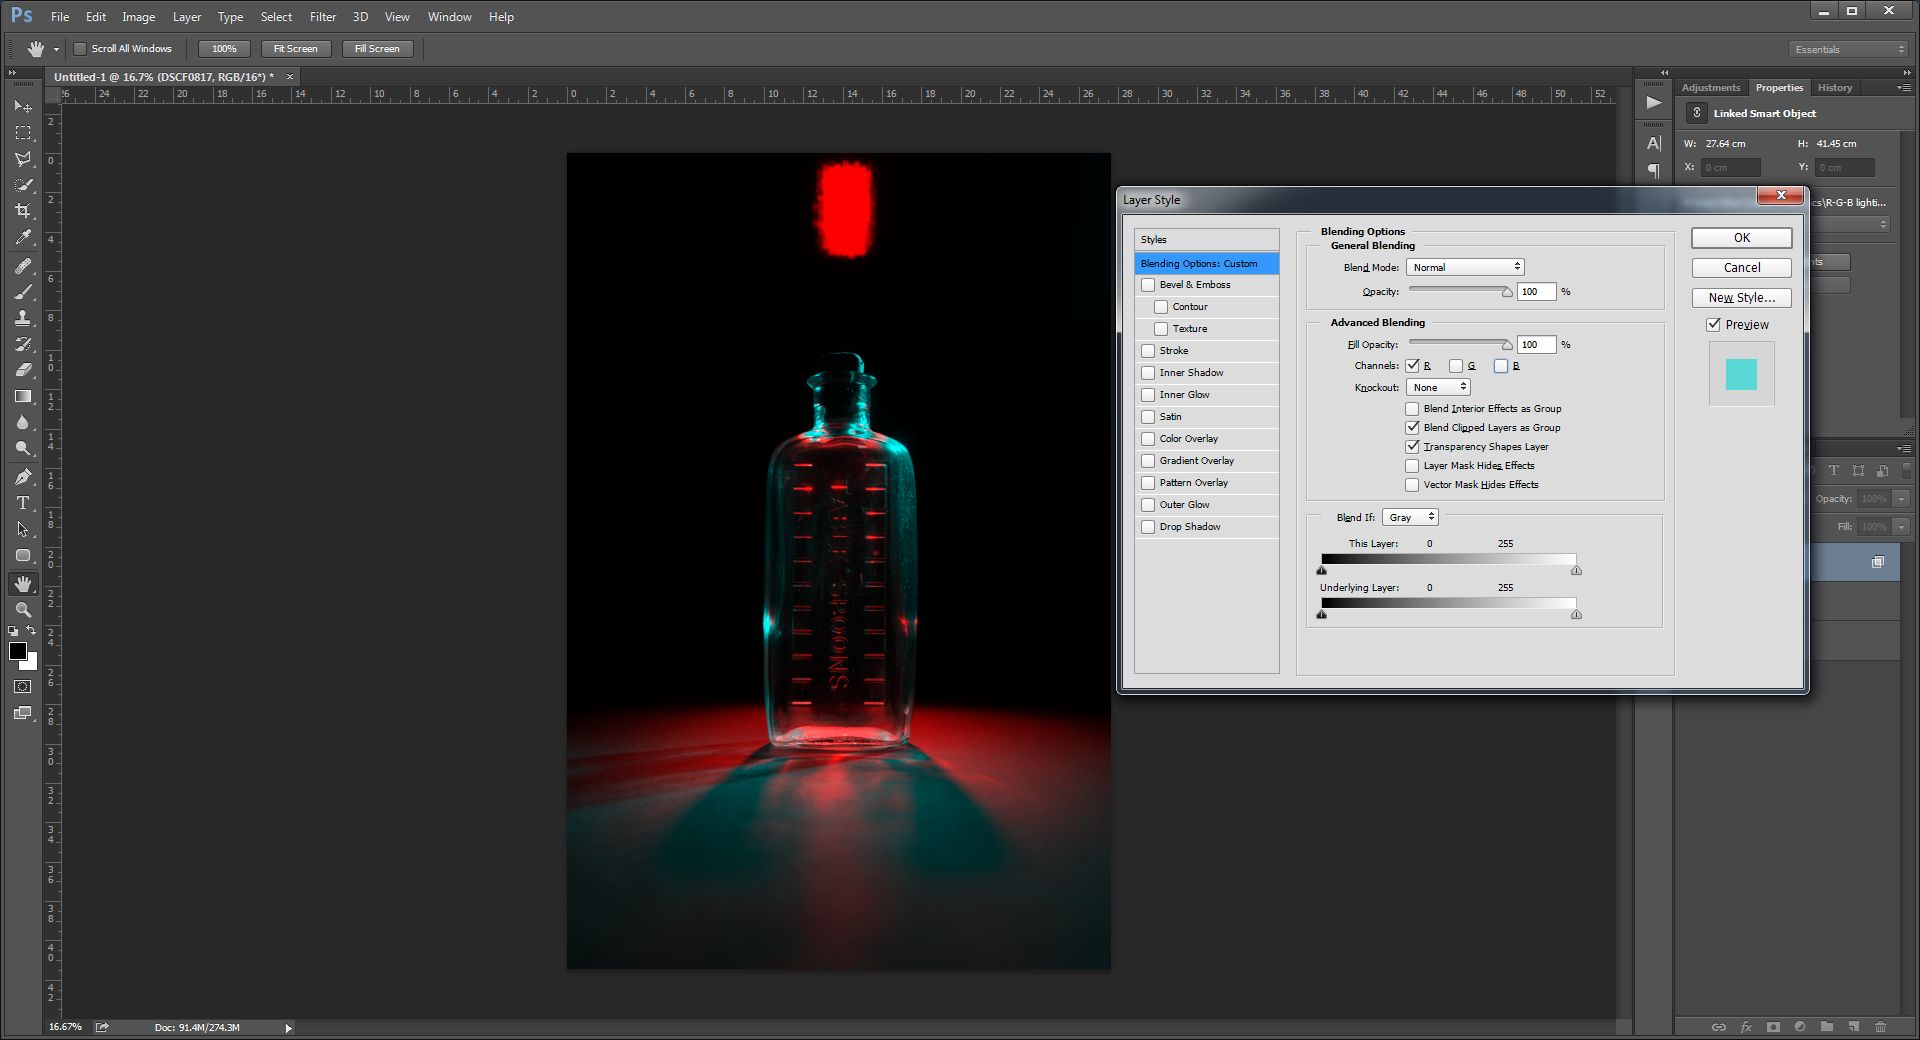
When you have your 3 images as layers in a single document, open the layer blending options for the top layer. To do this, double-click on the space to the right of the layer's name. Or right-click on the layer and choose Blending options from the context menu.
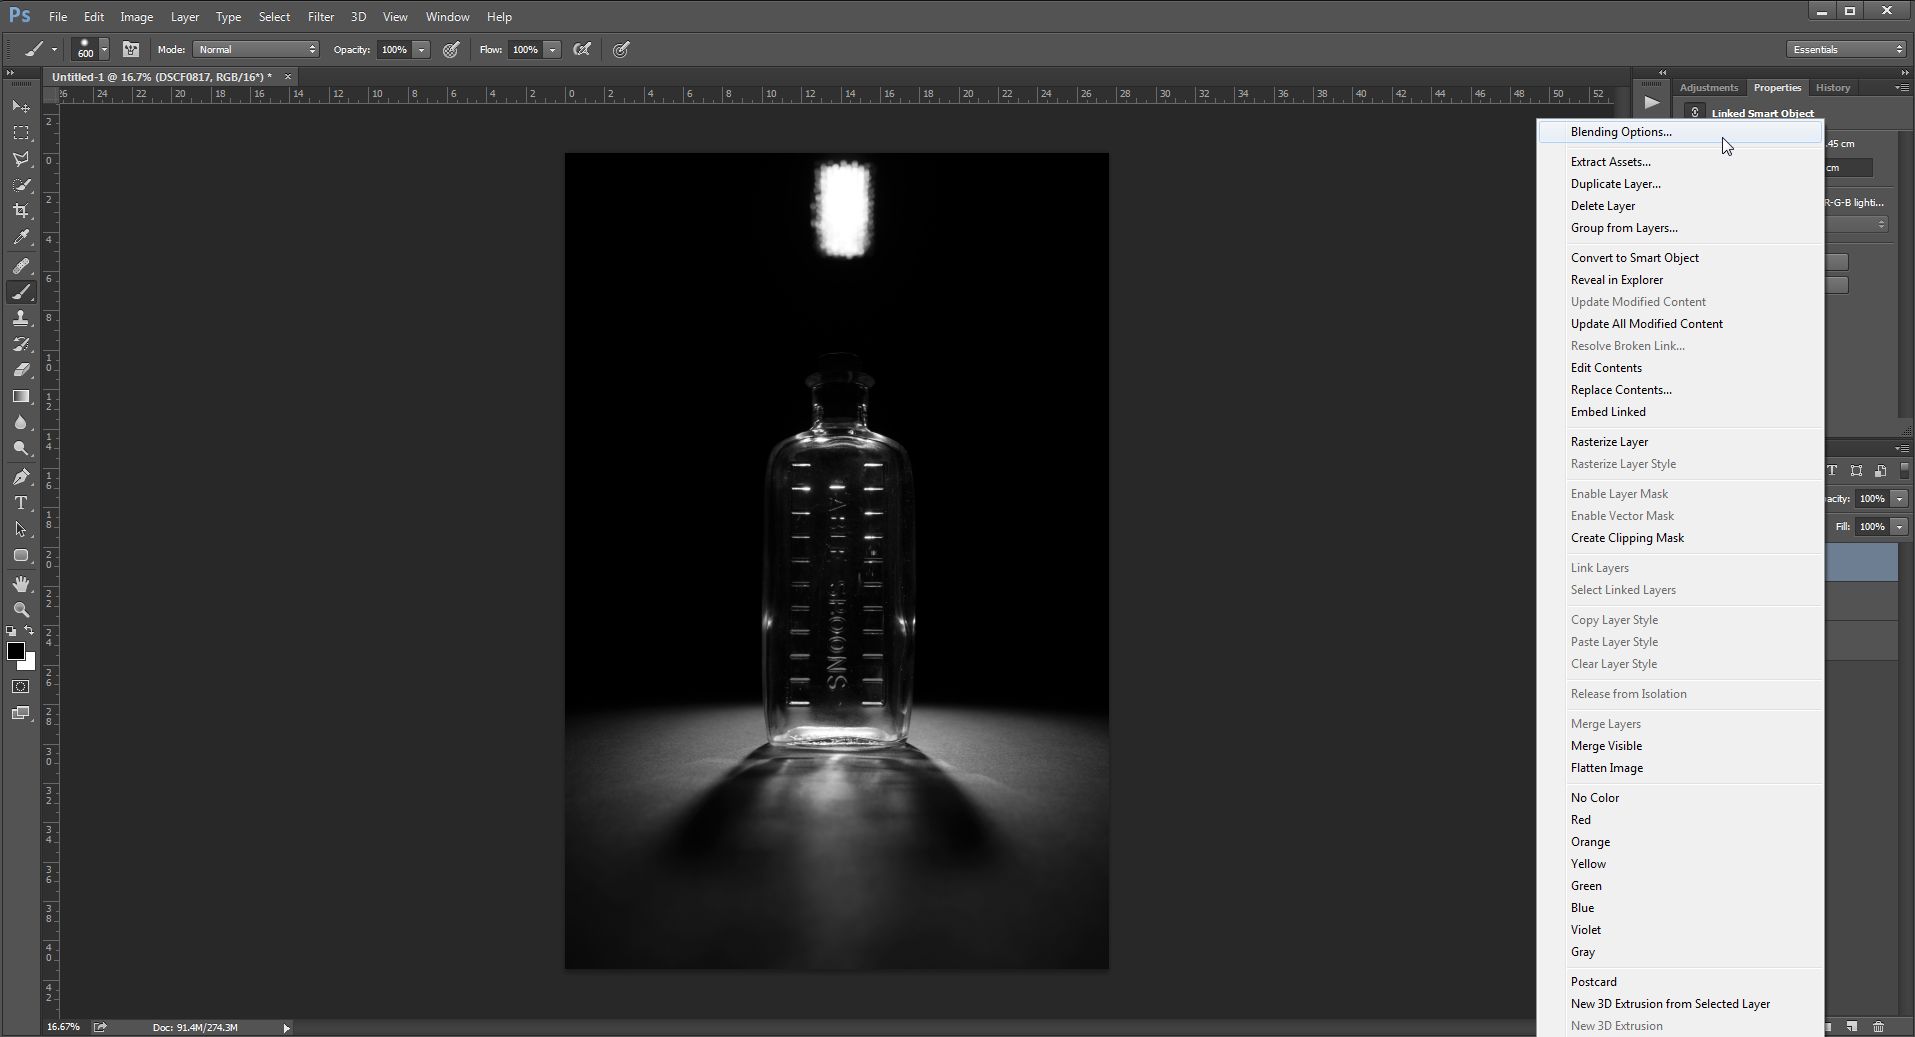
In the blending options dialog, under the Advanced Blending section, you'll see Channels where you can tick / untick whether this layer should blend only the red, green, or blue, or some combination of those three channels. For this image I chose red only.
Click OK on the blending options window. Now you want to do the same thing with the middle layer, but choose a different channel. I chose Blue.
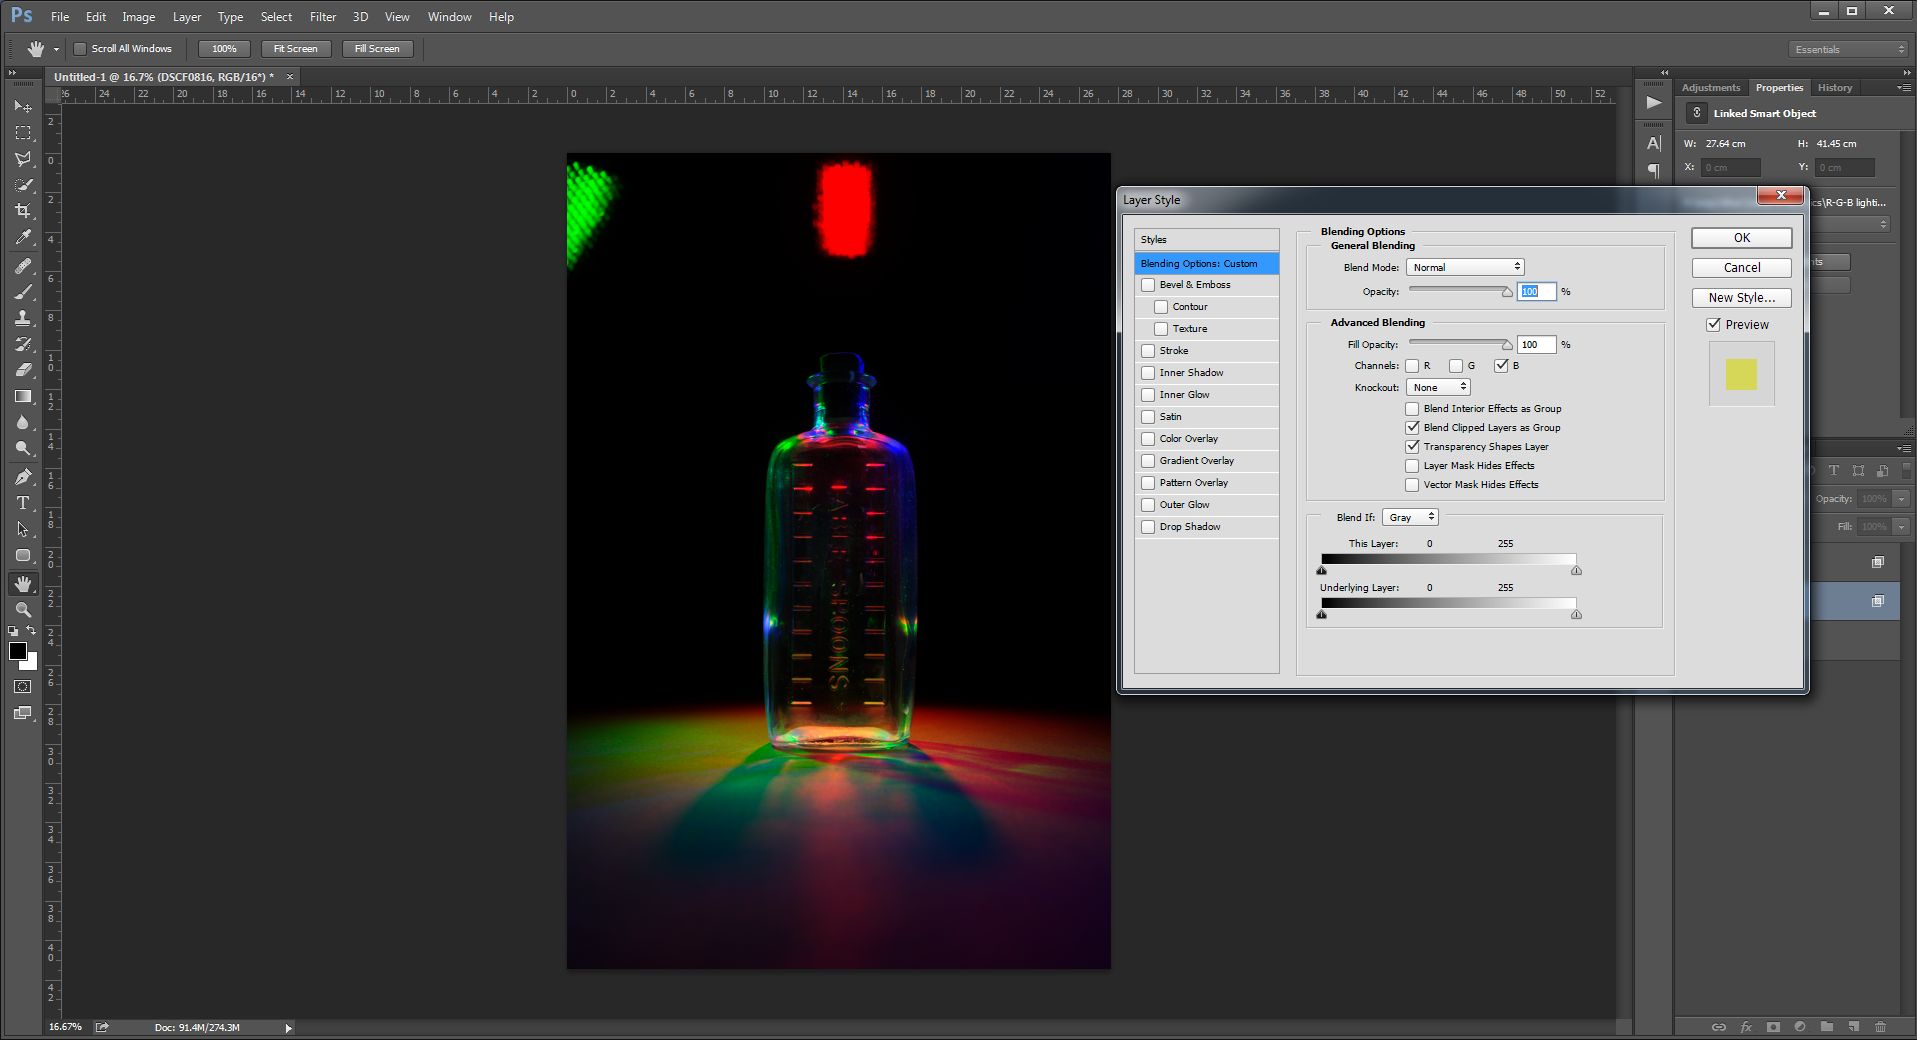
Click OK, and you're done. Then make any touch-ups you need to as normal.
With the Blending options and color fill layer techniques you can play around quite a bit to achieve different results. Change which layer you're using for which color. Try setting the layers to other blend modes. Adjust the opacity of the layers. Add in Hue/Saturation adjustments. The number of different combinations you can try are almost endless.
Only two differently lit images were used for this shot, giving different colors:
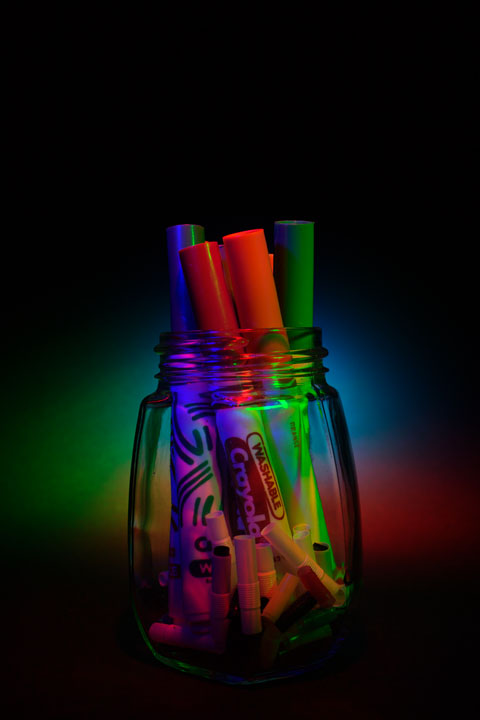
Although the example used in the tutorial above was monochrome, the technique will work with color images too. The below shot uses six color images - three shots where the pens were lit differently, and three where the background was lit differently.
Finally, what happens if instead of changing the lighting between each shot, the subject moves?
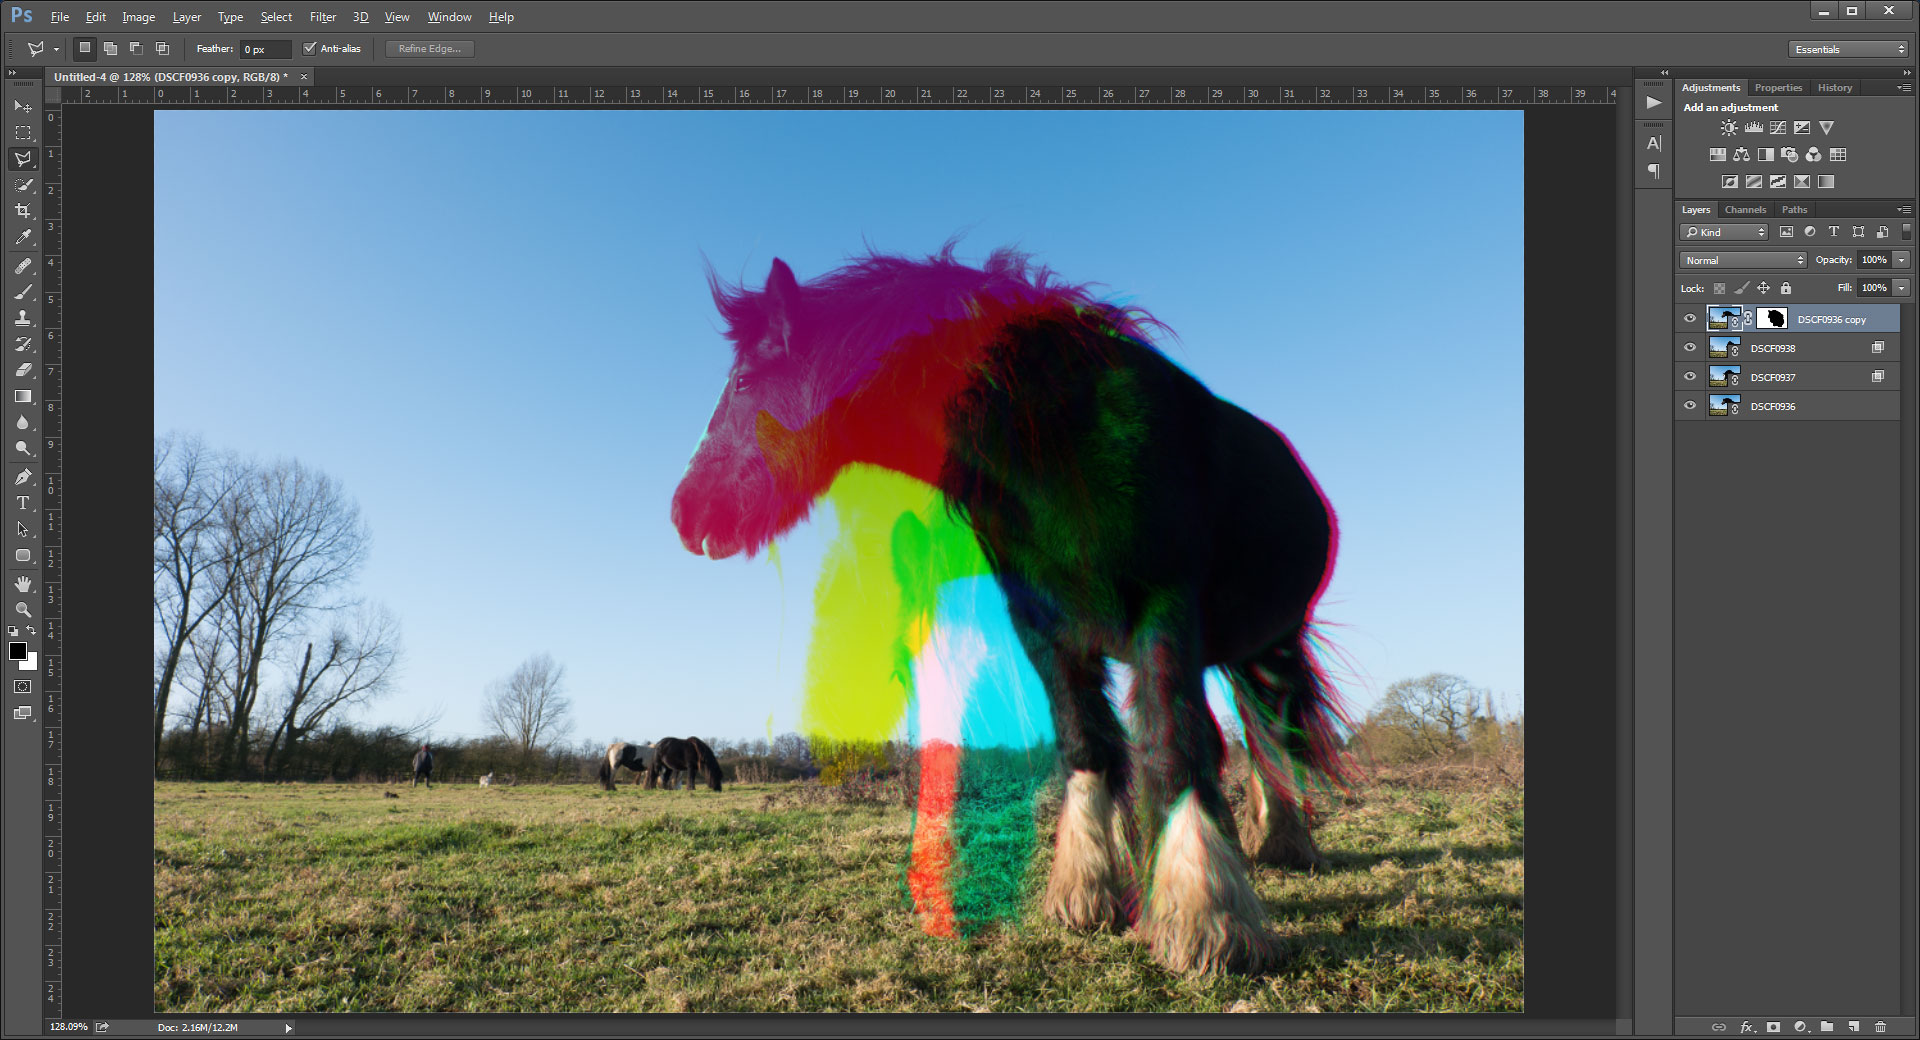
I've masked out most of the image to keep the effect on the horse in the foreground rather than the walker and other horses in the background.
Interesting, but I think I need to do a bit more experimentation with moving subjects.
Whether you try this technique or not, don't be afraid to experiment and have fun with your photography.


